Cloud Firestore connector prerequisites
Introduction
These are the prerequisites for using the Cloud Firestore connector with a Cloud Firestore instance:
Create a service account and grant roles
Follow these steps to create a service account and grant roles to provide access to the Google Cloud project to be used with the Cloud Firestore connector:
-
Select a project in the Google Cloud Console.
Note
Ensure the Cloud Firestore API is enabled, and a database has been added for the selected project.
-
In the navigation menu, navigate to IAM & Admin > Service Accounts.
-
Click Create Service Account, located along the top of the page.
-
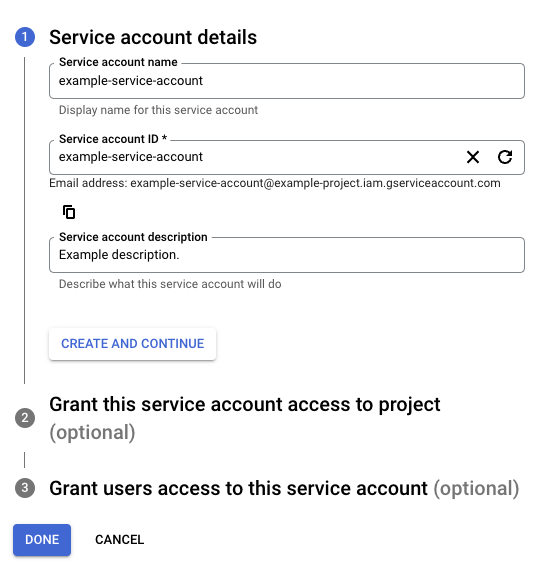
Enter the Service account details:

-
Service account name: Enter any string for the service account name.
-
Service account ID: This field is automatically populated to match the Service account name and can be edited, if desired.
-
Service account description: Enter a description for the service account.
-
-
Click Create and Continue.
-
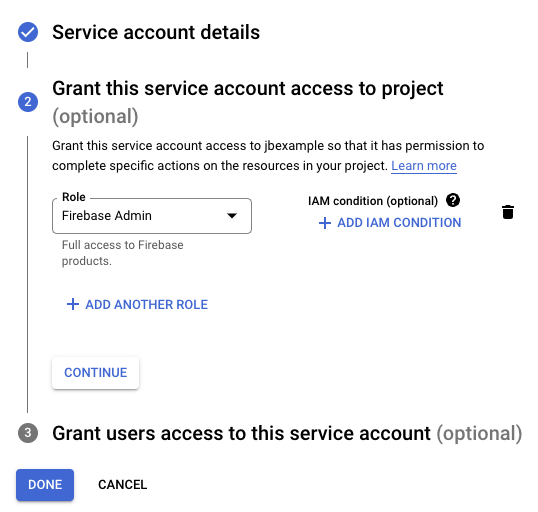
Assign a role to allow access to the project (required for a successful connection in the Cloud Firestore connector):

-
Role: Using the menu, select the appropriate Firebase role or custom role for your use case, then click Continue.
Note
When using a custom role, you must have the
firebase.clients.listpermission assigned to that role. otherwise, the Cloud Firestore connection won't be successful.When using predefined Firebase roles, these are the role combinations that can be granted to the service account to allow access to each Cloud Firestore activity:
Activity Cloud Firebase Roles Query Firebase Admin or
Firebase ViewerCreate Firebase Admin or
Firebase ViewerUpdate Firebase Admin or
Firebase ViewerDelete Firebase Admin or
Firebase Viewer
-
-
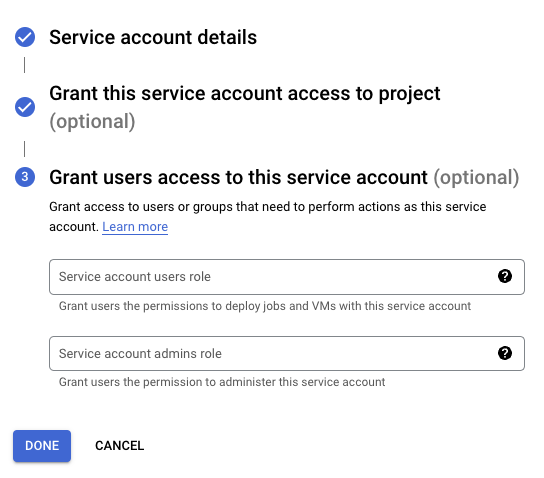
Optionally, grant access to the service account to specific users:

-
Click Done.
Obtain credentials
Follow these steps to obtain the credentials required for connection configuration:
-
On the Service accounts page, click the Actions menu for the service account created above, then click Manage keys.
-
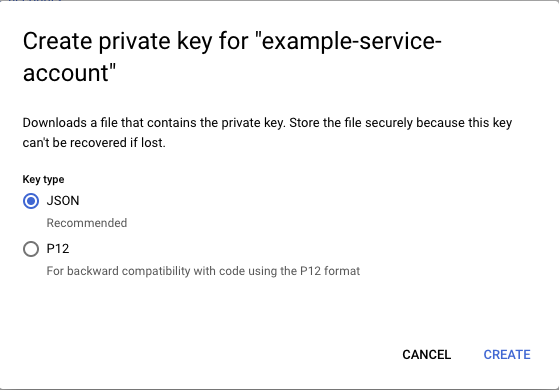
Click Add Key > Create new key, select JSON as the Key type, and then click Create to download the JSON file to your computer:

-
Open the downloaded JSON file in a text editor and retain the values of the
project_id,client_email,client_id,private_key_id, andprivate_keyto be used during connection configuration.