Google Drive connector prerequisites
Introduction
To use the Google Drive connector, you must have a Google service account for your project with appropriate permissions set, and certain credentials obtained from the service account.
Create a service account and grant roles
Follow these steps to create a service account and grant roles to provide access to the Google Cloud project to be used with the Google Drive connector:
-
Select a project in the Google Cloud Console.
Note
Ensure the Google Drive API is enabled for the selected project.
-
In the navigation menu, navigate to IAM & Admin > Service Accounts.
-
Click Create Service Account, located along the top of the page.
-
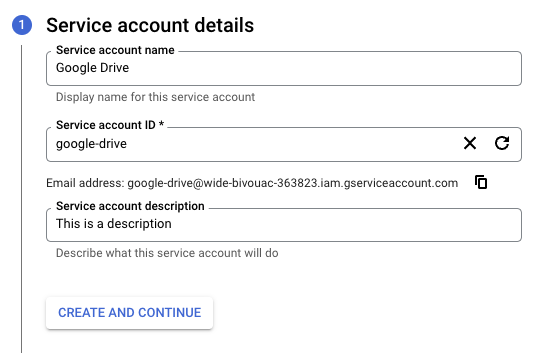
Enter the Service account details:

-
Service account name: Enter any string for the service account name.
-
Service account ID: This field is automatically populated to match the Service account name and can be edited, if desired.
-
Service account description: Enter a description for the service account.
-
-
Click Create and Continue.
-
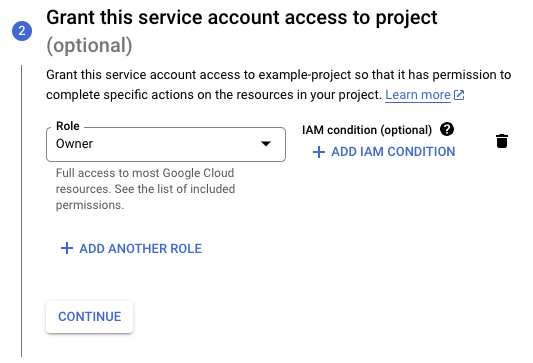
Assign a role to allow access to the project (required for a successful connection in the Google Drive connector):

- Role: Using the menu, select Owner as the Role, then click Continue.
-
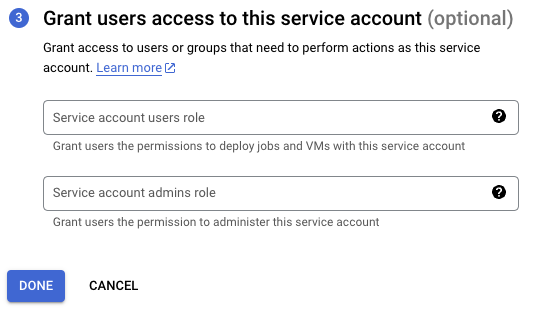
Optionally, grant access to the service account to specific users:

-
Click Done.
Note
To use the List files activity, you must separately grant access to these Google Drive scopes:
https://www.googleapis.com/auth/drivehttps://www.googleapis.com/auth/drive.filehttps://www.googleapis.com/auth/drive.readonlyhttps://www.googleapis.com/auth/drive.metadata.readonlyhttps://www.googleapis.com/auth/drive.metadatahttps://www.googleapis.com/auth/drive.photos.readonly Obtain credentials
Follow these steps to obtain the credentials required for connection configuration:
-
On the Service accounts page, click the Actions menu for the service account created above, then click Manage keys.
-
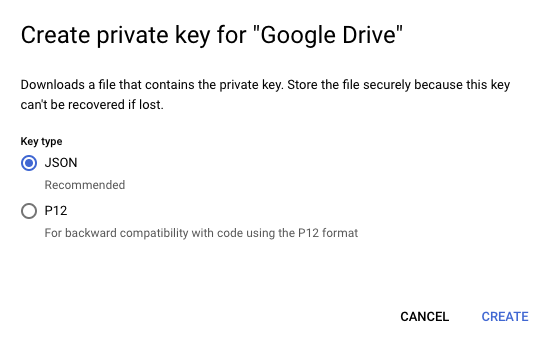
Click Add Key > Create new key, select JSON as the Key type, and then click Create to download the JSON file to your computer:

-
Open the downloaded JSON file in a text editor and retain the values of the
project_id,client_email, andprivate_keyto be used during connection configuration.