Slack prerequisites
Introduction
These are the prerequisites for using the Slack connector. You first create a Slack app in the selected workspace, and then add scopes to the created app.
These steps include these instructions:
- Obtain an OAuth token (required when using Token-based Auth in the connection).
- Configure 3-legged OAuth (required when using Authorization Code Grant in the connection).
Create a Slack app
Follow these steps to create a Slack app in the selected workspace:
-
On the Slack API website, click Create an App and then click From scratch.
-
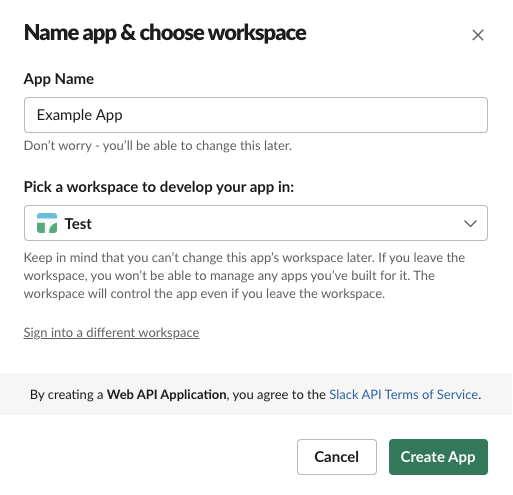
Provide a name for your app and select a workspace, then click Create App:
-
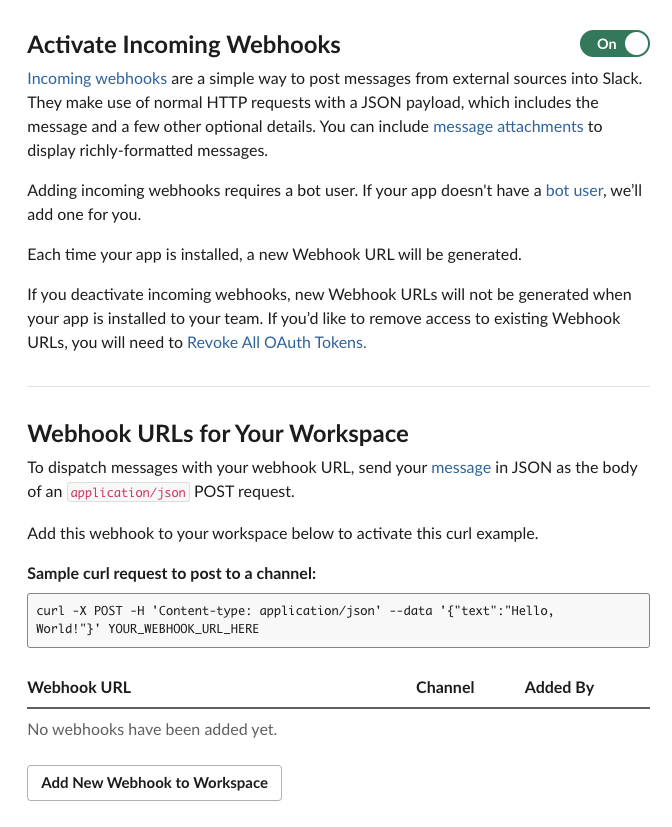
Go to the Incoming Webhooks page (accessed from the Features menu) and toggle the Activate Incoming Webhooks option to On, then click Add New Webhook to Workspace:
-
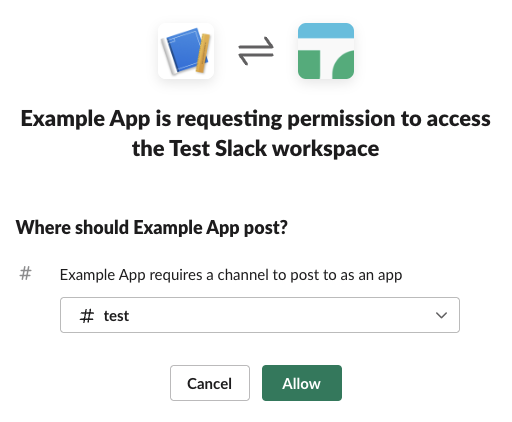
From the menu, select the Slack channel where you want to post messages and click Allow:
Note
Approval may be required from someone who manages apps in your workspace. Use the Request to Add New Webhook button to send a request for approval.
Add scopes
Follow these steps to add scopes to the created app:
-
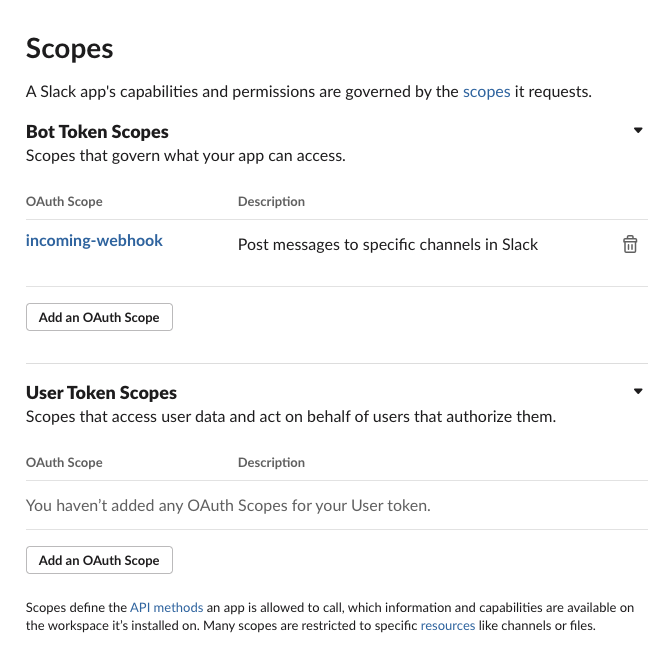
On the OAuth & Permissions page (accessed from the Features menu), go to the Scopes section and click Add an OAuth Scope under the Bot Token Scopes or User Token Scopes section (depending on the type of token you are using):
-
Add these scopes depending on the activities to be used:
Activity Scope Search chat:writechat:write.customizechat:write.publicconversations.connect:manageconversations.connect:readconversations.connect:writePost calls:readcalls:writechat:writechat:write.customizechat:write.publicconversations.connect:manageconversations.connect:readconversations.connect:writednd:readfiles:readfiles:writeremote_files:readremote_files:shareremote_files:writepins:readpins:writereactions:readreactions:writereminders:readreminders:writeusergroups:readusergroups:writeusers.profile:readusers:readusers:read.emailusers:writeChat conversations.connect:manageconversations.connect:readGet calls:readcalls:writechat:writechat:write.customizechat:write.publicconversations.connect:manageconversations.connect:readconversations.connect:writednd:readfiles:readfiles:writeremote_files:readremote_files:shareremote_files:writepins:readpins:writereactions:readreactions:writereminders:readreminders:writeusergroups:readusergroups:writeusers.profile:readusers:readusers:read.emailusers:writeteam.billing:readteam.preferences:readteam:readworkflow.steps:executeFiles files:readfiles:writeremote_files:readremote_files:shareremote_files:writeConversations conversations.connect:manageconversations.connect:readconversations.connect:writeUsers users.profile:readusers:readusers:read.emailusers:write
Obtain an OAuth token
If you are authenticating the connection with a bot token or user token, follow these steps:
-
Go to the OAuth & Permissions page accessed from the Slack API website's Features section.
-
To obtain a bot token, copy the Bot User OAuth Token (prefixed with
xoxb) under OAuth Tokens.To obtain a user token, copy the User OAuth Token (prefixed with
xoxp) under OAuth Tokens: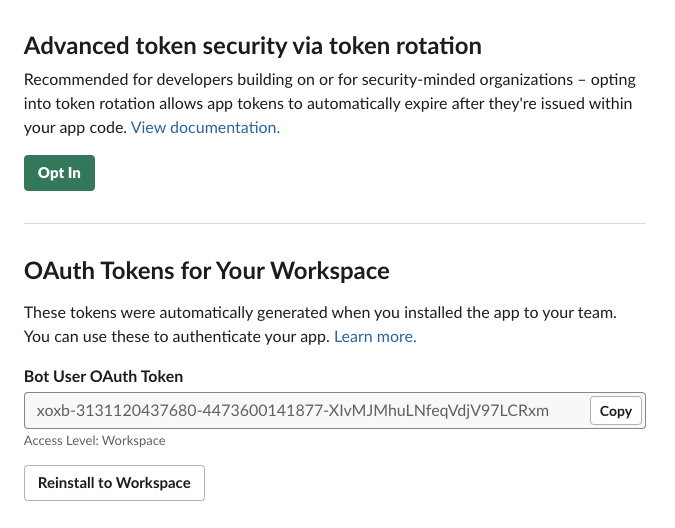
Note
The User OAuth Token is visible only when User Token Scopes have been added to the app.
Configure 3-legged OAuth
This section covers the steps for authenticating the connection to use 3-legged OAuth 2.0 (3LO) authentication with a private application configured in the Management Console App Registrations page.
Private applications are applications that you configure for the Slack instance (described in Create a Slack App) and then register in the Management Console App Registrations page with these values from the Slack app:
- Client ID and client secret
- Scopes
- Authorization URL
- Access token URL
- Refresh token URL
Note
When using the cloud application (Jitterbit App), an app registration is not used.
Redirect URL
When configuring your application in Slack, ensure the Redirect URL is set to one of the following URLs (depending on your organization's region):
| Region | URL |
|---|---|
| APAC | https://apps.apac-southeast.jitterbit.com/design-studio/api/v1/oauth/authcode |
| EMEA | https://apps.emea-west.jitterbit.com/design-studio/api/v1/oauth/authcode |
| NA | https://apps.na-east.jitterbit.com/design-studio/api/v1/oauth/authcode |
Instructions
These are the instructions for obtaining the required values for the app registration:
-
Configure an OAuth application for the Slack instance.
-
Navigate to your application on the Slack API website.
-
To obtain the client ID and client secret for the app registration, go to your Slack app's Basic Information page. The values are located under the App Credentials section:

-
To obtain the Scopes for the app registration, go to your Slack app's OAuth & Permissions page, navigate to the Scopes section and obtain the scopes used for the app. In the app registration's configuration, enter each of the app's scopes in its code format, for example,
read:me. -
Set the app's Authentication URL as
https://slack.com/oauth/v2/authorize. -
Set the app's Access token URL as
https://slack.com/api/oauth.v2.access. -
Set the app's Refresh token URL as
https://slack.com/api/oauth.v2.access. -
Go to Advanced options.
In the Token request tab under Parameters, enter
Accept-Encodingas the Key and*/*as the Value. Then select Request Header from the Send in menu.Note
The Access token URL is prepopulated with the value provided in step 6 and should not be changed.
-
In the Refresh request tab under Parameters, enter these key-value pairs:
-
For the first key-value pair, enter
Accept-Encodingas the Key and enter*/*as the Value. Then select Request Header from the Send in menu. -
For the second key-value pair, enter
grant_typeas the Key and enterrefresh_tokenas the Value. Then select Request URL from the Send in menu.Note
The Refresh token URL is prepopulated with the value provided in step 7 and should not be changed.
-
Once the 3-legged OAuth application is registered on the App Registrations page it is available to be selected in the OAuth Application menu under Private Applications in the Slack connection.