Create and configure a project in Jitterbit Integration Studio
Introduction
A project is a collection of one or more workflows that comprise and execute an integration use case. Projects are the "container" for operations that are organized into workflows, as well as other project components that may be part of an operation or exist elsewhere in the project.
This page describes how to create and configure a new project from within Integration Studio, how to open an existing project, how to edit the configuration settings of existing projects, and how to delete existing projects.
New Integration Studio projects can also be created by using Integration Studio integration recipes or Integration Studio process templates provided through Jitterbit Marketplace. For information on creating a new Integration Studio project from Marketplace, see Start a recipe or template project.
Create a new project
New projects are created from the Projects page. This page contains a repository of accessible Integration Studio projects. If no projects are accessible in the selected organization, none are listed.
To create a new Integration Studio project, click New Project:
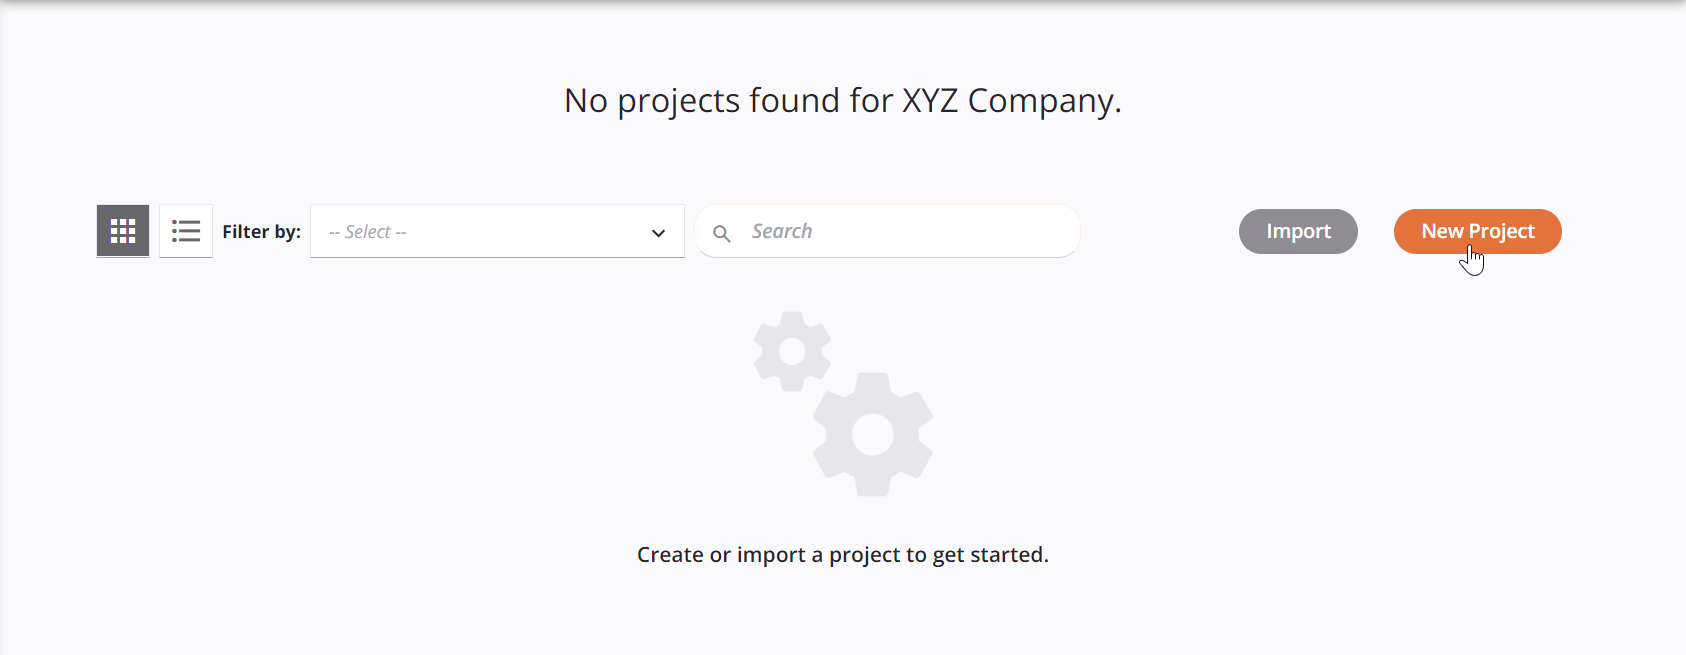
On clicking New Project, the project configuration screen opens. Two tabs are available, General and Deploy:
-
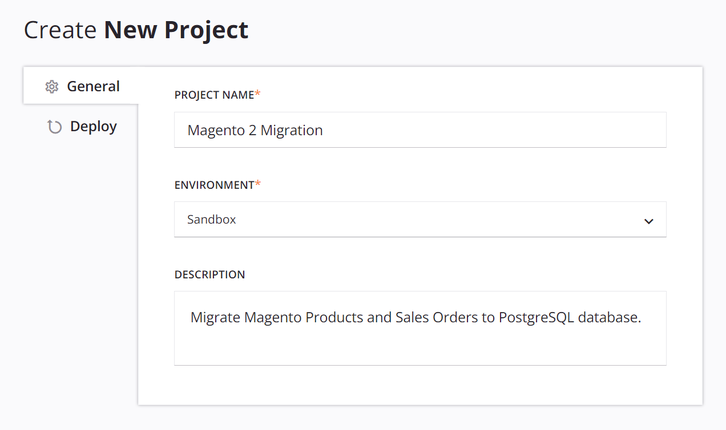
General: Specify general information about the project, including the project name, environment, and description:
-
Project Name: Enter a name to use to identify the project. The project name must be unique for each environment, and cannot already be in use as a Design Studio project name in the same environment. If a project with the same name already exists in the Harmony cloud, go to the Management Console > Projects page to manage the deployed project.
-
Environment: Use the dropdown to select an existing environment where you want to create the project. Organization administrators can set up new environments through the Management Console > Environments page.
Tip
If you do not see a newly created environment available to select, refresh the Projects page to force a reloading of environments.
-
Description: Enter an optional description for the project. This description will appear in the Projects page and may be useful to help project collaborators understand the project.
-
-
Deploy: Configure project-level deployment settings, which are able to be set only by users with a combination of the organization role Admin permission and environment Write access (see Harmony permissions and access). For users without the appropriate role permission, this message is displayed: "There is no requirement provided by your organization."
Note
These settings are not available to be configured at the organization level.
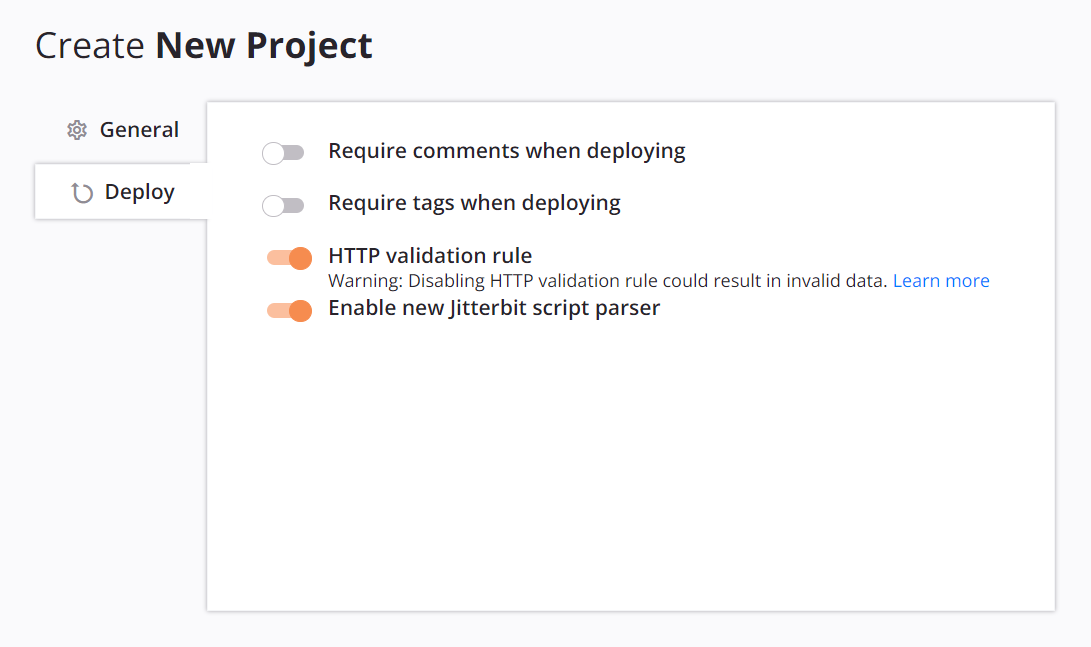
- Require Comments When Deploying: Select to require that each time this project is deployed, a dialog is presented that requires a comment to be added.
- Require Tags When Deploying: Select to require that each time this project is deployed, a dialog is presented that requires a tag to be added.
- HTTP Validation Rule: Enabled by default. Disabling this setting is not normally required. For more information see HTTP validation rule errors in Operation validity.
- Enable New Jitterbit Script Parser: Enabled by default as of the 10.68 / 11.6 release. Disabling this setting is not normally required and is advised only if you experience unexpected script output.
Click Start Designing to submit the new project information and proceed to the project designer:

This action stores the new project in Integration Studio; however, note that the project is not yet deployed (see Project deployment).
Tip
To make changes to the project's configuration after it is created, see Edit project settings later on this page.
Open an existing project
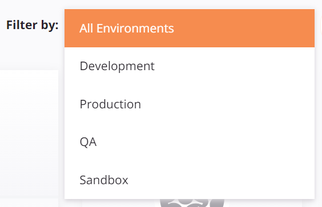
Existing projects are displayed in the Projects page filtered by environment. Use the Filter By dropdown to select a different environment for your selected organization:
Tip
The available environments are for your selected organization. The selected organization can be changed in the top navigation bar (see Changing the selected organization in Harmony portal).
Existing projects can be opened from either project tile view or project list view. For details on all available options available in each of these views, see Projects.
-
Project Tile View: Click the tile view icon to enter tile view. Then hover over a project tile and select View/Edit to open the project in the project designer:

-
Project List View: Click the list view icon to enter list view. Then hover over the empty cell in the Actions column and click the edit icon to open the project in the project designer:

Edit project settings
A project is first configured during project creation, covered earlier on this page. After a project is created, you can edit the project settings to make changes to the project name or description, or to export or delete the project.
The Project Settings option is accessible from these locations:
- The Projects page (see Tile view or List view in Projects).
- The project toolbar (see Project actions menu in Project toolbar).
This opens the project configuration screen. Two tabs are available, General and Deploy:
-
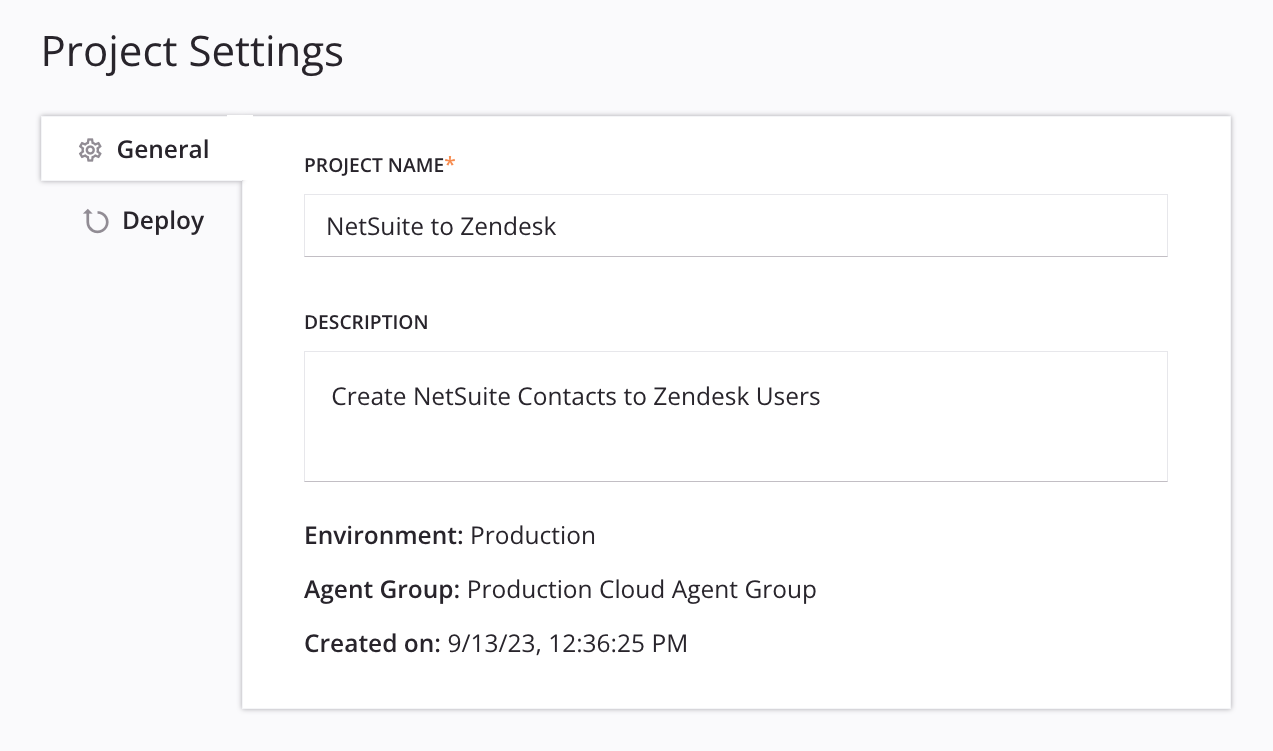
General: View general information about the project, and make changes to the project name or description:
-
Project Name: Edit the name used to identify the project. The project name must be unique for each environment, and cannot already be in use as a Design Studio project name in the same environment.
Tip
When renaming a project that has previously been deployed, the new project name is automatically reflected in the Harmony cloud without requiring a redeploy.
-
Description: Edit the project description. This description will appear in the Projects page and may be useful to help project collaborators understand the project.
-
Environment: The environment that the project resides within (specified during project creation or migration).
-
Agent Group: The agent group associated with the environment that the project resides within (specified in the Management Console).
-
Created On: The date and time that the project was created.
-
-
Deploy: Configure project-level deployment settings, which are able to be set only by users with a combination of the organization role Admin permission and environment Write access (see Harmony permissions and access). For users without the appropriate role permission, a message indicates what settings are enabled. (When no deployment settings are enabled, this message is displayed: "There is no requirement provided by your organization.")
Note
These settings are not available to be configured at the organization level.
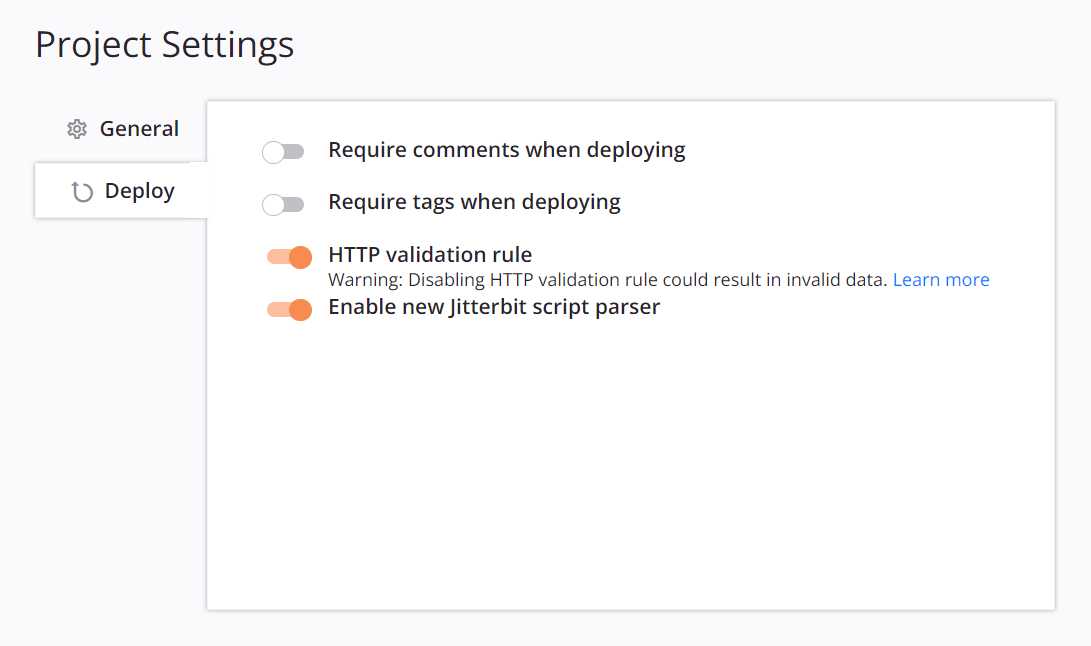
- Require Comments When Deploying: Select to require that each time this project is deployed, a dialog is presented that requires a comment to be added.
- Require Tags When Deploying: Select to require that each time this project is deployed, a dialog is presented that requires a tag to be added.
- HTTP Validation Rule: Disabling this setting is not normally required. For more information see HTTP validation rule errors in Operation validity.
- Enable New Jitterbit Script Parser: Enabled by default as of the 10.68 / 11.6 release. Disabling this setting is not normally required and is advised only if you experience unexpected script output.
These buttons or links are available along the bottom of the project configuration screen:

-
Save: Saves and closes the project configuration. This button will be enabled only after you have made changes to existing settings.
-
Cancel: Closes the project configuration without saving.
-
Export: Generates and initiates a download of a JSON file of the Integration Studio project. A project export can be used, for example, as a project backup or to share a copy of the project. For details, see Project exports and imports.
-
Move to trash: Removes the project from the environment in Integration Studio and the Harmony cloud. Projects can be restored up to 90 days after being moved to trash. After 90 days, the project is permanently deleted and cannot be restored (see Delete and restore a project later on this page).
Delete and restore a project
You can delete, restore, or permanently delete a project from the Projects page.
The Move to trash option is accessible from these locations:
- The project settings (see Edit project settings earlier on this page).
- The Projects page (see Tile view or List view in Projects).
On clicking Move to trash, a confirmation message asks you to confirm that you want to move the project to the trash:
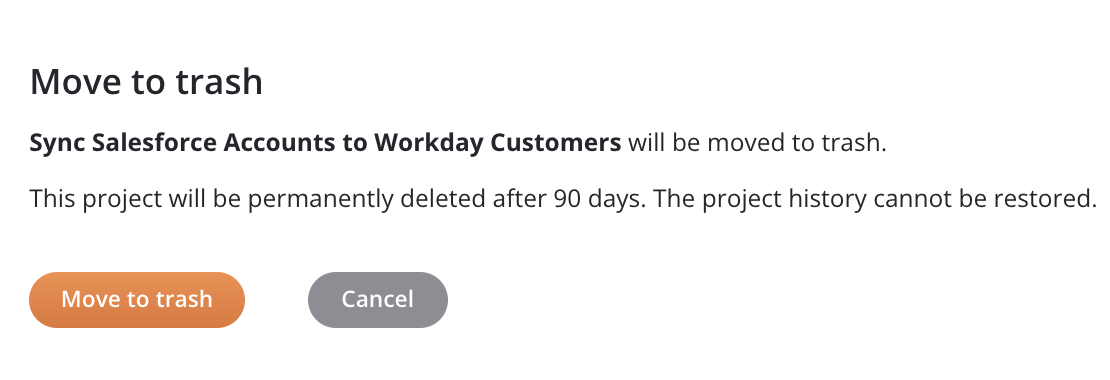
A project can be restored up to 90 days after it has been moved to the trash. After 90 days, projects in the trash will be permanently deleted.
The Restore and Delete Permanently options are accessible from the Projects page (see Tile view or List view in Projects).
On clicking Delete Permanently, a confirmation message asks you to confirm that you want to permanently delete the project:

You must type the word DELETE to enable the Delete button.
Troubleshooting
Common reasons you may not be able to delete a project are that the project has dependent projects or that the project has operations with an incomplete status.
Migrated projects
If the project you are attempting to delete has been migrated, it cannot be deleted until you first delete all projects farther down the migration chain (see Migration chain in Project migration). After clicking Delete in the Delete Forever dialog, a second dialog indicates that the project cannot be deleted and includes the names and environments of the migrated projects preventing deletion:
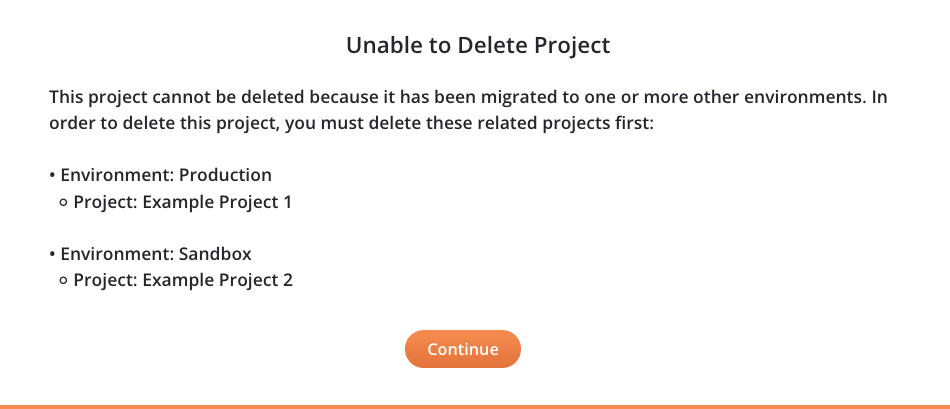
To resolve, first delete all projects farther down that migration chain (listed in the dialog), and then try to delete the original project again.
Operations with an incomplete status
Projects with submitted operations that are in an incomplete status cannot be moved to the trash. If the project you are attempting to move to the trash has any operations in an incomplete status, including Submitted, Received, Pending, Running, Cancel Requested, or Delayed Status, an error message will be returned.
To resolve, you can cancel incomplete operations from these locations:
- The operation (see operation status in Design canvas).
- The operation log table.
- The Runtime Operations page of the Management Console (see Canceling runtime operations).