Plugins
Introduction
The Plug-ins page of the Management Console allows Harmony organization administrators to add and manage Jitterbit standard plugins or custom plugins.
Important
Plugins provided by Jitterbit are deprecated. See Deprecation and support in Plugins.
Plugins are installed on Harmony Agents and can be used in both Cloud Studio and Design Studio projects (see Cloud Studio Plugins and Design Studio Plugins, respectively).
To access the Plug-ins page, log in to the Harmony portal, then use the Harmony Portal menu in the top left to hover over Management Console > Customizations and select Plug-ins:

Note
Make sure you are accessing the desired organization, which can be changed in the top navigation bar (see Changing the selected organization in Harmony portal).
Manage plugins
The Plug-ins table shows information about each plugin that is installed within your organization. Standard Jitterbit plugins are installed by default.
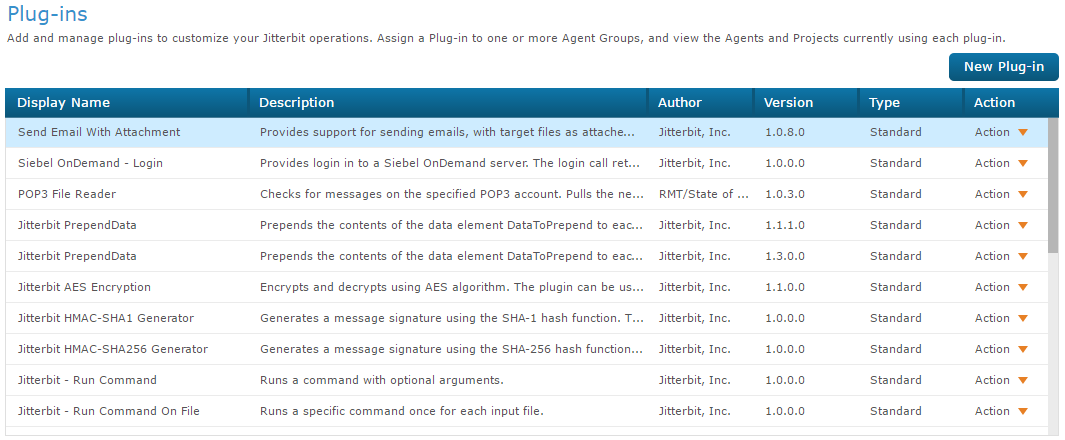
Add new plugins
Jitterbit standard plugins are available for download in the Plugins. Also see Plugins available in Harmony for a list of current standard plugins.
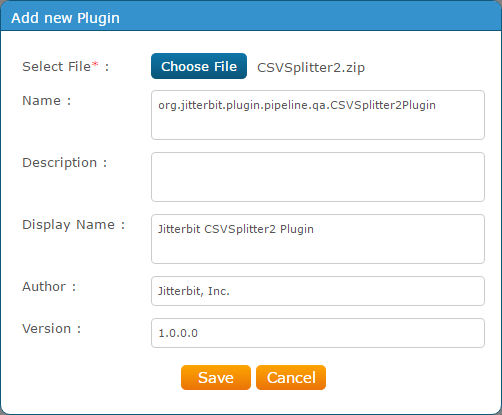
To add a new plugin, click the  button. In the popup, use the button to browse to the plugin in either ZIP or XML format. For standard plugins, some fields will populate with information for the plugin.
Associate agent groups
Standard Jitterbit plugins will be associated with certain Agent groups by default. See Plugins available in Harmony for a complete listing.
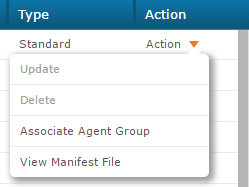
To associate a plugin with an available agent group, use the Action dropdown on the far right and select Associate Agent Group.
The available agent groups will be listed in the popup.
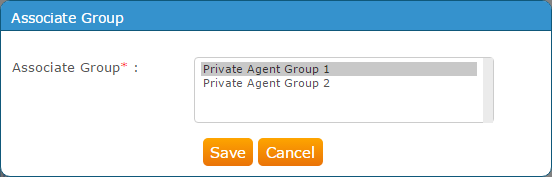
Select the agent group you want to associate, then click Save.
To check that the appropriate agent groups are associated, when the plugin is selected, you can view the Assigned Agent Groups tab in the bottom portion of the screen.
Update plugins
You can update a custom plugin from the Action dropdown in the far right column using Update.
For standard Jitterbit plugins, this option will be grayed out.
Delete plug-ins
You can delete a custom plug-in from the Action dropdown in the far right column using Delete.
For standard Jitterbit plugins, this option will be grayed out.
View manifest files
You can view the manifest file for each plugin from the Action dropdown in the far right column using View Manifest File.
The XML file should display or download.
<?xml version="1.0" ?>
<JitterbitPlugin SpecVersion="1.0">
  <PipelinePlugin SpecVersion="1.0">
    <!-- Unique name of the plugin, it can be anything
         but it is recommended to us a URL -->
    <Name>http://www.jitterbit.com/plugins/pipeline/user/example</Name>
    <!-- Version of this pipeline plugin -->
    <Version>0.9.3-beta1</Version>
    <!-- The name to use when the plugin is displayed in the UI
         Should be different from the unique name.-->
    <DisplayName>Jitterbit Example</DisplayName>
    <Author>Jitterbit, Inc.</Author>
    <Description>Describe the plugin.</Description>
    <!-- Where to check for updated versions of this plugin -->
    <UpdateUrl>http://www.jitterbit.com/plugins/pipeline/user/example.html</UpdateUrl>
    <!-- Where to find documentation about how this plugin works -->
   <DocumentationUrl>http://www.jitterbit.com/plugins/pipeline/user/example/docs</DocumentationUrl>
    <!-- Command line used to execute the plugin. Since this plugin is implemented
         using the Java SDK, it is executed by invoking Java. You need to use version
         7 or higher of Java to use the Java SDK. -->
    <Command>java</Command>
    <!-- The arguments to pass to the executable. Since this plugin is packaged as an
         executable JAR file, you need to pass -jar and the path to the JAR file.
         $(plugin.directory) expands to the directory where the plugin is installed. -->
    <Arguments>-jar "$(plugin.directory)PluginExample_1.jar"</Arguments>
    <!-- Optional list of data elements that describes which data elements are required
         and their default values. If a data element is required but does not have a default
         value the data element has to be defined before the pipeline plugin is executed or
         the plugin will not be executed and the operation aborted.
         If All="true" is specified, all data elements will be sent to the plugin,
         this should not be used by default since it may slow down the execution. -->
    <DataElements All="false">
      <DataElement Name="ExampleInt" Type="int" Required="false">
        <Documentation>
          An integer.
        </Documentation>
        <!-- If a data element is required you might want to add a default value.-->
        <DefaultValue>9</DefaultValue>
      </DataElement>
      <DataElement Name="ExampleBool" Type="bool" Required="false">
        <Documentation>
          A boolean, use values "true"/"false" or 0/1.
        </Documentation>
        <DefaultValue>true</DefaultValue>
      </DataElement>
    </DataElements>
    <!-- The value describes where the plugin can be applied, e.g. Target, Source, WebServiceMethod
         Relative is where in relation to the pipeline position this plugin is executed -->
    <PipelinePosition Optional="true" Relative="Pre" ExecutionOrder="50">Target</PipelinePosition>
    <PipelinePosition Optional="true" Relative="Post" ExecutionOrder="50">Source</PipelinePosition>
    <PipelinePosition Optional="true" Relative="OnRequest" ExecutionOrder="50">WebServiceCall</PipelinePosition>
  </PipelinePlugin>
</JitterbitPlugin>
View detailed information
Additional information for each plugin is shown in the bottom portion of the screen in three tabs: Assigned Agent Groups, Installed In Agents, and Usage.
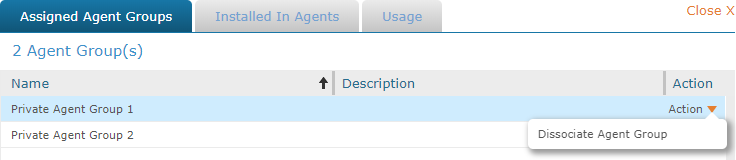
View assigned agent groups or dissociate agent group
When a row in the Plug-ins table is selected, the Assigned Agent Groups tab shows the agent groups that are associated with the plugin.
You can use the Action dropdown on the far right to remove the association of an agent group for the plugin. Associating agent groups is done from the Plug-ins table in the top portion of the screen.
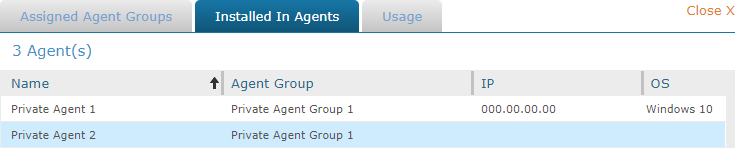
View installed agents
The Installed In Agents tab shows the Agents within each agent group that the plugin is installed within. This tab includes information about each agent including IP address and operating system.
View usage
The Usage tab lists any projects that currently have the plugin in-use. The tab also includes the environment the project is within, the specific operation, and the usage type.

Note
The environment, project, and operation will display only when the plugin is associated with a source or target. The usage will not display when the plugin is used in a script within the operation.