Message queues
Introduction
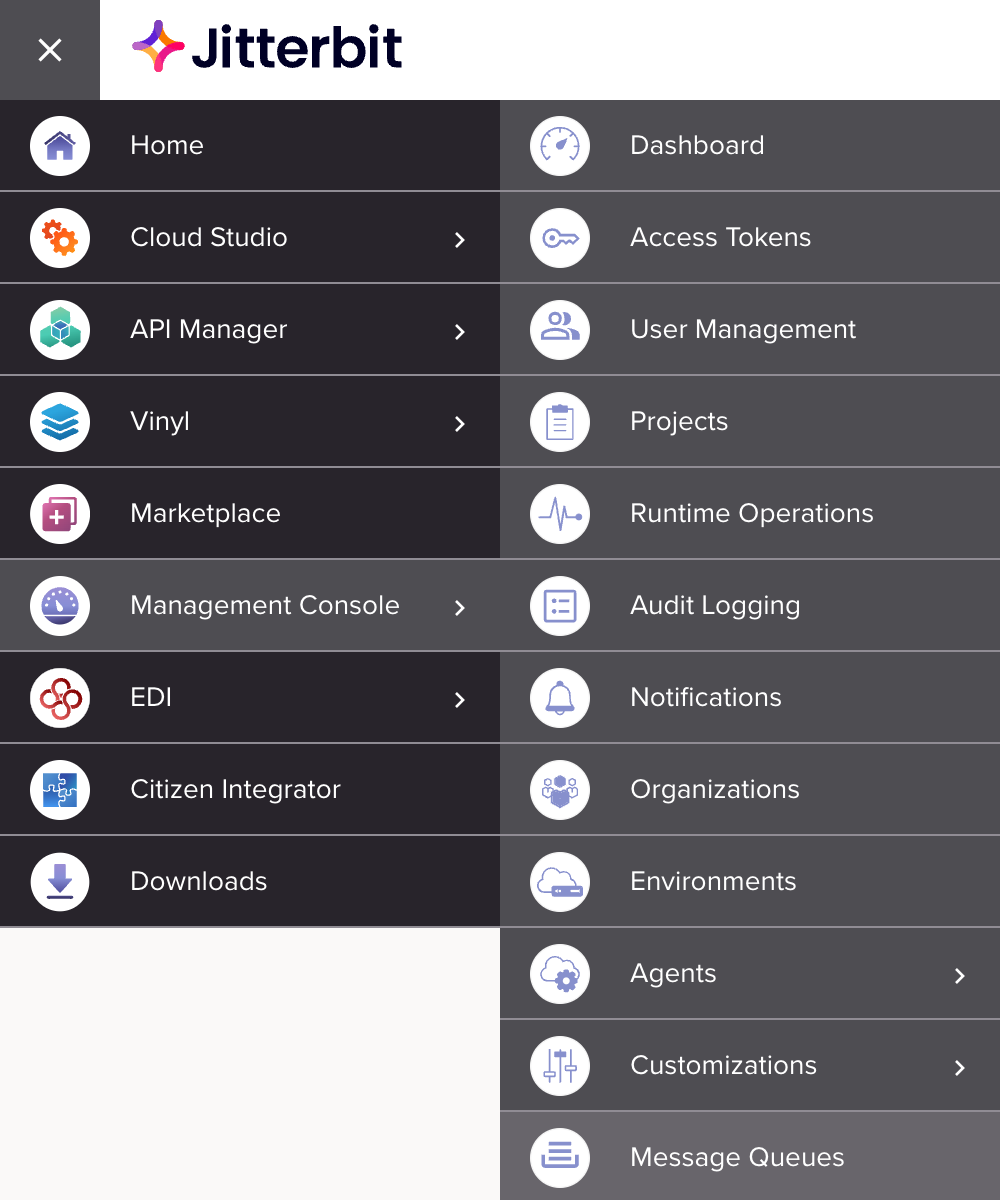
The Message Queues page of the Management Console allows Harmony organization administrators to create and manage their queues to be used with the Jitterbit message queue service.
Members of a role that has been granted the Read organization permission can also access the Message Queues page.
To access the Message Queues page, log in to the Harmony portal, then use the Harmony portal menu in the top left and navigate to Management Console > Message Queues:
Note
If using a private agent that is behind a firewall within your network, you must allowlist the message queue service.
Message queues page header
The header along the top of the Message Queues page includes these configuration areas:

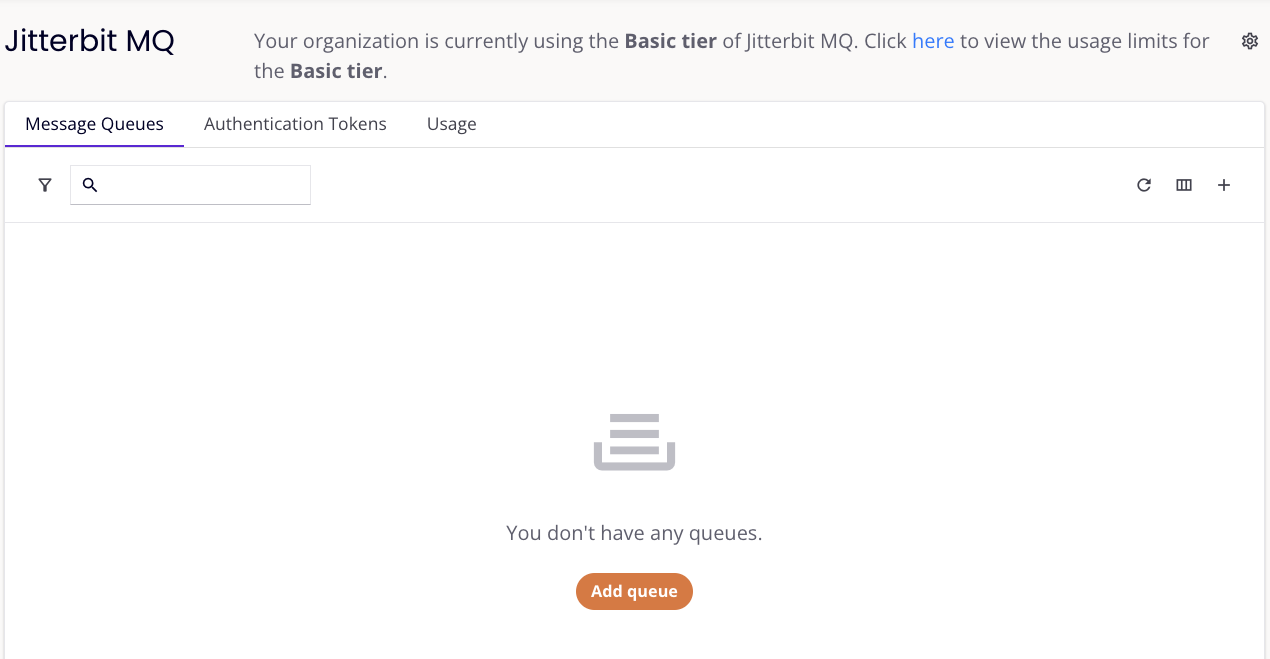
Message Queues tab
Within the Message Queues tab, you create, manage, and monitor message queues to be used with the Jitterbit MQ connector.
Create message queues
Use the Add Queue button or the add icon to create a new message queue:
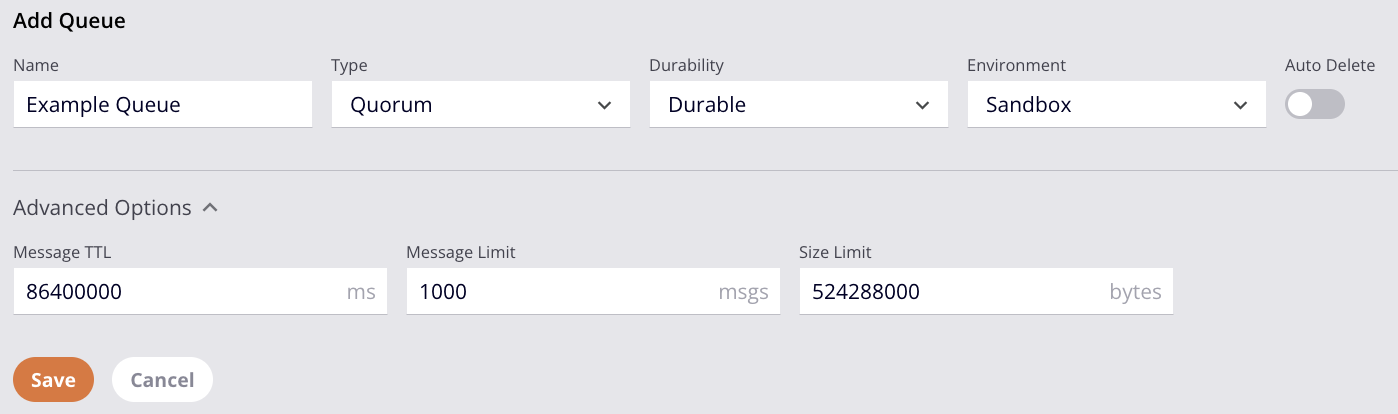
These configuration options become available to configure in the first row of the message queues table:
-
Name: Enter a name for the message queue. The queue name must be unique to the environment in which the queue is being created within.
Note
If the queue name consists of numeric-only values, it will not be returned in a search within the Message Queues tab.
-
Type: Select the type of queue to create, either Quorum or Classic:
-
Quorum: Implements replicated queues (also known as mirrored queues), writes queue metadata to a disk, and provides protection against data loss, by default.
-
Classic: Implements replicated or non-replicated queues.
-
-
Durability: If Classic is selected as the Type, select the durability of the queue, either Durable or Transient:
-
Durable: Durable queues write metadata to disk. Durable queues (and their messages) are recovered in a system reboot. This option can result in longer processing times.
-
Transient: Transient queues store metadata in memory. Transient queues (and their messages) are not recovered in a system reboot. This option can result in a shorter processing times.
Note
If Quorum is selected as the Type, Durable is the only Durability option available.
-
-
Environment: Select the environment for the message queue.
Important
All environments are disabled for messaging by default. Environments can be enabled for messaging in settings.
-
Auto Delete: This option is not functional.
-
Advanced Options: You can use these advanced options to refine your use case:
-
Message TTL: Enter the message TTL (Time to Live) in milliseconds. The default and maximum value allowed is
864000000milliseconds (10 days). The minimum value allowed is3600000milliseconds (1 hour). -
Message Limit: Enter the number of messages allowed within the queue at any time. The default is
1000messages. The maximum value allowed depends on your usage limits.Note
If the number of messages exceeds the message limit for an individual queue, this runtime error will be returned:
"statuscode":500,"Error":"Error sending message." -
Size Limit: Enter the message length (in bytes) allowed for each message within the queue. The default is
524288000bytes (approximately 524 megabytes). The maximum value allowed depends on your usage limits.
-
-
Save: Click to save the queue and return to the Message Queues tab, where the created queue is displayed in the message queues table.
-
Cancel: Click to discard the queue and return to the Message Queues tab.
View message queues
Each row in the message queues table displays message queues created within the organization:

-
Name: The name of the queue.
-
Type: The type of queue, either Quorum or Classic.
-
Status: The status of the queue.
-
Durability: The durability of the queue, either Durable or Transient.
-
Environment: The environment of the queue.
-
Total Messages: The total number of messages within a queue.
-
Ready Messages: The number of messages available to be retrieved by a Get or Get bulk activity. A message must be retrieved by a Get or Get bulk activity before a timeout of 24 hours. Once the timeout expires, the message is discarded.
-
Unack Messages: The number of messages retrieved by a Get or Get bulk activity awaiting acknowledgement (by the Acknowledge activity) or negative acknowledgement (by the NACK activity).
Note
When a message is retrieved by a Get or Get Bulk activity (and auto-acknowledgement is not configured), the message must be explicitly acknowledged before a timeout of 30 minutes. Once the timeout expires, the message is returned to Ready Messages, where it must be retrieved again by a Get or Get Bulk activity before being acknowledged or negatively acknowledged.
-
Actions: These actions are available in the Actions column when hovering over a message queue row:
-
Copy Queue Name: Click the copy icon to copy the queue name to your clipboard. This value is used in a Jitterbit MQ Get or Send activity.
-
Duplicate: Click the duplicate icon to duplicate the message queue.
-
Purge: Click the purge icon to delete Ready Messages from a queue. The queue will be retained.
Note
Unack Messages are not purged from the queue. Unack Messages must be returned to Ready Messages (after the 30-minute delivery timeout) before they can be purged.
-
Delete: Click the delete icon to delete the queue and all the messages it contains. Deleting a queue will break any activities interacting with the message queue.
-
-
Filter: Click the filter icon to filter the table results by Type, Status, Durability, and Environment.
-
Search: Enter any part of the queue name into the search box to filter the list of queues (alphanumeric characters only). The search is not case-sensitive.
-
Refresh: Click the refresh icon to refresh the table results.
-
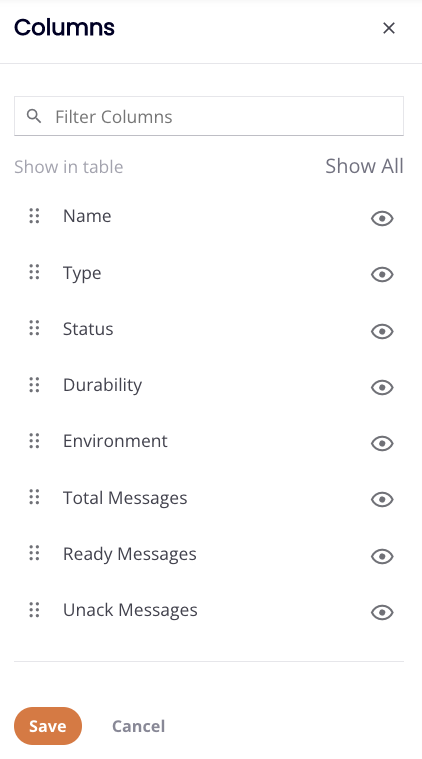
Filter Columns: Click the filter columns icon to open a drawer that allows you to reorder the columns or adjust their visibility in the message queues table:
-
Search: Enter any part of the column name into the search box to filter the list of columns. The search is not case-sensitive.
-
Show all: Click to show all columns. By default, all columns are shown.
-
Hide: The column is visible. Click to hide it.
-
Show: The column is hidden. Click to show it.
-
Reorder Column: Click and drag the reorder icon to adjust the order the column appears in.
-
Save: Click to save any changes and return to the Message Queues tab.
-
Cancel: Click to discard any changes and return to the Message Queues tab.
-
-
Add Queue: Click the add icon to create a new message queue.
-
Queue Information: Clicking on a queue row within the table opens a dialog containing additional queue settings, such as the Advanced Options configured during message queue creation:
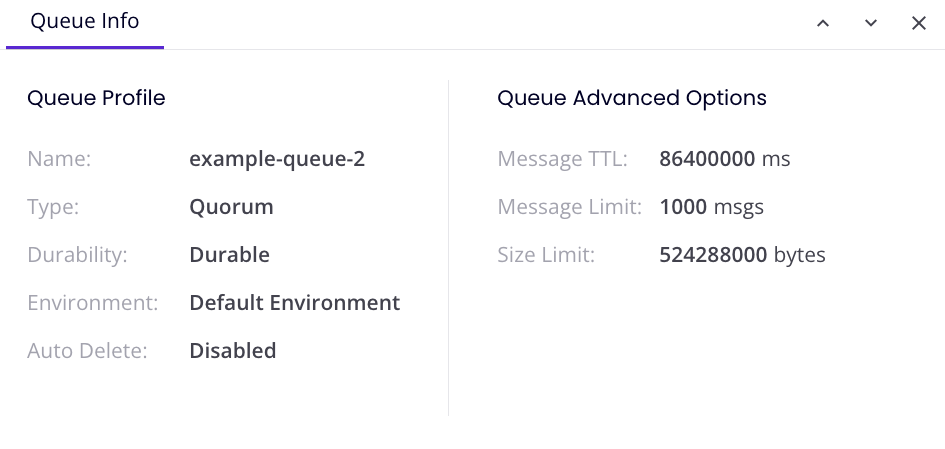
Use the up or down arrows to view the settings of other queues.
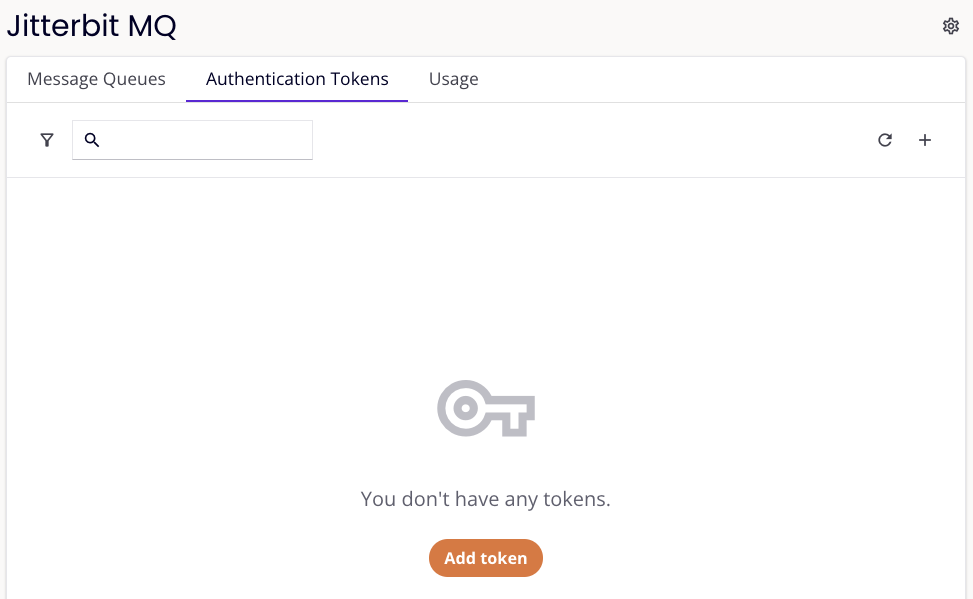
Authentication Token tab
Within the Authentication Token tab, you create authentication tokens to be used in a Jitterbit MQ connection.
Create authentication tokens
Use the Add Token button or the to create a new authentication token:
These configuration options become available to configure in the first row of the authentication tokens table:
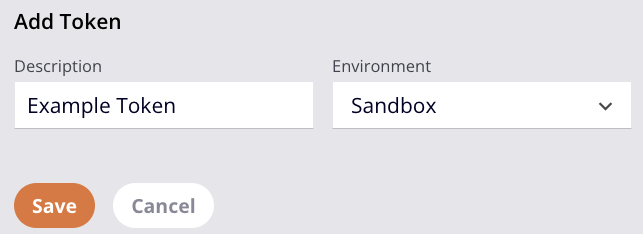
-
Description: Enter a description for the authentication token.
-
Environment: Select the environment for the authentication token. The environment of the token must be the same environment as the message queue and the Cloud Studio project that is using the Jitterbit MQ connector.
-
Save: Click to save the authentication token and return to the Authentication Tokens tab, where the created token is displayed in the authentication tokens table.
-
Cancel: Click to cancel the token creation and return to the Authentication Tokens tab.
View authentication tokens
Each row in the authentication tokens table displays authentication tokens created within the organization:
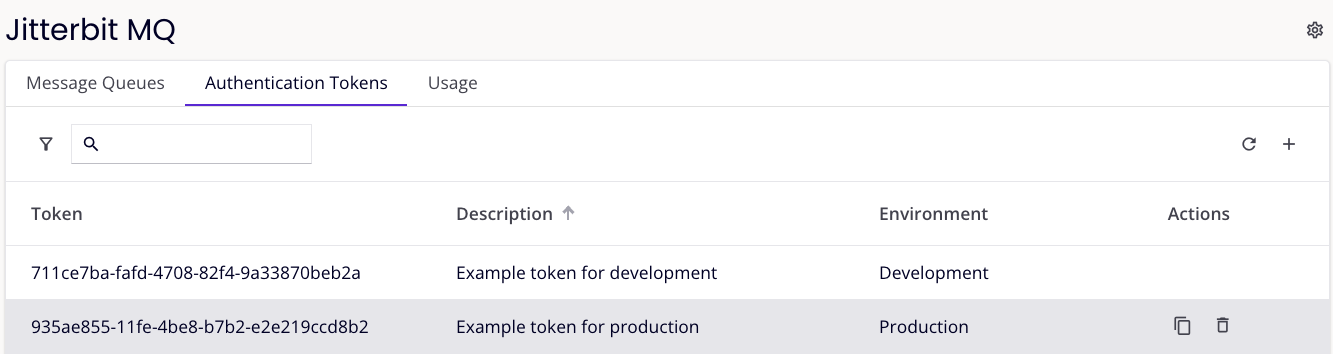
-
Token: The value of the authentication token.
-
Description: The description of the authentication token.
-
Environment: The environment of the authentication token.
Tip
See the Management Console environments page for the environment ID, which is needed for the Jitterbit MQ connection.
-
Actions: These actions are available in the Actions column when hovering over an authentication token row:
-
Copy Token: Click the copy icon to copy the value of the authentication token to your clipboard. This value is used in a Jitterbit MQ connection.
-
Deactivate: Click the delete icon to deactivate the authentication token. Deactivating the token will remove it from the authentication tokens table and will break any Jitterbit MQ connections using that token.
-
-
Filter: Click the filter icon to filter the table results by Environment.
-
Search: Enter any part of the authentication token value, description, or environment into the search box to filter the list of tokens (alphanumeric characters only). The search is not case-sensitive.
-
Refresh: Click the refresh icon to refresh the table results.
-
Add Token: Click the add icon to create a new authentication token.
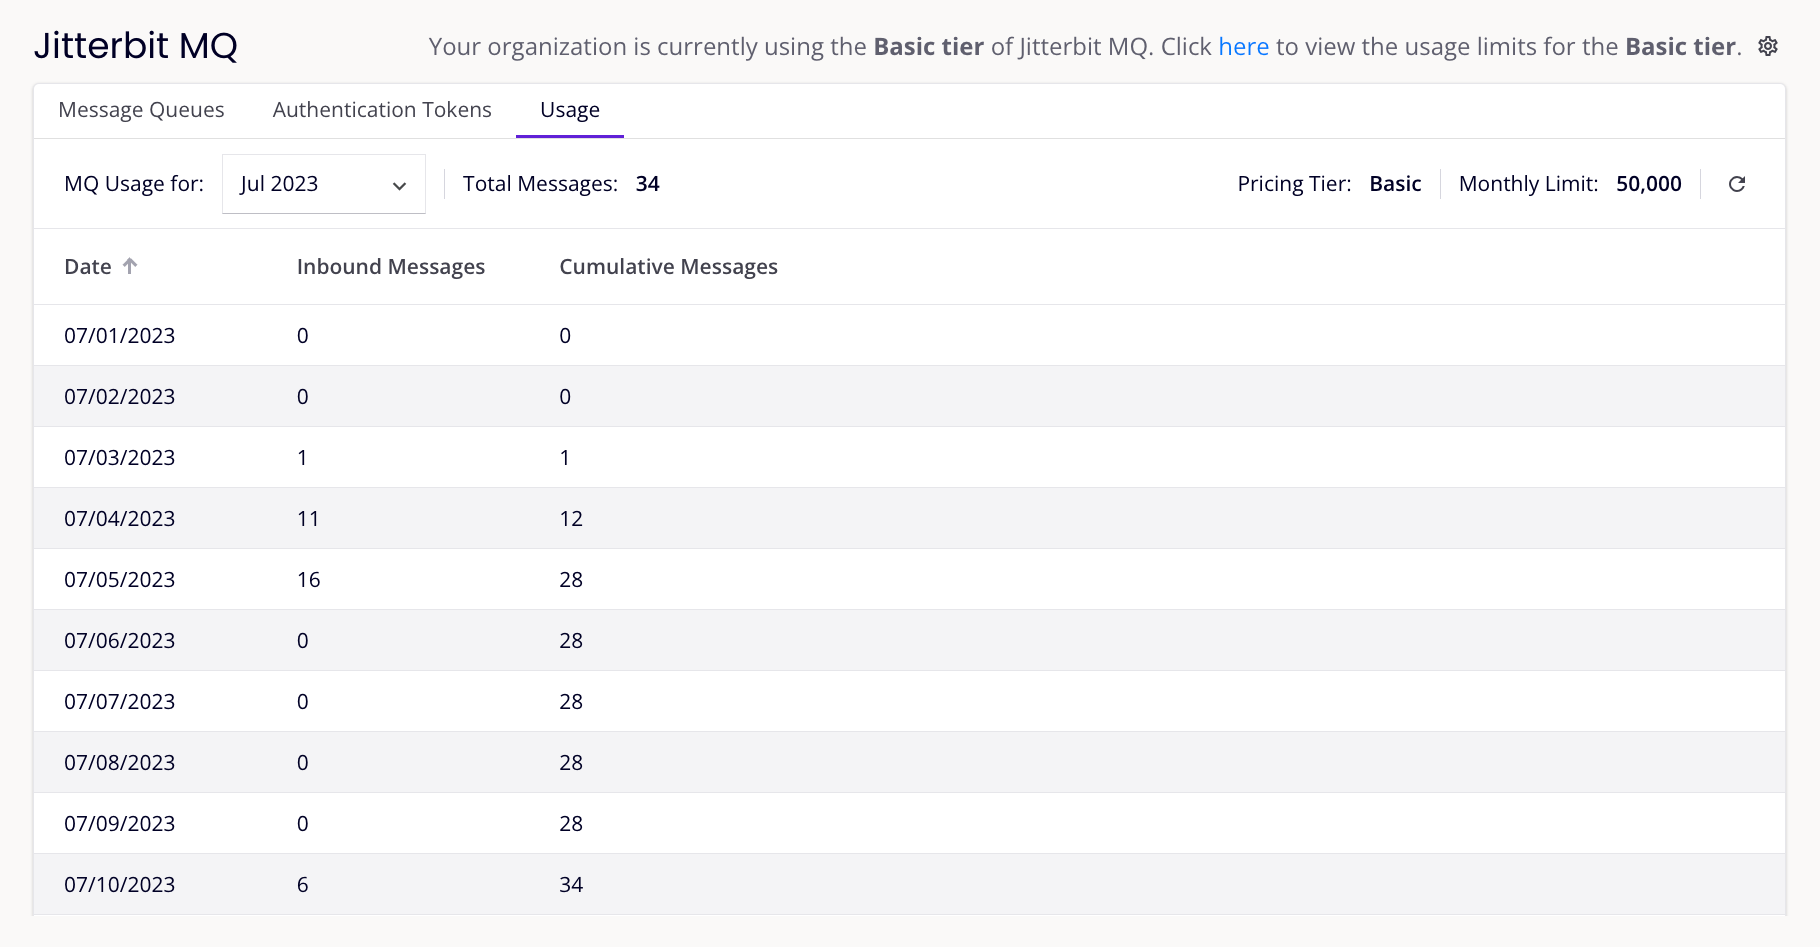
Usage tab
Within the Usage tab, you can view the total number of inbound messages processed by the message queue service within a given month and day:
-
MQ Usage For: Use the menu to select the month to view.
-
Total Messages: The total number of inbound messages processed by the message queue service for the selected month.
-
Pricing Tier: The organization's purchased tier that determines the contractual usage limits, either Basic or Premium.
-
Monthly Limit: The number of messages allowed within a month, as determined by the organization's purchased tier and its usage limits.
-
Refresh: Click the refresh icon to refresh the table results.
-
Date: Displays dates within the month up to the current date. Click the column header to sort the dates by descending or ascending order.
-
Inbound Messages: The number of inbound messages processed for the day.
-
Cumulative Messages: The total number of messages processed for the month up to the row's date. When you have reached the month's limit, the number is displayed in red and a notification is displayed:

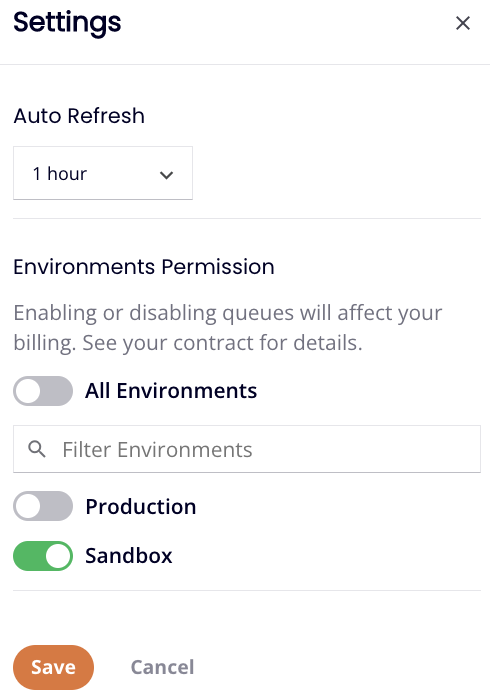
Settings
Click the settings icon (located in the rightmost corner of the page header) to open a configuration dialog for setting the automatic refresh interval and enabling or disabling messaging for environments:
-
Auto Refresh: From the menu, select the automatic refresh time interval for the Message queues table data, either 5 Minutes, 15 Minutes, 30 Minutes, or 1 Hour.
-
Environments Permission: Enable or disable messaging queues by environment using these options:
-
All Environments: When toggled on, message queues are enabled for all environments.
-
Search: Enter any part of the environment name into the search box to filter the list of environments. The search is not case-sensitive. The table results are filtered in real time with each keystroke.
-
Environments: Use the toggle to enable or disable message queues for individual environments.
-
Save: Click to save any changes.
-
Cancel: Click to discard any changes.
-