Organizations
Introduction
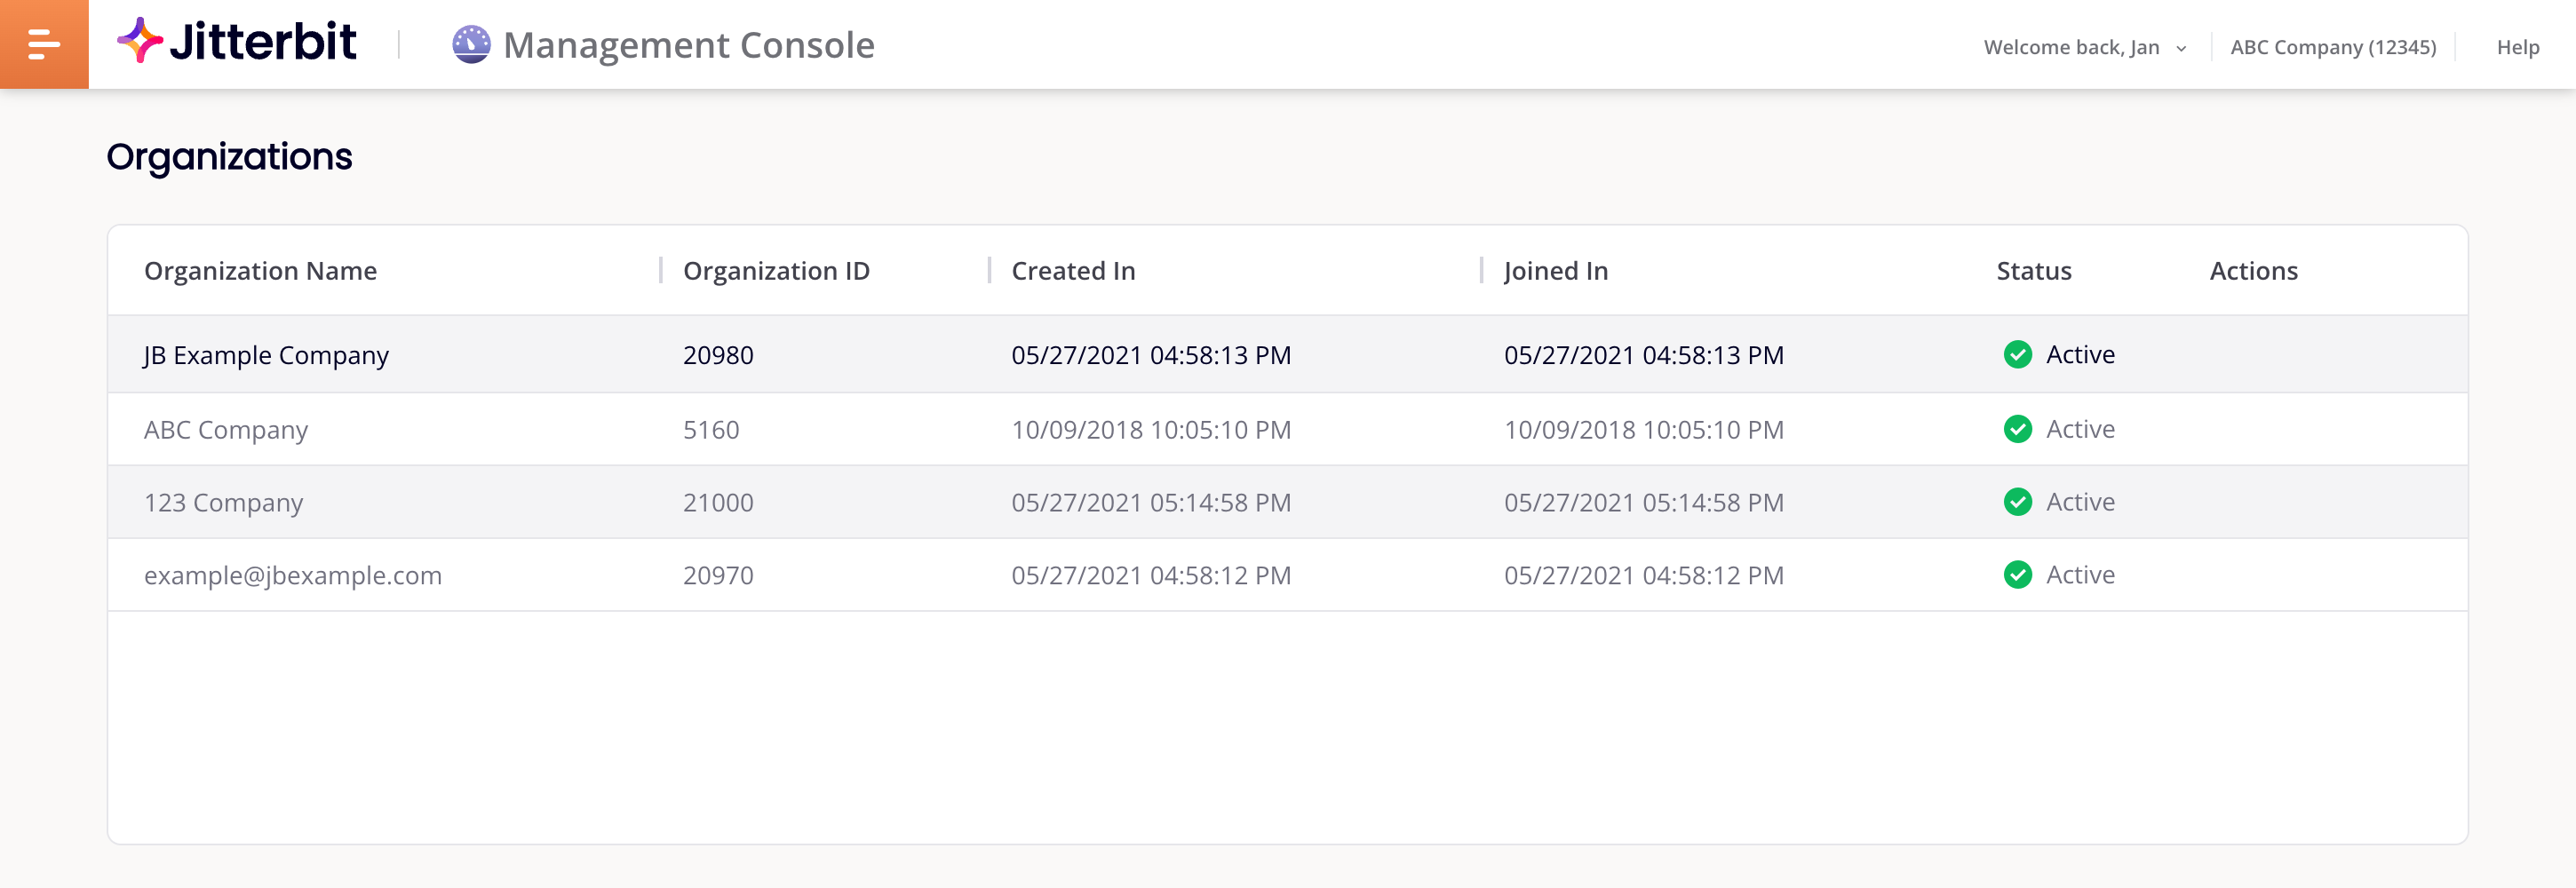
The Organizations page is a table listing the Harmony and Data Loader organizations you are a member of:
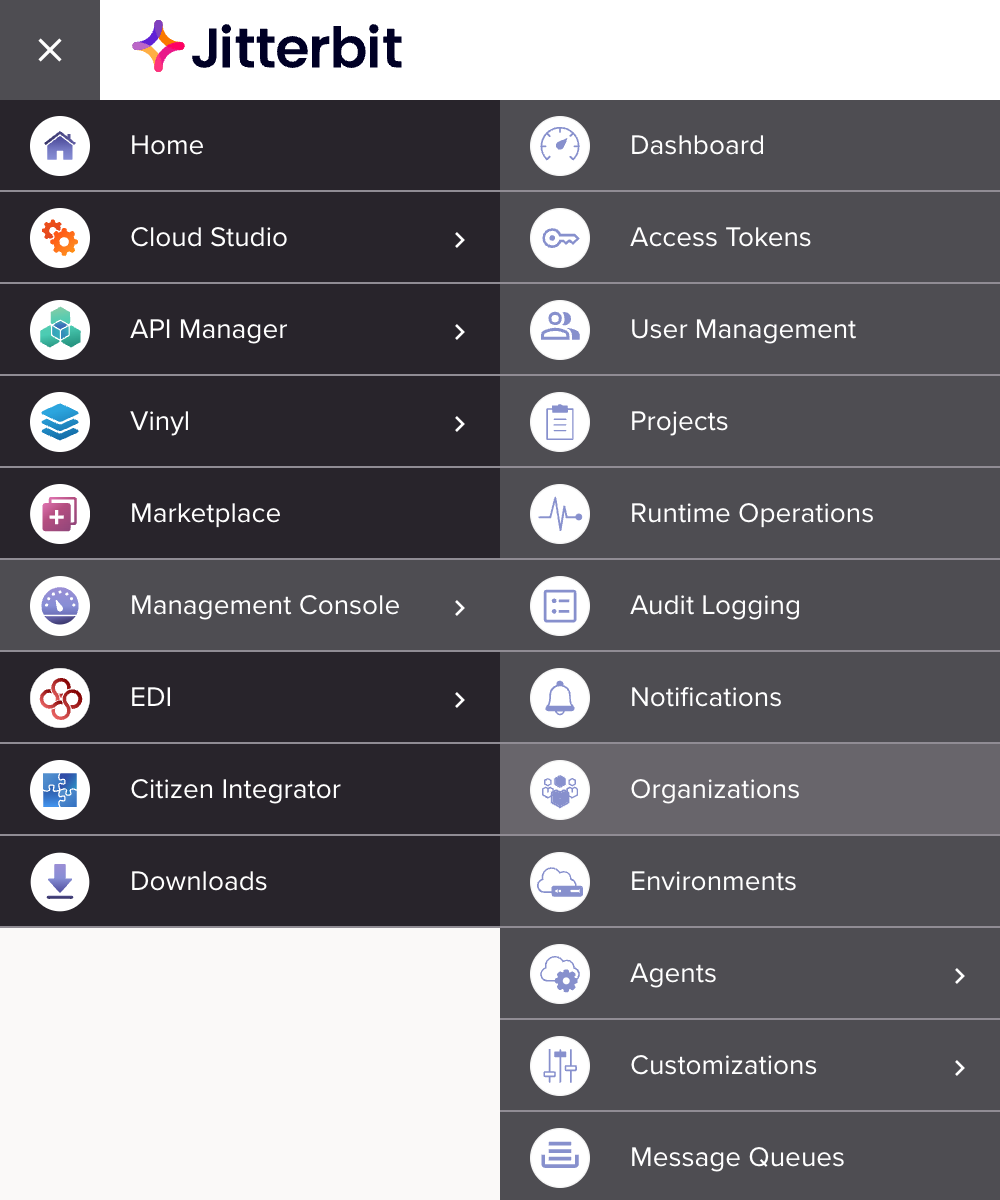
To open it, select Management Console > Organizations from the Harmony portal menu:
To access this page, you must be either a Harmony organization administrator (a member of a role with the Admin permission), or a member of a role with View Logs or Execute environment role access.
On the Organizations page, you can do the following:
-
View organizations in a table.
-
Edit an organization's policies.
-
Edit an organization's details.
Everything you do in Harmony is done within the context of the active organization as selected in the Harmony portal header menu. An administrator can invite you to join many organizations, but there will always be at least two organizations to select from:
-
A Harmony organization, usually identified with your company's name. If you belong to more than one Harmony organization you can choose a default on the My Account page. If you are an administrator for an organization, you can invite other users to join it.
-
A Data Loader organization (sometimes called a personal organization), usually identified by your email address. This is used to load data into Salesforce via the Salesforce Bulk API. You cannot invite anyone to join this organization. If you select this as your active organization, your access to Harmony is limited to the Management Console pages Dashboard, Runtime Operations, and Agents > Agents, and the Harmony portal Downloads page.
Important
To edit an organization, you must be a member of it, and it must be selected as the active organization in the Harmony portal header menu.
Organizations table
The Organizations table lists the organizations you are a member of:
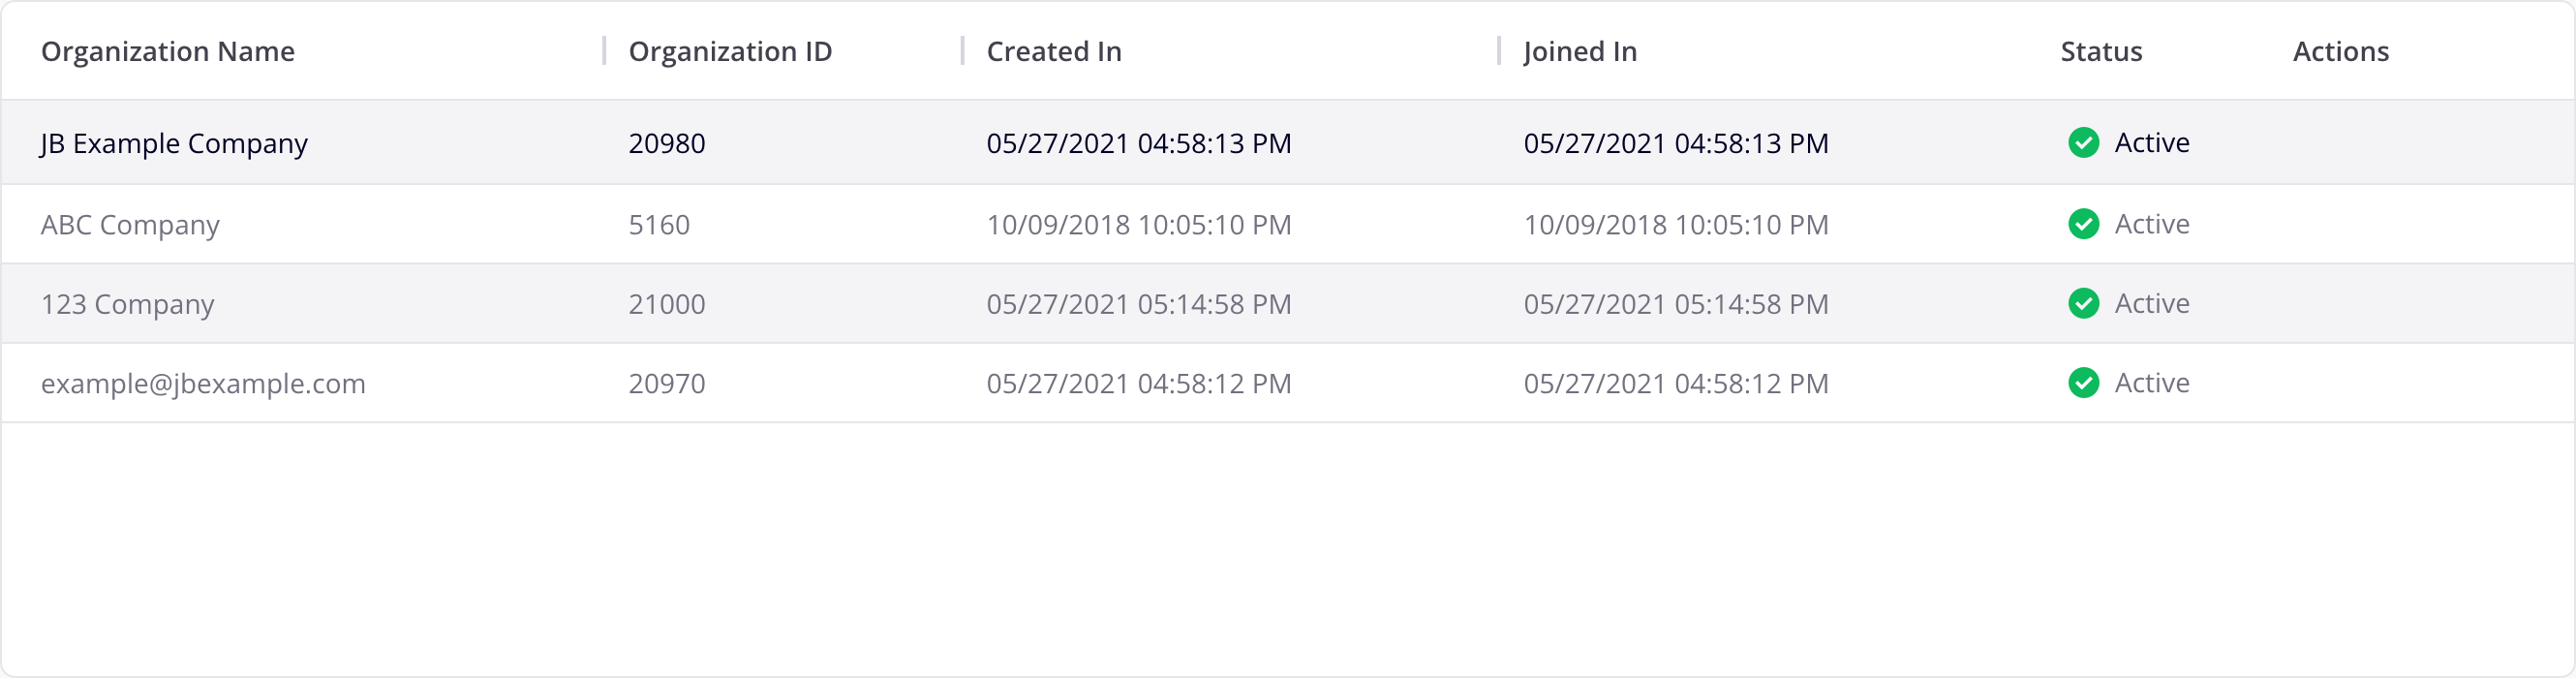
You can sort the table on the Organization Name, Organization ID, Created In, or Joined In columns. Click a column heading to sort. Click again to reverse the sort order. Drag a column's Resize bar to resize it.
Organization policies
To edit a selected organization's policies, either click its row in the table, or hover on the organization and click Organization Policies. A pane opens at the bottom of the page with the following tabs:
Agent management
The Agent Management tab contains the following private agent settings:

-
Disable Auto Connector Update: Enable to prevent updates to Connector SDK-based connectors deployed in operations running on private agents. When this setting is enabled, using a connection’s Test button does not download the latest version.
Caution
This setting is ignored and connectors are updated if you do any of the following:
- Select Action > Update connectors for the agent's group in the Management Console Agent groups page.
- Upgrade or reinstall the private agent, or reset its PostgreSQL database.
-
Remote agent configuration: Enable to allow remote private agent configuration.
-
Override schedule agent time zone: Enable to set which time zone to run current and future schedules. This setting takes effect with agent version 10.40 or later. By default, a scheduled operation's time zone depends on which agent it runs. Date and time functions are unaffected by this setting. For schedule consistency, it is recommended to use a time zone that does not observe daylight saving time, such as UTC (cloud agents use UTC by default). If using a private agent, you can use this setting and select Etc/UTC.
API management
The API management tab contains the following settings:

-
Require security profile to publish: Enable to require that APIs created with API Manager have a security profile assigned when saving the API, regardless of the status (Draft, Published, or Published with Draft). Existing APIs without an assigned security profile are unaffected until they are edited.
-
Enable audit logging: Enable to activate user activity audit logging in select Harmony applications, such as Management Console and Cloud Studio.
Connection management
The Connection Management tab contains the following settings:

-
Re-authentication on change: Enable to make certain Cloud Studio connectors force users to re-enter connection credentials when editing certain fields in an endpoint's connection. This feature is currently supported for these connectors:
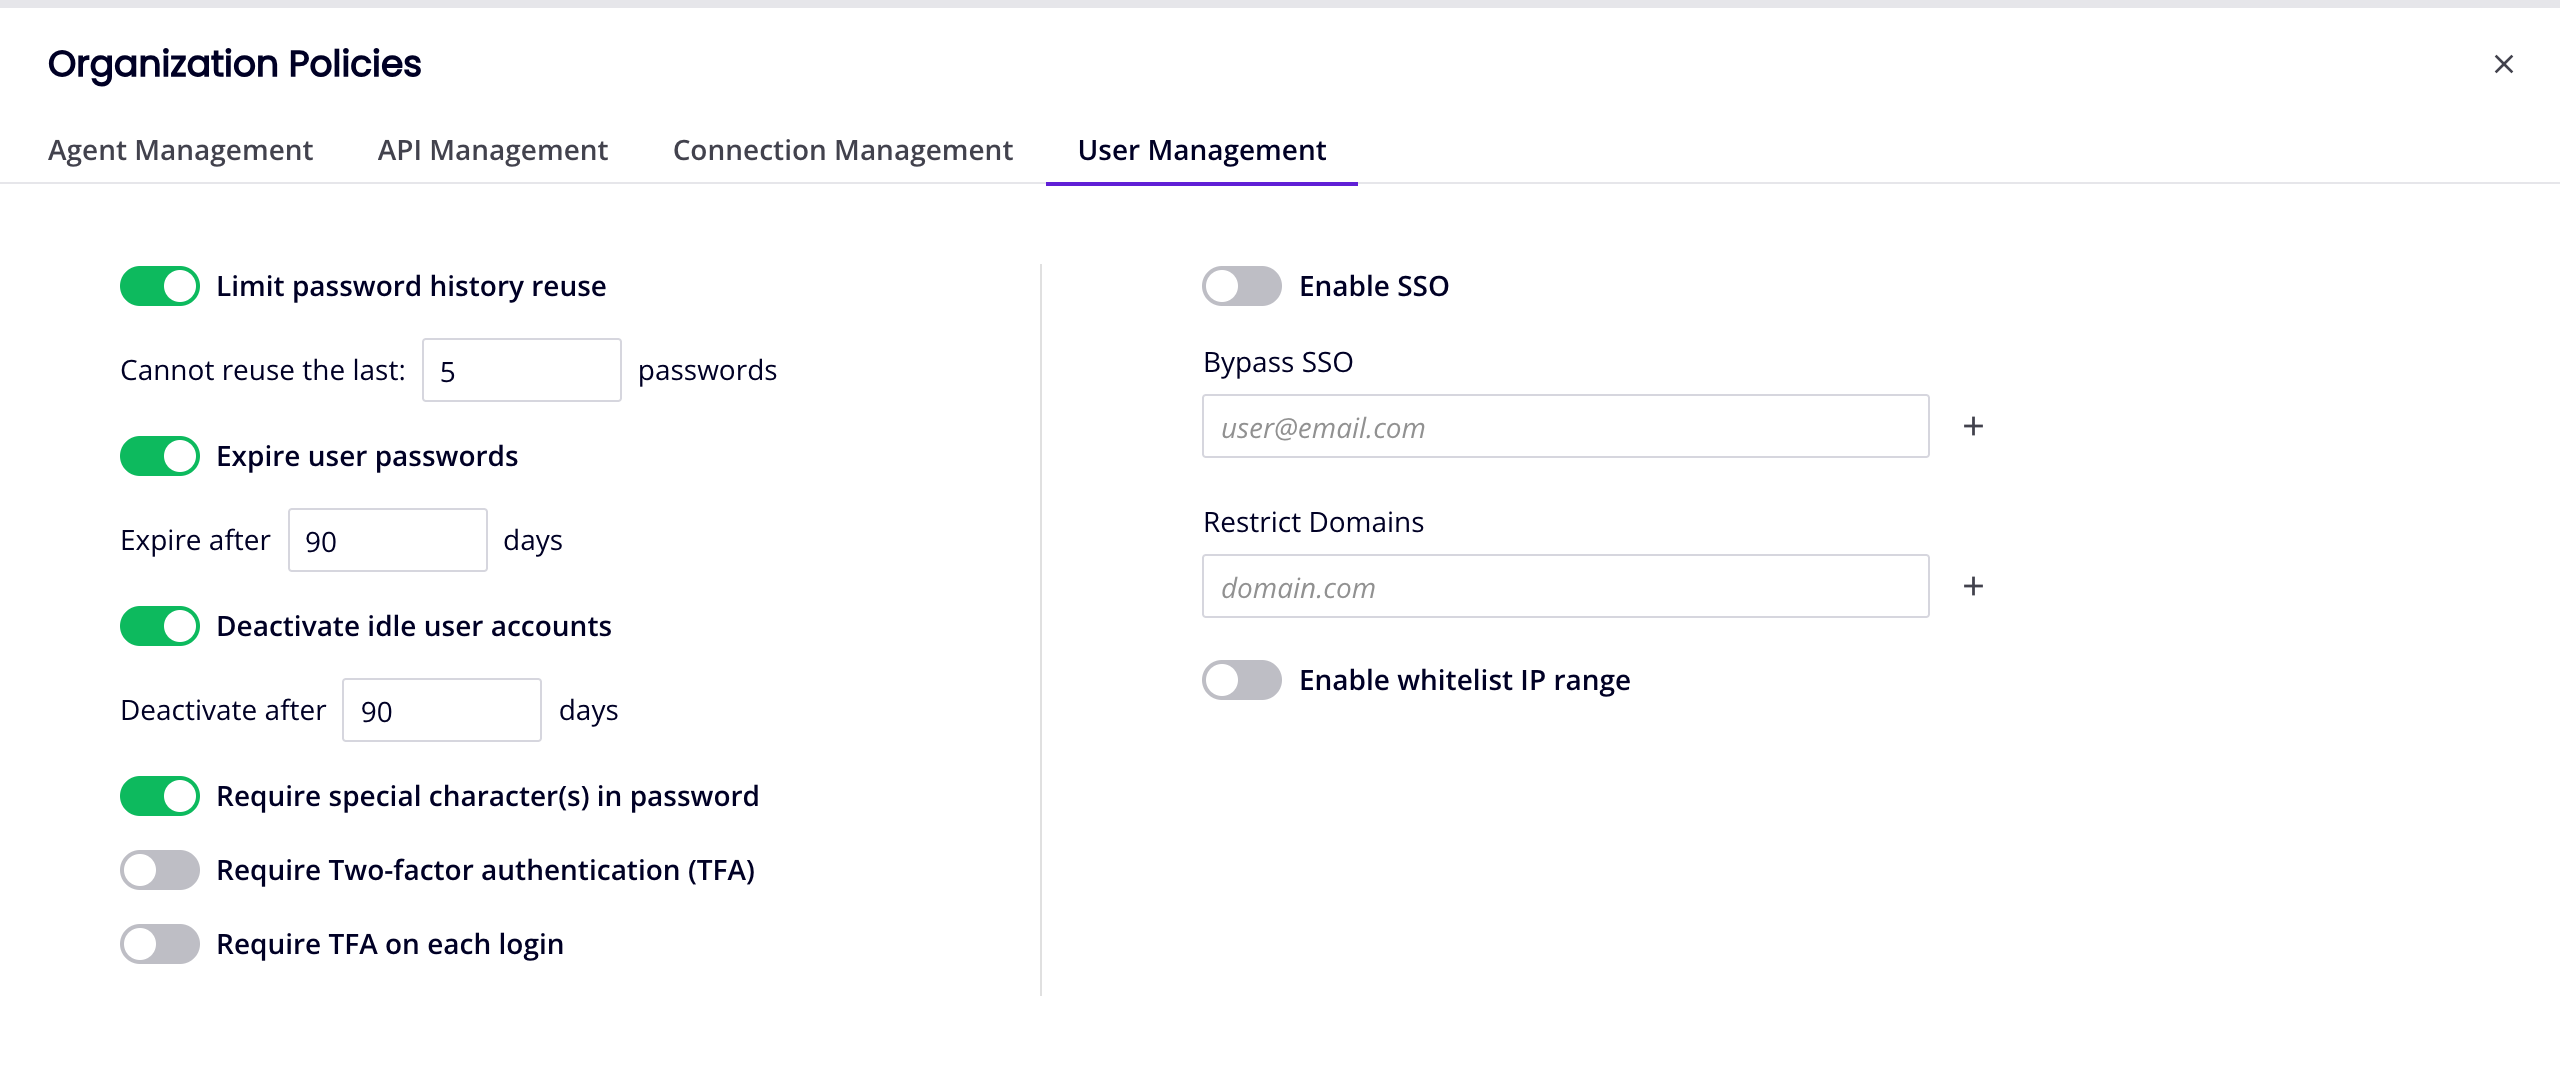
User management
The User Management tabs contains the following settings:
| Field | Description | Applies to Harmony Orgs | Applies to SSO Orgs |
|---|---|---|---|
| Limit password history reuse | Users with forgotten passwords cannot re-use the last X number of used passwords (Default: 5). | ||
| Expire user passwords | Active users must change passwords every X number of days (Default: 90). | ||
| Deactivate idle user accounts | Deactivate accounts inactive for X number of days (Default: 90). | ||
| Require special character(s) in password | Harmony passwords must include one of the following characters: ! # $ % _ < = > | ||
| Require Two-factor authentication (TFA) | Use two-factor authentication, and re-verify devices every X number of days (Default: 30). Enabling this disables Require TFA on each login. | ||
| Require TFA on each login | Use two-factor authentication on every login. Enabling this disables Require Two-factor authentication (TFA). | ||
| Enable SSO | Enable SSO for all users, except those in the Bypass SSO list. | ||
| Bypass SSO | Bypass SSO for any users in the Bypass SSO list. | ||
| Restrict Domains | Restrict access to the specified domains. To specify multiple domains, separate each with a comma or semicolon. | ||
| Enable whitelist IP range | Restrict login access, for Harmony portal, Design Studio, private agent, or private API gateway, to host IPs in the specified IP range. |
Organization details
To edit an organization, hover on its row and click Edit Organization. The Edit Organization panel opens:
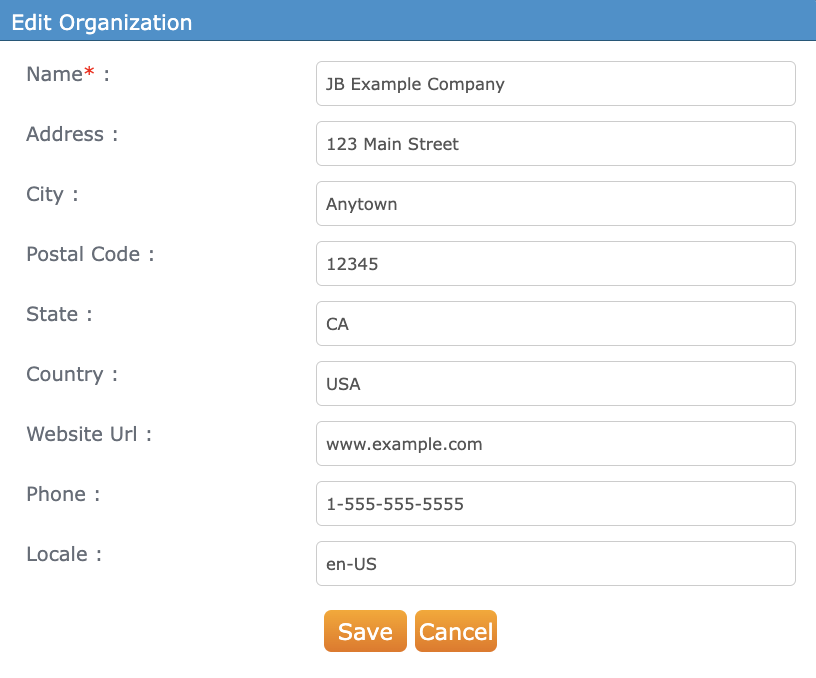
The fields are as follows:
- Organization name: The organization name. This is the only field used by Harmony.
- Website URL: (Optional)
- Country: (Optional) Select one before setting a phone number.
- Phone number: (Optional) Select a country before setting this.
- Street address: (Optional)
- City: (Optional)
- State or province: (Optional)
- Postal code: (Optional)
Click the Save button to save any changes and close the panel.
Click the close icon or the Cancel button to abandon any changes and close the panel.