User Management page in Jitterbit Management Console
Introduction
When a user accepts an invitation to join an organization, what they can access in Harmony depends on whether they were invited as a Harmony user or an external user. For Harmony users, access is defined by the roles they are assigned, the permissions each role grants, and the access levels those roles have in different environments. External users don't have roles, and can only access the API Manager Portal.
Organization administrators use the Environments page to manage environments and access levels, and the User Management page to manage Harmony users, external users, and roles:
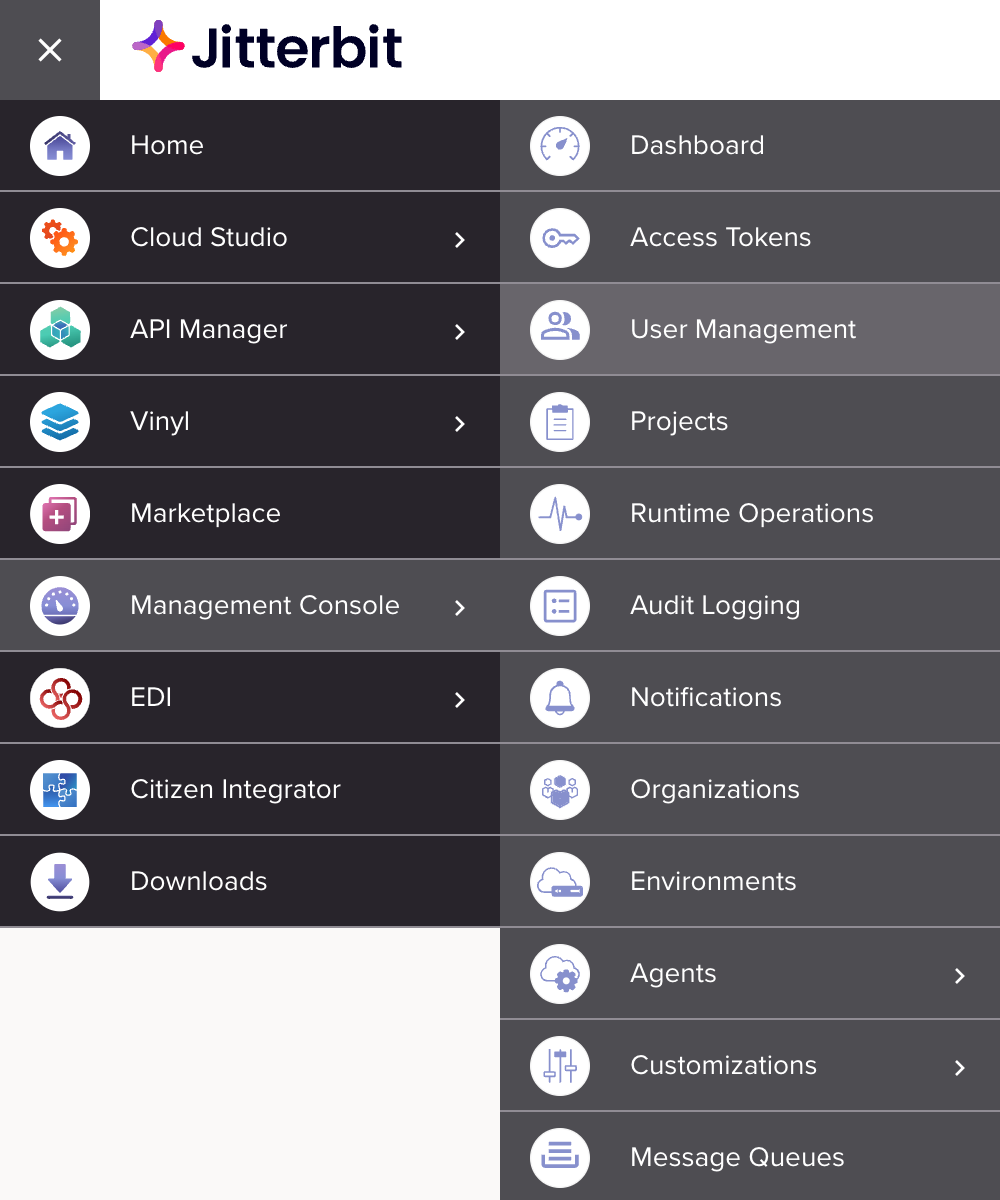
To open it, select Management Console > User Management from the Harmony portal menu:
To access this page, you must be either a Harmony organization administrator (a member of a role with the Admin permission), or a member of a role with Execute or View Logs environment access.
Harmony users
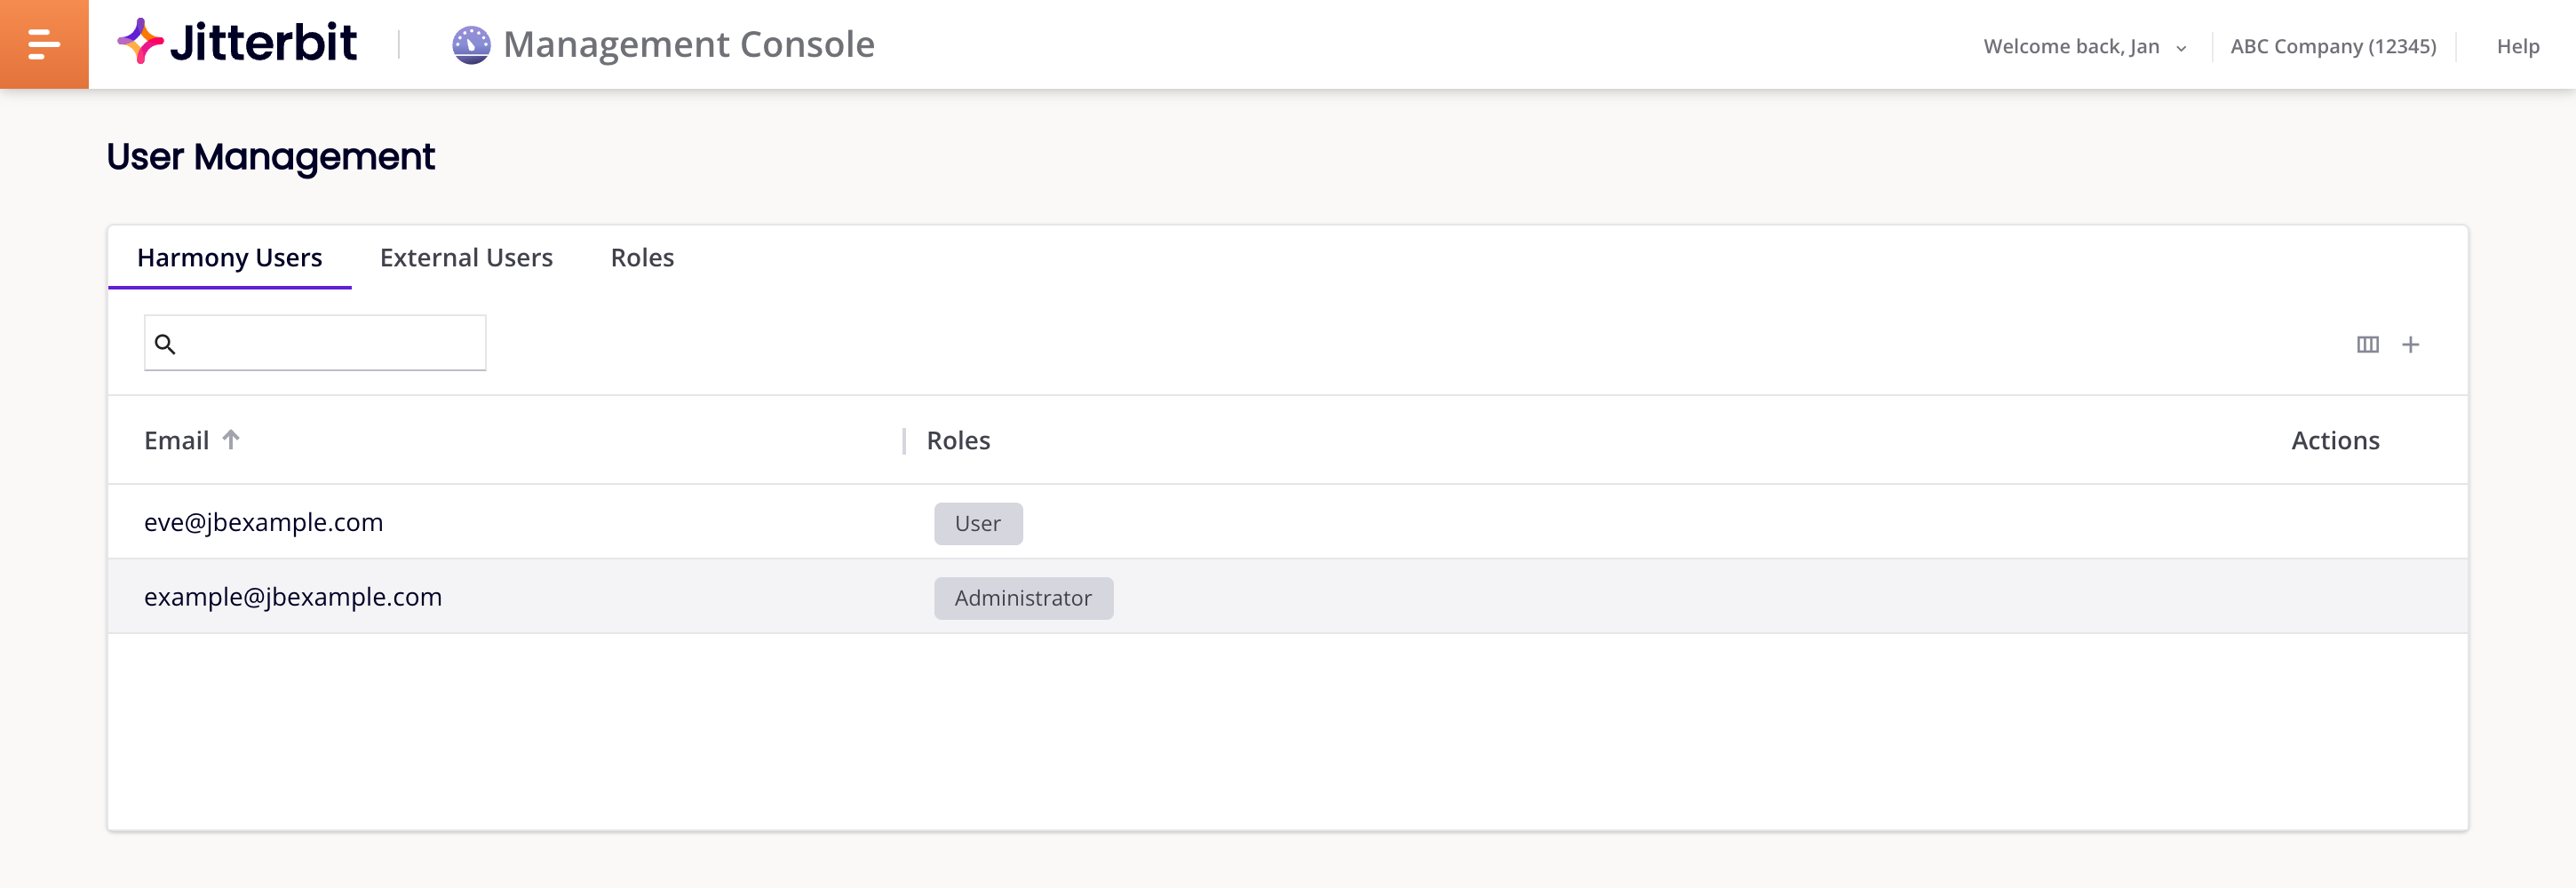
The Harmony Users tab is where administrators manage Harmony users:
Under the tab bar is a toolbar with the following:
- Search: Enter text and press return to search for a user.
- Filter Columns: Click to open the Columns drawer.
- Add user: Click to add a Harmony user.
Under the toolbar is a table with the following columns:
- Email: The user's email address.
- Roles: The role or roles assigned to the user.
- Status: The user's status, either Active or Inactive.
- Actions: These actions are available when hovering on the Actions column:
- Remove user: Click to remove the Harmony user.
Add a Harmony user
To add a Harmony user, click Add Harmony user or Add user. A new row appears in the table:

Set the values as follows:
- Email: Enter the email address of the Harmony user. If the organization has SSO enabled, the email address must match that used with the SSO identity provider.
- Roles: Click to open the menu, then select one or more roles.

Click Send invitation to send an email to the user.
To cancel the action at any time before sending, click Cancel.
Note
A user can be invited to either one SSO-enabled organization, or to one or more non-SSO organizations. A user cannot be a member of both an SSO-enabled and an SSO-disabled organization.
Edit a Harmony user
To assign, unassign, activate, or deactivate a user's roles, click on any of the roles in the Roles column. The User Role Settings drawer opens:
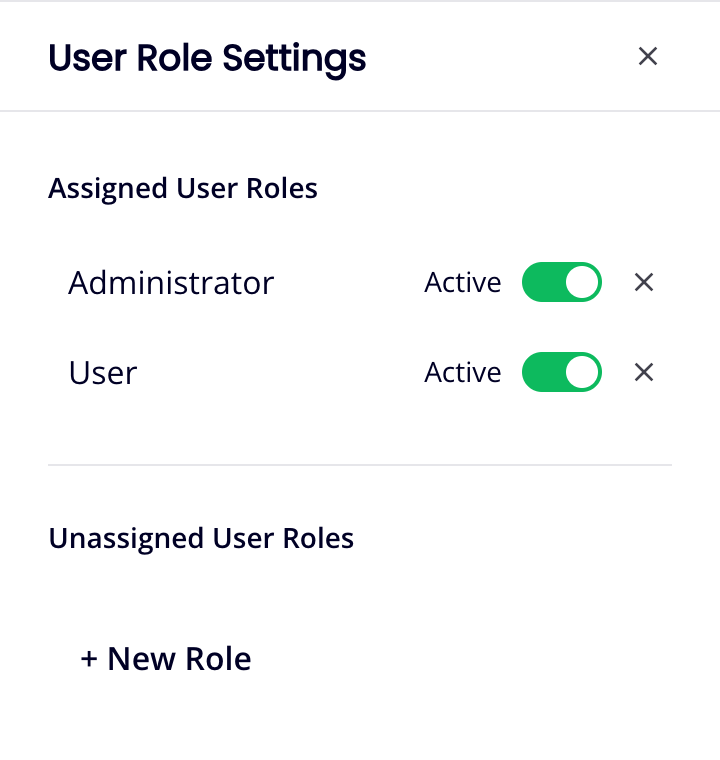
The drawer has the following controls:
- Assigned User Roles: Use the toggles to deactivate or activate roles for the user:
Active: The assigned role is active. Click to deactivate it. Inactive: The assigned role is inactive. Click to activate it. - Unassign User Role: Unassign the role from the user.
- Unassigned User Roles:
- To assign a role that exists but is not assigned, hover on one, then click Assign.
-
+ New Role: Create a new role. The drawer title changes to Create a New Role:
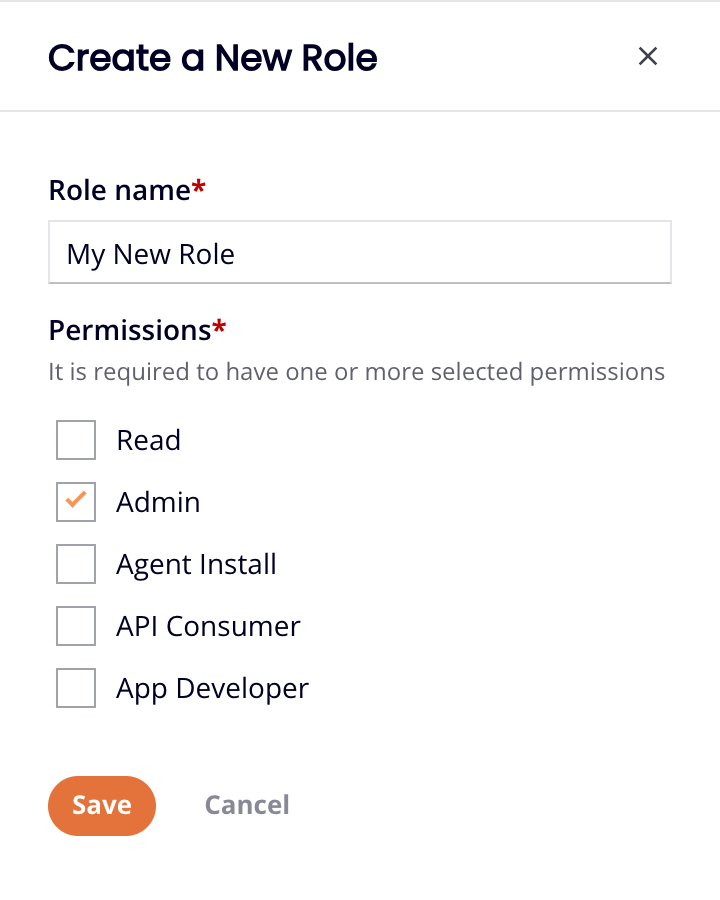
-
Role Name: Enter a name for the new role.
-
Permissions: Select at least one permission.
Click Save to save the new role.
Click to close the Create a New Role drawer and return to the User Role Settings drawer.
-
Remove a Harmony user
To remove a Harmony user, hover on the Actions column, then click Remove user. The following dialog appears:
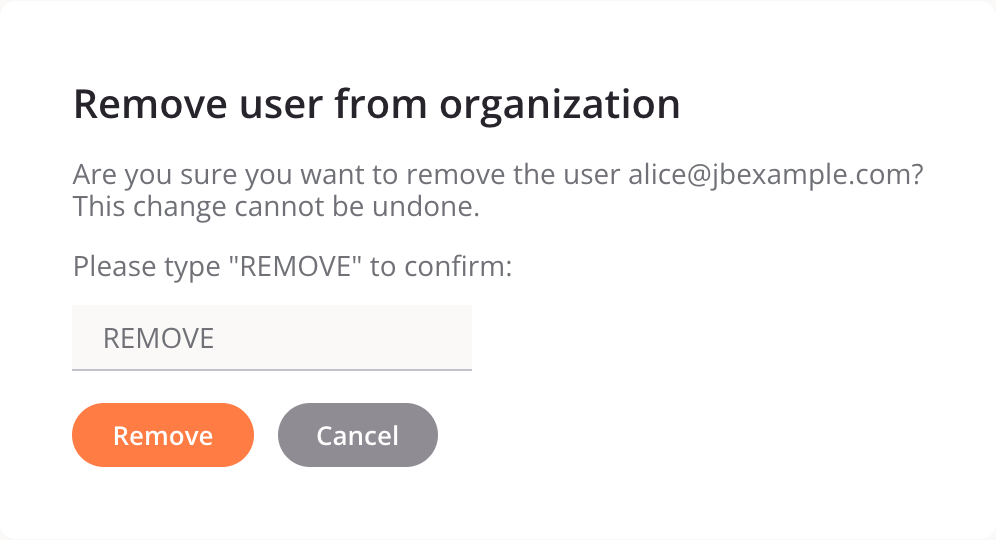
Enter the word REMOVE where indicated, then click the Remove button.
Caution
This action permanently removes the user and immediately revokes their access to Harmony.
External users
The External Users tab is where administrators manage an external user's access to their assigned APIs or API groups and the API Manager Portal page:
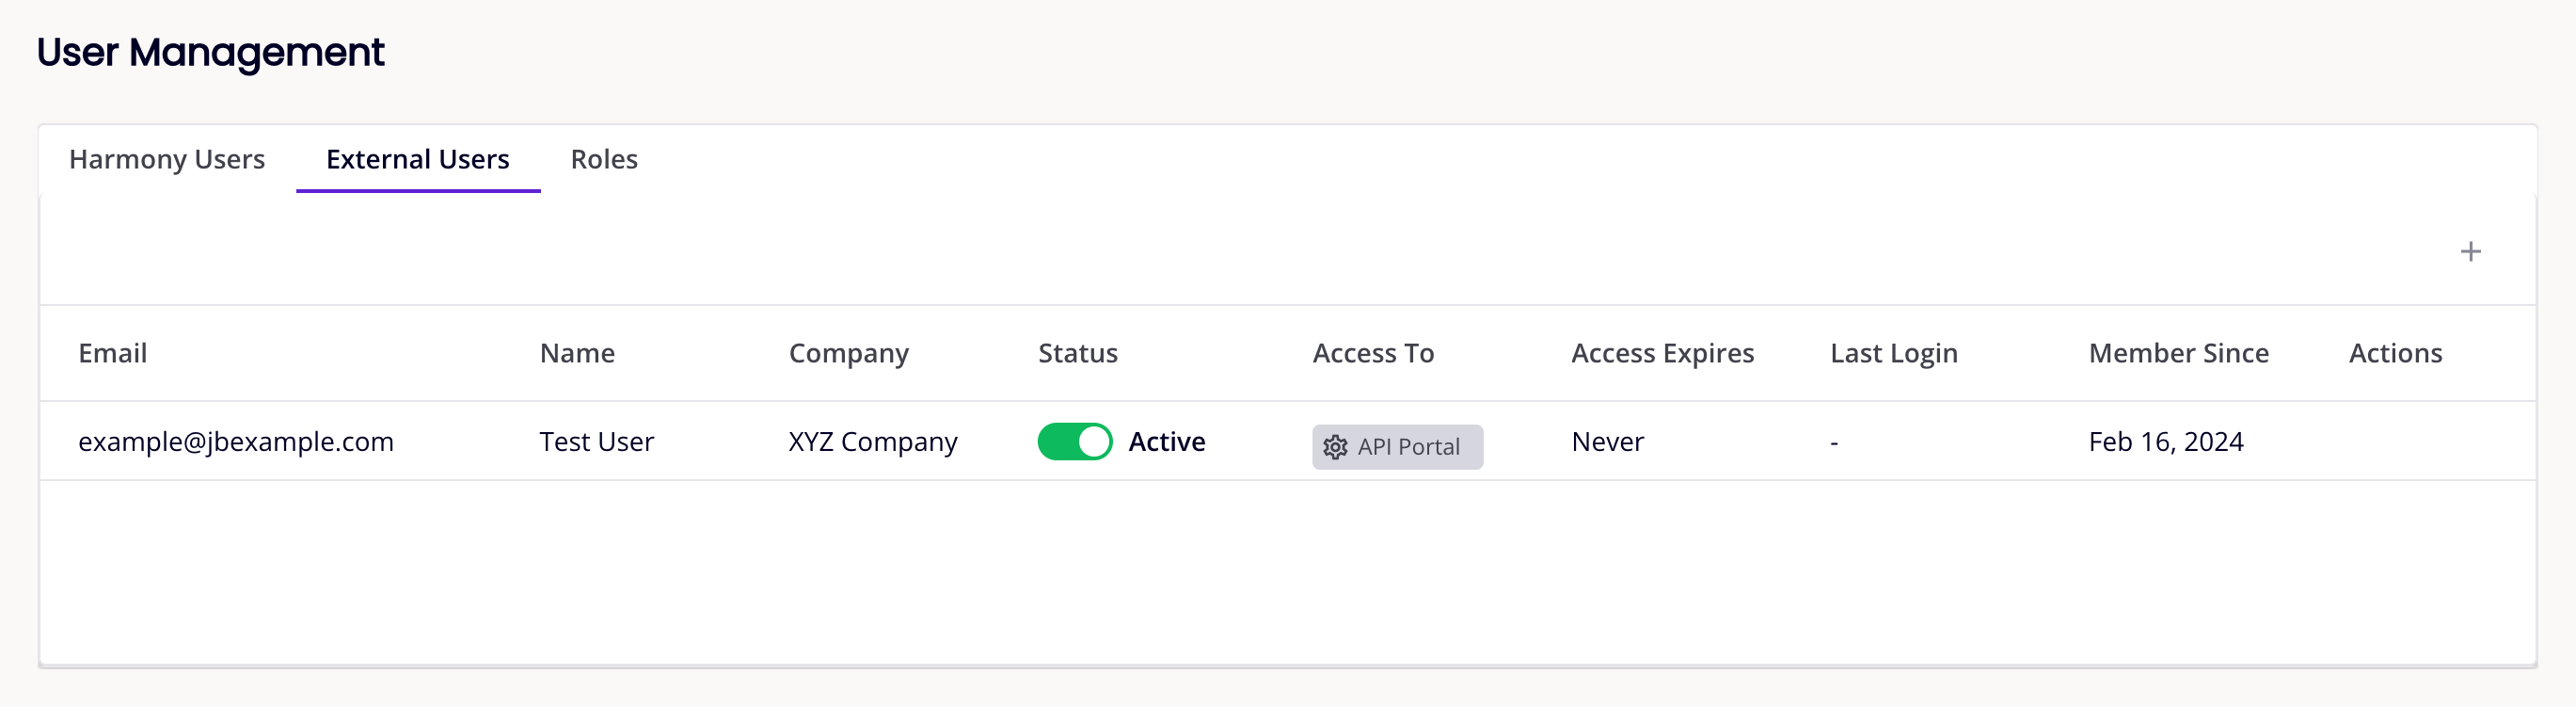
Under the tab bar is the Invite external user icon, and a table with the following columns:
- Email: The user's email address.
- Name: The user's name.
- Company: The user's company name.
- Status: The user's access status:
- Requested: An invitation was sent but has not been accepted.
- Active: The user's access is active.
- Suspended: The user's access is suspended.
- Expired: The user's access has expired.
- Access To: Click API Portal to open the API Portal drawer, then select which API groups and APIs the user can access.
- Access Expires: The user's access expiry date. Access expires at 11:59 pm on the selected day in the user's local time zone.
- Last Login: The date of the user's last login.
- Member Since: The date the user registered their account.
- Actions: These actions are available when hovering over the Actions column:
Add an external user
To add an external user, click Add external user or Invite external user. A new row appears in the table:

Set the values as follows:
- Email: Enter the email address of the external user. The email address cannot be that of an existing Harmony user.
- Access To: This field is set to APIM (API Manager portal) and cannot be changed.
- Access Expires:
Never: With the toggle disabled, the user's access never expires. Set date: With the toggle enabled, click the icon to open a calendar and pick an expiry date. Access expires at 11:59 pm on the selected day in the user's local time zone.

Click Submit to send a registration email to the external user. When submitted, the registration email includes a link that prompts the recipient to register as an API Manager Portal user.
Edit an external user
You can edit the access expiry date and access groups for registered external users:
-
To change a user's access expiry date, hover on the Actions column, then click Edit external user.
Set Access Expires as follows:
Never: With the toggle disabled, the user's access never expires. Set Date: With the toggle enabled, click the icon to open a calendar and pick an expiry date. The expiry time is 11:59 pm on the external user's local machine's time zone.
Click to save, or to cancel.
-
To change a user's access groups, click the API Portal button in the user's Access To column. The configuration drawer opens.
Under API Groups, select the groups you want the user to access. Under APIs, select an environment, then select the APIs you want the user to access.
Click the Close icon to close the drawer.
Delete an external user
To delete an external user and revoke their access to the API Manager Portal, hover on the user's Actions column, then click Delete external user. The following dialog appears:
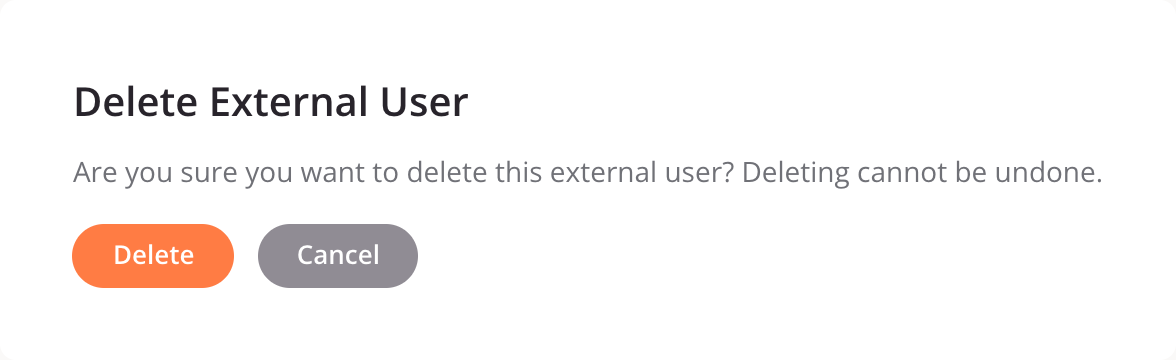
Click the Delete button to permanently and irreversibly delete the external user, or click the Cancel button to abandon the action.
Roles
The Roles tab is where administrators manage Harmony user roles:
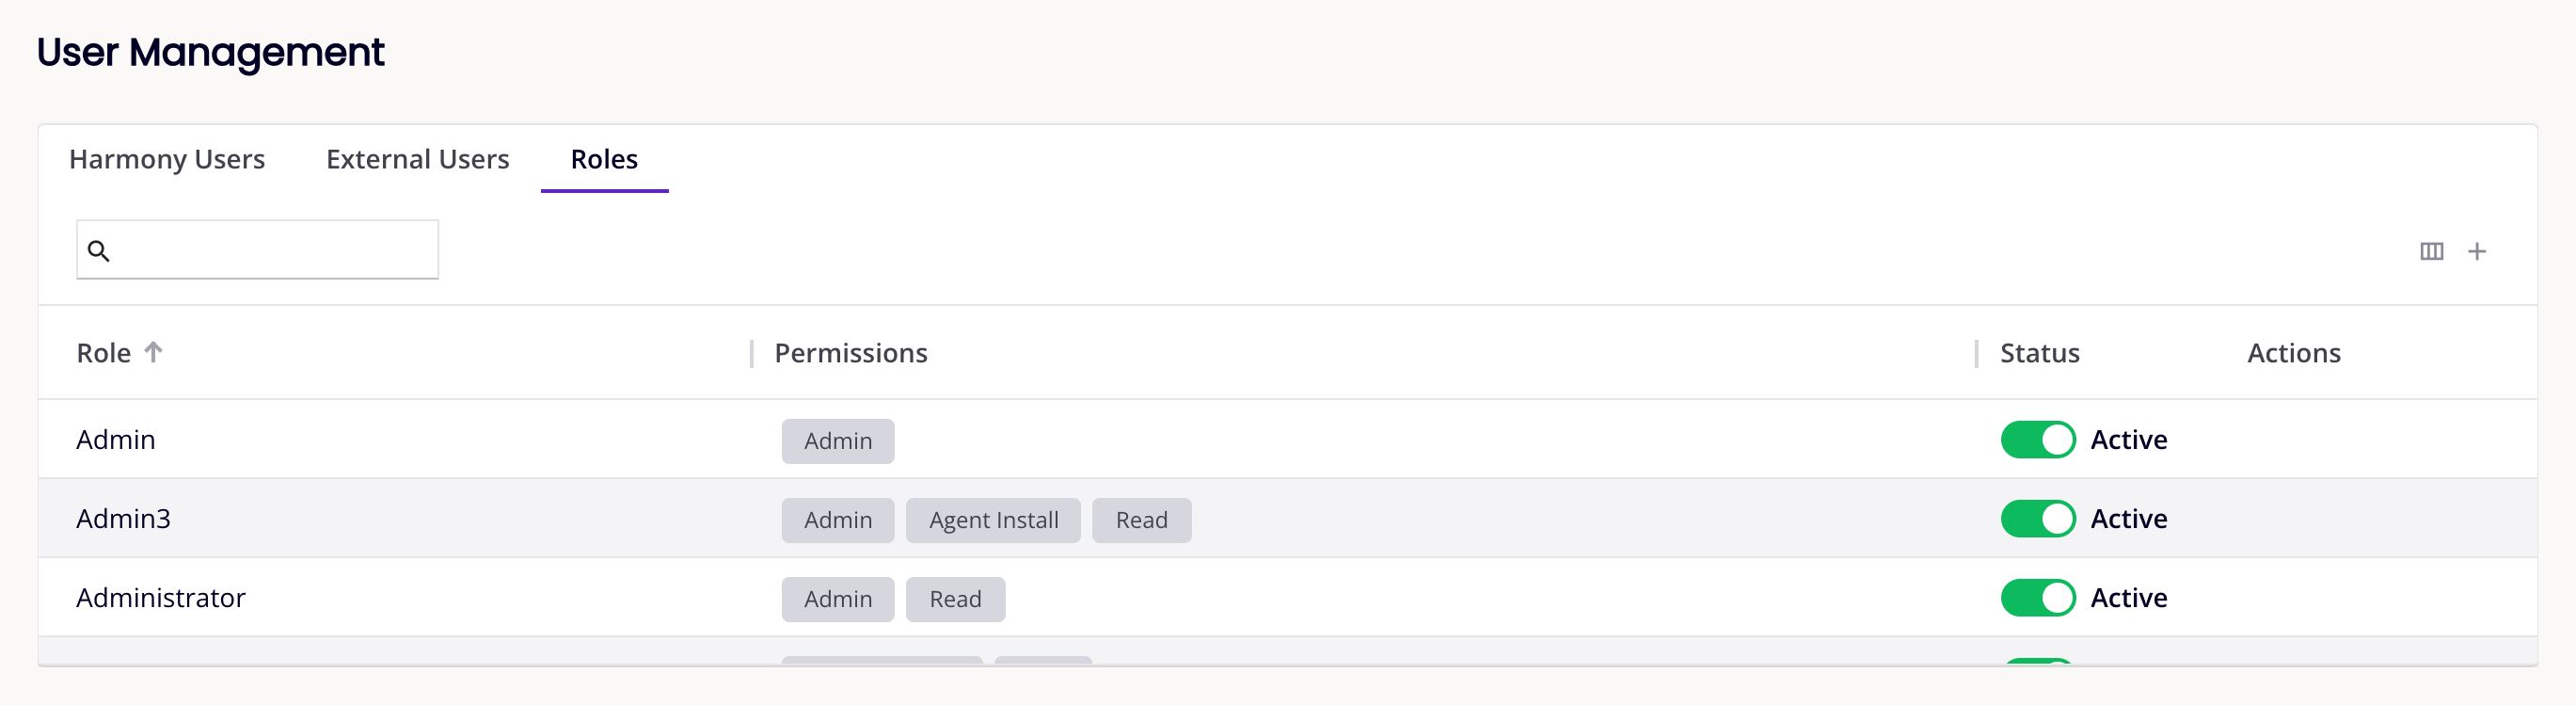
Under the tab bar is a toolbar with the following:
- Search: Enter text and press return to search for a role. The text matches any in the Role, Permissions, or Status columns.
- Filter Columns: Click to open the Columns drawer.
The table's column headings are as follows:
- Role: The role name.
- Permissions: The role's permissions.
- Status: The role's status, either Active or Inactive.
- Actions: Hover on an active role to reveal the following actions:
- Edit Role: Click to edit the role. Only active roles can be edited.
- Remove Role: Click to remove the role.
Add a role
To add a role, click the Add Roleicon, or the Add Role button if there are no roles. A new row appears in the table:

Enter or select values as follows:
- Role Name: Enter a unique name for the role.
-
Permissions: Click to open the menu, then select at least one permission from the list:
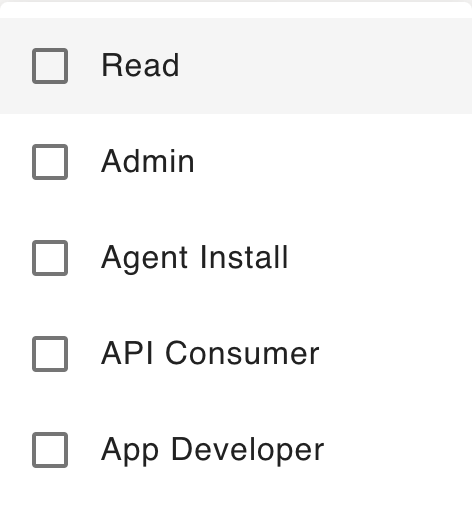
Note
The App Developer permission is deprecated and no longer used.
Click the Save button to save the role:

Tip
Roles can also be added in the Harmony users tab.
Edit a role
You can edit a role to change its status (active or inactive), its name, and the permissions it grants. You can also change the status of individual users assigned to a role, or unassign users from a role.
-
A role's status is active by default. To deactivate a role, click role's toggle in the Status column. A Deactivate Role dialog appears:
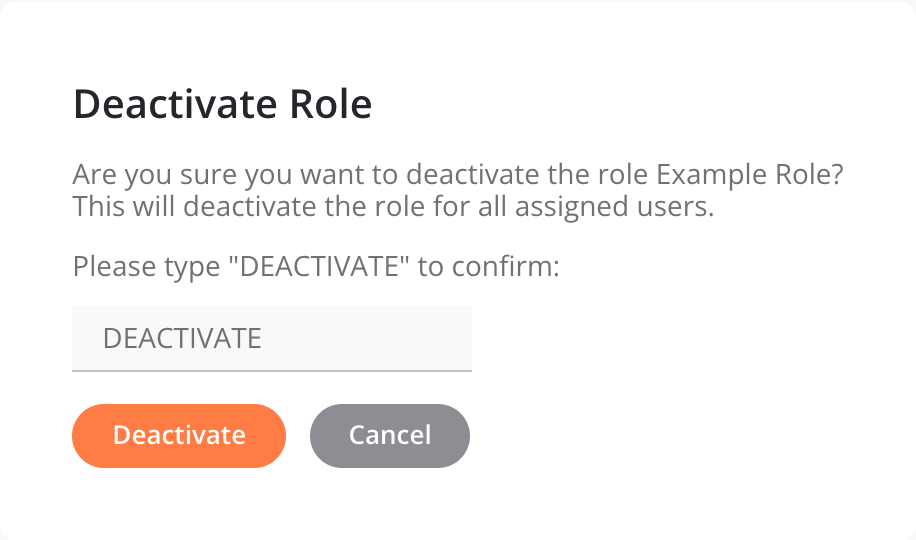
Enter the word DEACTIVATE where indicated, then click the Deactivate button.
To reactivate an inactive role, click the role's toggle in the Status column. No additional confirmation is needed for this action.
-
To edit a role's name or permissions, hover on the role's Actions column, then click Edit Role. The role opens in an Edit Role row:

Edit the Role Name or Permissions values:

Click Save to save the changes.
Note
The Administrator and User roles cannot be edited, removed, or deactivated.
Roles drawer
When a role is selected in the Roles table, a drawer opens at the bottom of the screen with the following tabs:
The tab toolbar show the tabs names, the number of items in each, and the following icons:
-
Previous: Select the previous role in the roles table.
-
Next: Select the next role in the roles table.
-
Fullscreen: Expand the pane.
-
Close: Close the pane.
Assigned users
In the Assigned Users tab, you can see which users are assigned to a role, activate or deactivate a user's role status, unassign a user, and assign a user to the selected role:
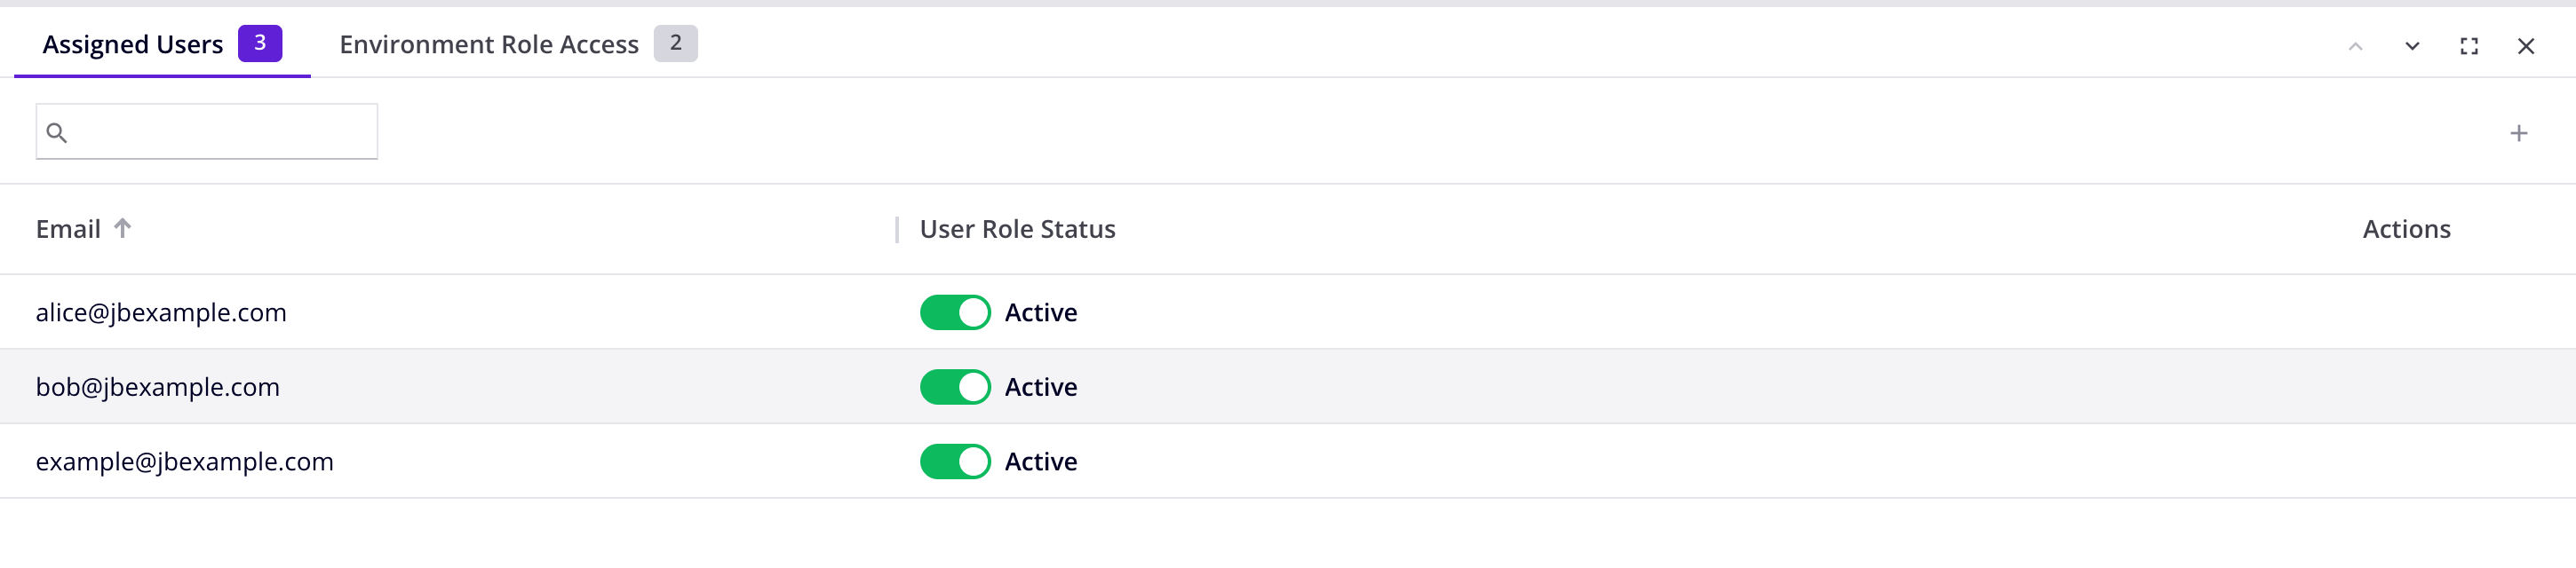
To change a user's role status, click the User Role Status switch.
To unassign a user from a role, hover on the user's Actions column, then click Unassign user. A dialog opens asking you to confirm the action.
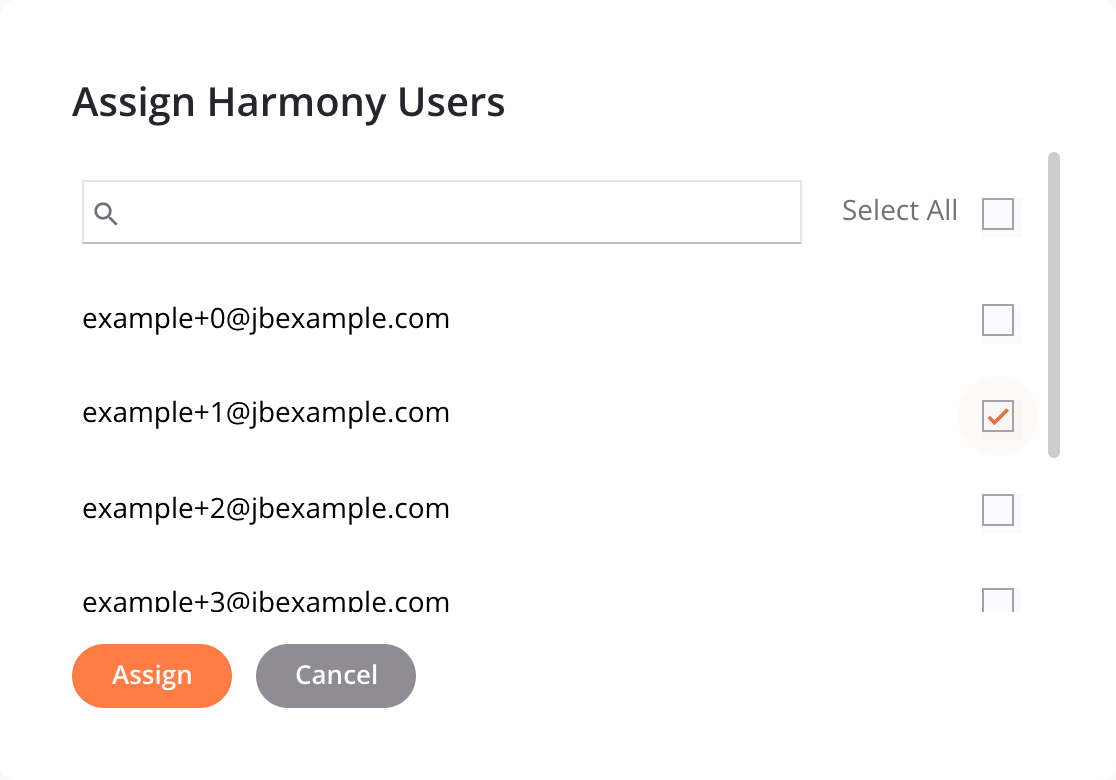
To assign one or more users, click Assign user. In the Assign Harmony Users dialog, select one or more users, then click Assign:
Environment role access
In the Environment Role Access tab, you can view and edit the access levels the role has in each of the organization's environments:
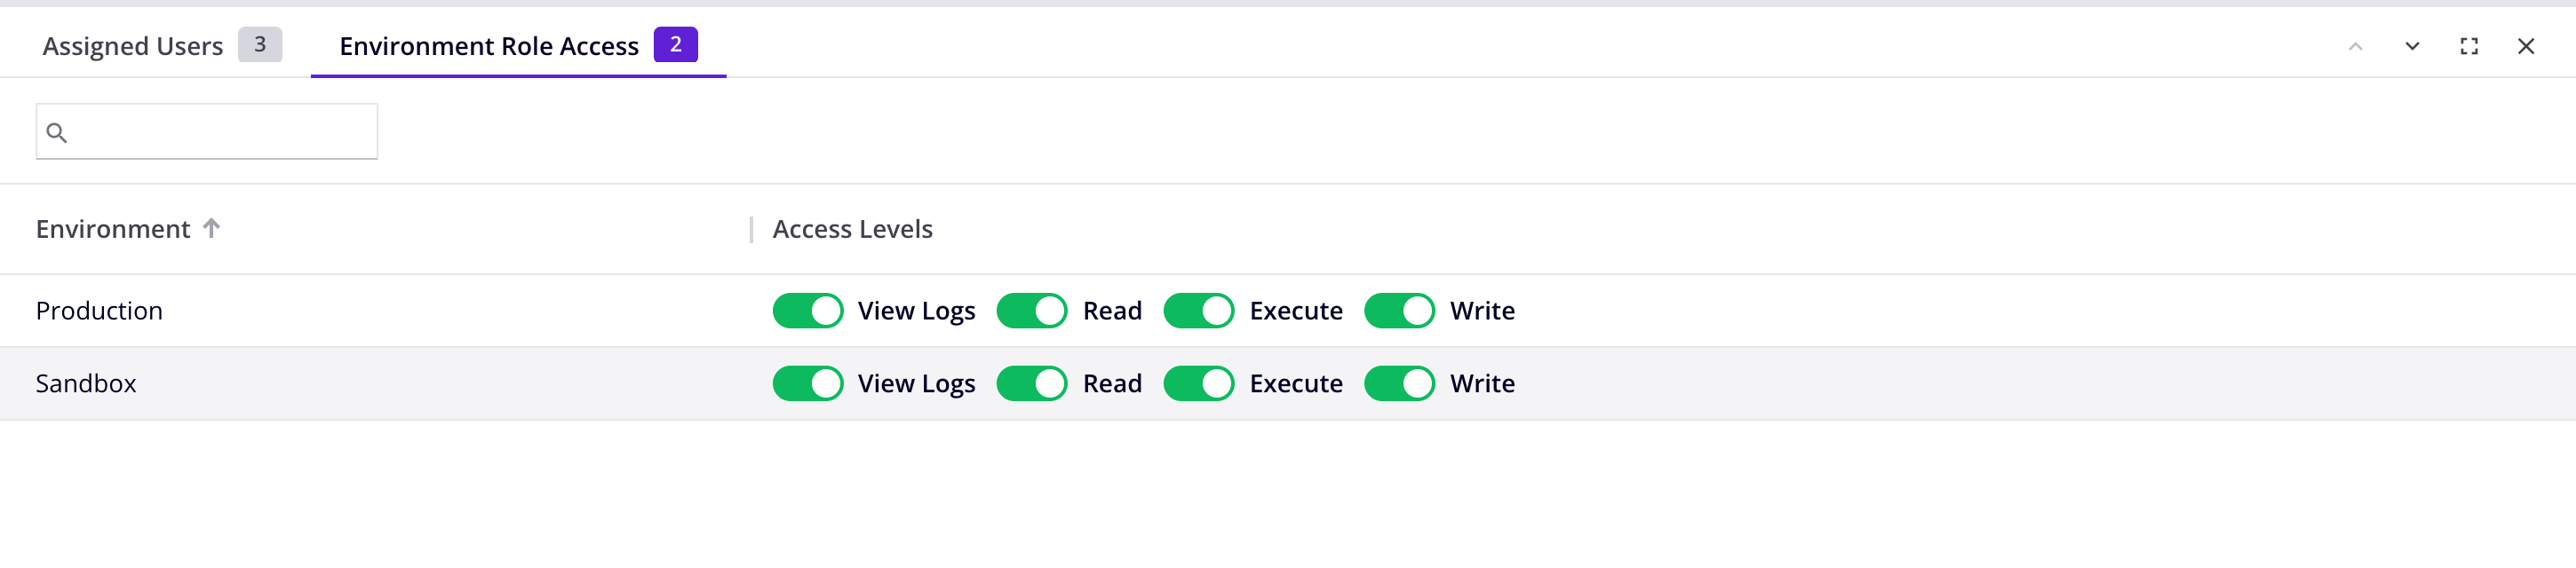
To change an environment's access level, click the switch corresponding to the levels View Logs, Read, Execute, and Write.
Remove a role
To remove a role, hover on the role's Actions column, then click Remove Role. The Remove role dialog appears:
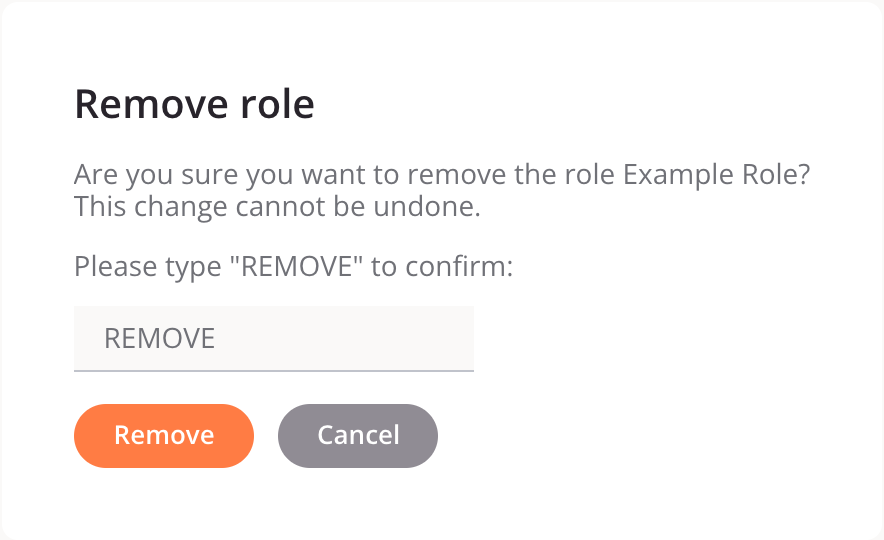
Enter the word REMOVE where indicated, then click the Remove button.
Caution
This action removes the role for all users.
Role permissions
A Harmony user's access to Harmony depends on what roles an administrator assigns them, and what permissions each role grants. Administrators must assign at least one permission to each role. Any combination of the following permissions can be assigned:
- Read: This is the lowest privilege level, and is implied if the Admin permission is selected.
- Admin: This is the highest privilege level, and implies all other permissions even when not selected. In organizations whose Harmony subscription has expired, Admin permission provides read-only access to the areas listed to the left.
- Agent Install: Use this permission in conjunction with environment access levels to grant privileges to install agents in an environment. On its own, this permission allows access to the Harmony portal Home page and its links only.
- API Consumer: Use this permission in conjunction with environment access levels to grant privileges to see OpenAPI documentation in an environment. On its own, this permission allows access to the API Manager Portal page. Users with this permission can also access the Harmony portal Home page and its links in the organization being accessed if they have roles in other organizations. An alternative to using this permission is to add external users.
Permissions allow the following access to Jitterbit Harmony applications and pages:
Harmony application | Harmony application page | Read | Admin | Agent Install | API Consumer |
|---|---|---|---|---|---|
| Harmony portal | Home and links | c | |||
| Downloads | |||||
| Integration Studio | Project-level deployment settings | a | |||
| API Manager | My APIs | a | |||
| Portal Manager | |||||
| Portal | a | ||||
| API Logs | a | ||||
| Analytics | a | ||||
| Security Profiles | |||||
| Trusted IP Groups | |||||
| API Groups | |||||
| Management Console | Dashboard | ||||
| Access Tokens | |||||
| User Management | |||||
| Projects | |||||
| Runtime Operations (Activities) | |||||
| Audit Logging | |||||
| Notifications | |||||
| Organizations | |||||
| Environments | |||||
| Agents > Agent Groups | |||||
| Agents > Agents | |||||
| Customizations > Plug-ins | |||||
| Customizations > Client Certificates | |||||
| Customizations > App Registrations | |||||
| Message Queues | |||||
| Marketplace | |||||
| EDI | Transactions | ||||
| Admin | |||||
| Archive | |||||
| Messaging | |||||
| App Builder | Admin | ||||
| Install private API gateway | |||||
| Install private agent | b |
Notes
a. The environment's Role Access must also have the Read access level enabled.
b. The environment's Role Access must also have the Write access level enabled.
c. Access to this page in the organization being accessed only when a user has roles in other organizations.
Table settings
On the Harmony Users and Roles tabs, you can sort the table, adjust the widths of columns, and rearrange columns:
- Sort: To sort a table in ascending order, click a column heading. Click again to reverse the sort order.
- Resize columns: Drag a column's Resize bar to resize it.
-
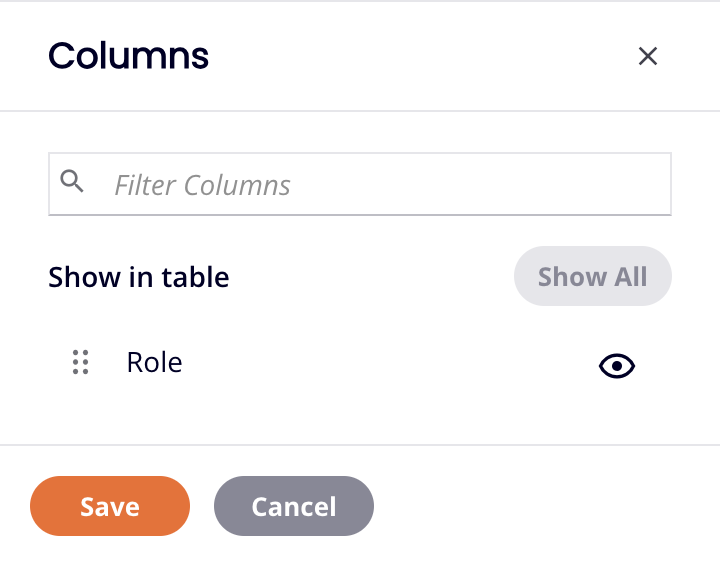
Columns: To change the arrangement and visibility of columns, click Filter Columns. The Columns drawer opens:
Harmony Users tab:
Roles tab:
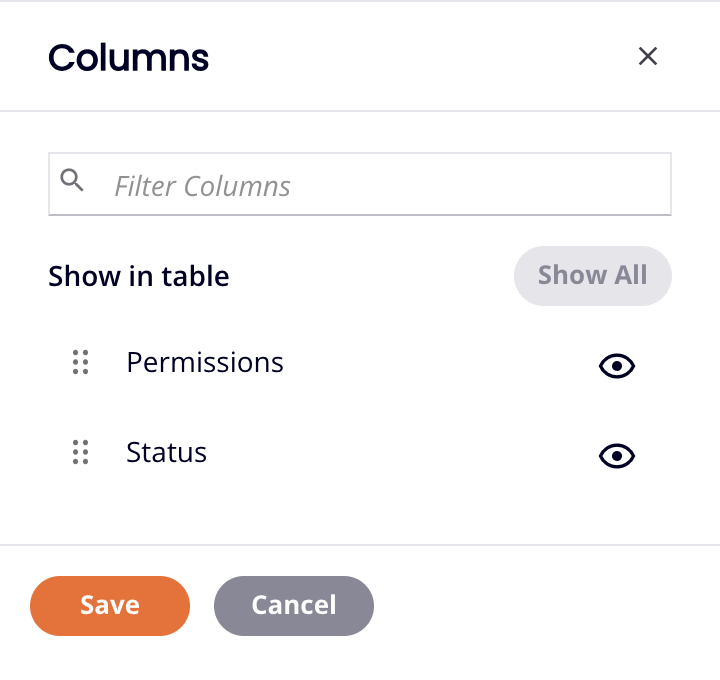
The drawer has the following controls:
- Show All: Make all columns visible.
- Move: Drag and drop to change the position of the column relative to others.
- Hide: The column is visible. Click to hide it.
- Show: The column is hidden. Click to show it.
- Save: Save the columns.
- Cancel: Close the columns drawer without saving changes.