Upgrade from Jitterbit v5.x to Harmony
Introduction
Warning
Jitterbit version 5.x is the legacy Jitterbit product. Jitterbit strongly recommends that all customers upgrade to Harmony. For more information, see Get started.
Note
This process is for upgrading Jitterbit version 5.x to Harmony using Design Studio. Design Studio includes tools to help you convert your 5.x projects to Harmony projects.
Harmony is the latest release in Jitterbit's history to simplify and accelerate enterprise integration. Harmony includes powerful new features for designing, deploying, and managing integrations for the modern enterprise.
This page covers all necessary tasks for upgrading your version 5.x projects to Harmony. For an overview of all the components of Harmony, see the Jitterbit security and architecture white paper.
Get started with Harmony
See the Get started page for information on registering for Harmony, inviting team members, and a summary of how to set up environments and agent groups.
Upgrade the design application to Harmony
Harmony Design Studio must be used for upgrading your 5.x projects to Harmony. The Harmony Design Studio includes tools to help you convert your 5.x projects to Harmony projects.
If you do not need to upgrade your existing 5.x projects, another option is using our web-based Cloud Studio project designer to rebuild your projects from scratch.
Harmony Design Studio is available for download from the Harmony Portal:
- Log in to the Harmony Portal and choose Downloads.
- Download Design Studio. If the download is not available on this page, please contact your Customer Success Manager for access.
- Install Design Studio. Refer to System requirements for additional information.
- Open the Design Studio application and create a new project. See Design Studio quick start guide for more detailed instructions and walkthrough.
Upgrade the Jitterbit integration server to Harmony agents
Harmony cannot be configured to connect to your existing Jitterbit Integration Server. Instead, you have the option of using private agents, cloud agents, or a hybrid deployment.
Upgrade to private agents
Existing Jitterbit Integration Servers cannot be upgraded or converted into Harmony private agents. A Harmony private agent is a separate installation. Private agents are available for download from the Harmony Portal using the Downloads page.
private agents cannot be installed on the same physical or virtual machine where the Jitterbit Integration Server is installed. Jitterbit private agents includes a PostgreSQL database that is installed by default. You also have the option to install the private agent database into an existing PostgreSQL database. You should not, however, install the Harmony Agent database into an existing Integration Server database.
- Log in to the Harmony Portal and choose Downloads.
- Download and install the private agent. Refer to Private agent installation for additional information, including installation instructions.
Upgrade to cloud agents
Cloud-to-cloud integrations can now be run on a Jitterbit Cloud agent groups. To run projects in the cloud, simply select a Jitterbit cloud agent group as the agent group servicing your environment.
By doing this, all operations deployed in the environment will be run on the Jitterbit cloud agent group.

Warning
You cannot use the cloud agent group to run your projects if you:
-
Have any local file or file share sources or targets
-
Reuse the PostgreSQL database bundled with the Integration Server
-
Have custom plug-ins installed on the Integration Server
-
Have hosted web services in any of the projects
-
Use any plug-ins other than these:
-
Prepend Data
-
OASIS Web Service Security
-
Private cloud agents
You can install private agents on private cloud services such as Amazon Web Services. Note, however, that Harmony agents cannot be installed on the same physical machine or virtual machine where the Jitterbit Integration Server is installed.
Upgrade and deploy existing projects to Harmony
Convert projects
Harmony Design Studio automatically converts older Jitterbit projects created in Jitterbit Version 5.x into a format required for Harmony. This conversion is done when a version 5.x project is opened in Design Studio.
With Harmony, all projects are deployed to an environment. To deploy a converted project to an environment, simply select the environment to which the project needs to be deployed. You must create an environment before older projects can be converted.

Warning
Additional conversion steps are required for projects created in versions 4.x, 3.x, or 2.x. Projects created in versions 2.x must first be converted to version 3.6, then converted to 5.x, and then they may be upgraded to Harmony Design Studio. Projects created in versions 3.x or 4.x must be converted to version 5.x prior to upgrading them to Design Studio.
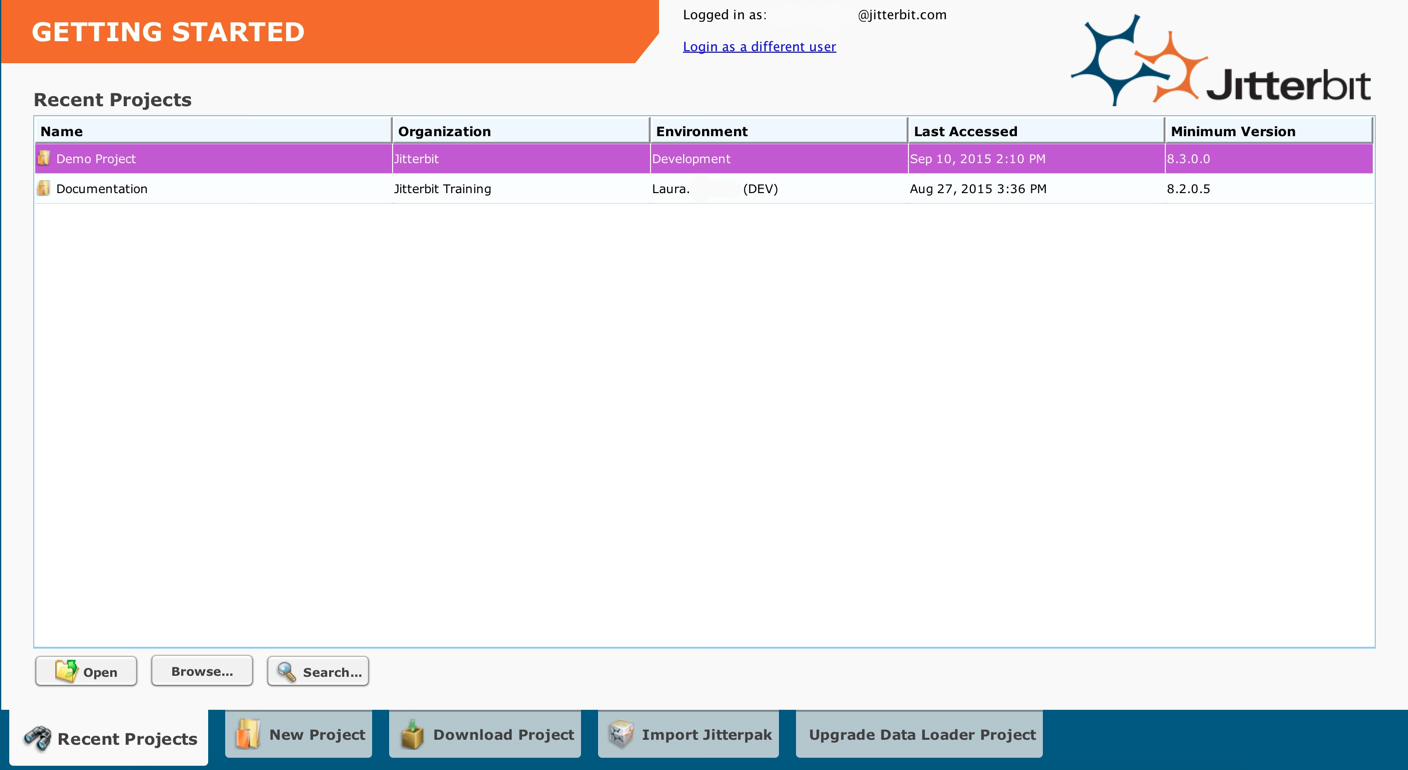
Import Jitterpaks
Harmony Design Studio supports the ability to import Jitterpaks created from versions 5.x of Jitterbit. Choose the Import Jitterpak option when the Harmony Design Studio is launched. You must create an environment before a project in a Jitterpak can be converted and deployed. Contact support for assistance if your projects were created in versions 2.x, 3.x or 4.x.

Warning
Additional conversion steps are required for Jitterpaks created in versions 4.x, 3.x, or 2.x. Jitterpaks created in versions 2.x must first be converted to version 3.6, then converted to 5.x, and then they may be imported/upgraded to Harmony Design Studio. Jitterpaks created in versions 3.x or 4.x must be converted to version 5.x prior to importing/upgrading them to Design Studio. Contact support for assistance if your projects were created in versions 2.x, 3.x or 4.x.
Considerations when using the PGP plug-in
The PGP plug-in has been re-designed with Harmony. With 5.3 or older versions of Jitterbit, the PGP plug-in requires the keys to be stored as files on the local disk (on the Integration Server). The path to the key file is then passed as input to the plug-in.
With Harmony, the PGP plug-in has been redesigned to take the key directly as input. As a result, you may have to modify the project accordingly.
One option is to put the key file on a separate location accessible in a secure manner such as Secure FTP or HTTPS, configure a corresponding Jitterbit source in the project, and call the ReadFile function to get the key and pass it to the plug-in.
Tip
The PGP plug-in will still work with the local key files. You will have to modify your project only if you are moving from a local server to the Jitterbit cloud agent group.