How To Configure a Pre-Set Filter
In Vinyl you can configure a Grid panel to load with a pre-set filter value. The filter can easily be cleared out by the User, if desired, to see all results (not just the filtered set). This article will step you through how to configure a pre-set filter.
In terms of where you will configure the pre-set filter, it can be configured on any control that can act as a link. You might configure the filter on a Button control that exists on a Parameter page. Alternatively you might configure it on the Site Menu using a Site Menu Object.
Business Use Case Example
To illustrate this concept, consider the business use case scenario where you have an Accounts panel and you would like the records that initially load to only display those in the Status of Qualified or Lead. Without the pre-set filter in place, the panel is currently loading all records including those of the Status Closed Lost and Closed Won.

Accounts panel with pre-set filter
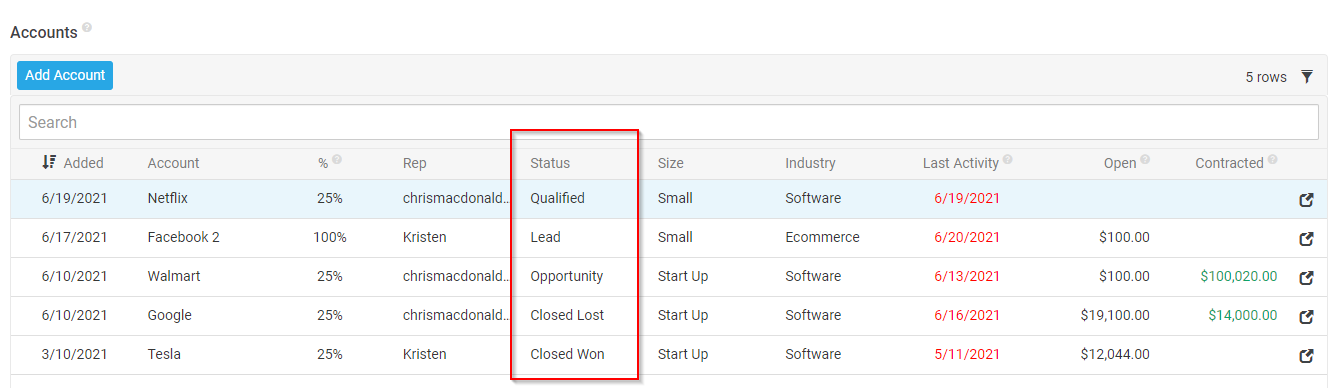
Accounts panel with no pre-set filter configured
To Configure a Pre-Set Filter driven by Button Control
In this scenario we will configure a pre-set filter using Button control residing on a Parameter page. This configuration assumes you have a Parameter table in place, with columns referring to the StatusID values you wish to use as Filters. We also assume you have a Business Rule defined, which represents a Business Object built off of the Parameter table and contains the StatusID values in it that you want represented by the filter.
- Navigate in your app to the area from which you'll define the pre-set filter. For example: Parameter page
- Go to the Action Drawer > Live Designer
- Select the control on the panel you want to filter on
- Click teh Button tab
- Expand Navigation and Actions
- Set the Link to Page value
- Click the Link Criteria button
- Click + Criteria
- Set the Source Column as
StatusID1and the Target Column as{{PanelName}}.$f.in.StatusID.0 - Leave the Type value as Bind
- Click the checkmark icon to save
- Click Create
- Set the Source Column as
StatusID2and the Target Column as{{PanelName}}.$f.in.StatusID.1 - Leave the Type value as Bind
- Click the checkmark icon to save
- Return to the application view, and test that the button now takes the User to the appropriate panel with the pre-set filter being applied
To Configure a Pre-Set Filter driven by Site Menu Object
If you are looking to have a page off of the application Site Menu load with the pre-set Filter applied, you can configure the pre-set Filter using a Site Menu Object. For example, we would like the Accounts panel to load in a filtered state when the User clicks on Accounts from the application Site Menu.
This configuration assumes you have a Parameter table in place, with columns referring to the StatusID values you wish to use as Filters. We also assume you have a Business Rule defined, which represents a Business Object built off of the Parameter table and contains the StatusID values in it that you want represented by the filter.
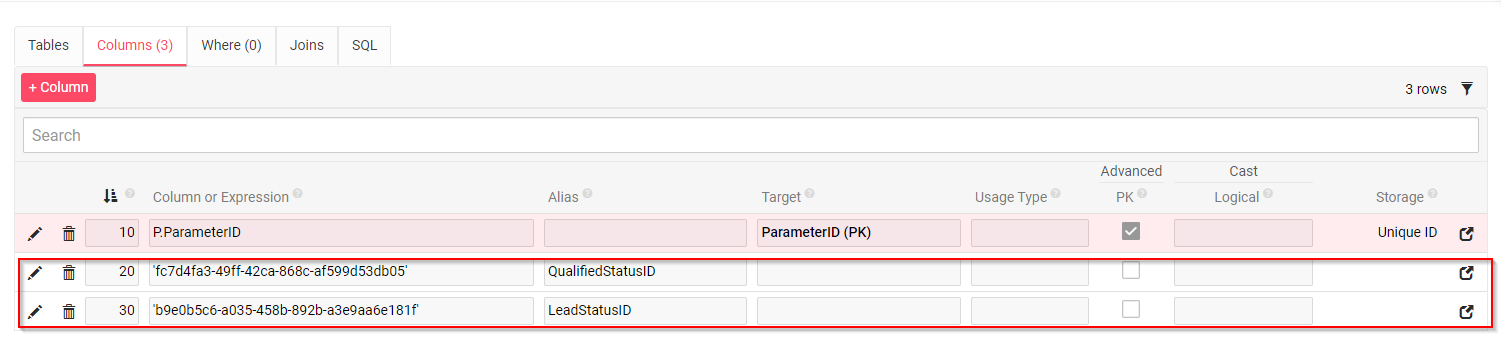
Parameter table illustrating the Columns defined to represent Qualified and Lead StatusID
- Navigate to the App Workbench > Menu
- Click Open Record for the Application Menu
- Click Edit
- Set the Source Rule value to the configured Business Rule containing the defined filter values
- Click Save
- Click x to exit out of the Menu panel
- Locate the navigation value you want to configure from the Menu Items panel. For example: Accounts
- Click Open Record
- Click Link Options
- Click the Link Criteria icon
- Click Create
-
Set the Source Column as
StatusID1and the Target Column as{{PanelName}}.$f.in.StatusID.0.For example:
- Source Column = LeadStatusID
- Target Column = Accounts.$f.in.AccountStatusID.1
-
Leave the Type value as Bind
- Click the checkmark icon to save
- Click Create
- Set the Source Column as
StatusID2and the Target Column as{{PanelName}}.$f.in.StatusID.1 - Leave the Type value as Bind
- Click the checkmark icon to save
- Click x to exit out of the Control Link Criteria screen
- Return to the application view, refresh the web browser and test