How to Create a Custom Vinyl Login Page
If you are looking to modify the Vinyl Login page, this article outlines the recommended best practice. Following this method is preferred to alternative methods as this approach will preserve your changes when upgrading Vinyl in the future. Alternative methods such as scripting against the database or unsealing Vinyl are not recommended and will not be preserved on update.
Images can either be Base64 encoded with proper syntax or you can upload the image direct to Vinyl (preferred method) in order to use an image on the Vinyl Login Page. Please see the section titled To Use a Vinyl Hosted Image for steps on that configuration. Here is a link to a Base64 image encoder site: https://www.base64-image.de/. Instructions are provided below on how to generate a Base64 encoded image.
If you are going to upload the image to Vinyl, go to the Vinyl IDE > Look and Feel > Images > select the Collection your app is using > click +Image and upload the image. After it has been uploaded, you can click the popup icon to expand the Image detail information and right-click on top of the image as it appears in the Photo section. See section below on To Create a Custom Login Theme for step by step instructions.
When referencing image paths in Themes, the exact syntax may differ slightly depending on how the Vinyl hosting URL has been configured. The recommended way to reference an image path is to start the path value with ./, for example ./service/image/153f5b0b-c367-4409-a428-23813b6a5ab2.
In order to push a new Login theme from Development > QA > Production, save your custom Theme to your Theme Collection that is making the Dev > QA > Prod trip.
Important
Vinyl only supports one custom Login Theme per site. Upon saving your Custom Login Theme that implements the Vinyl Login Base Theme, Vinyl will immediately use this instead of the Login Base if it exists.
To Create a Custom Login Theme
- Navigate to Look and Feel
- Confirm you have a Collection selected that you can modify
- Click + Theme
- Provide an identifiable Theme Name for the new custom Theme. For example: Customer Login Theme
- Select "Login Base Theme" as the Base Theme
- Click the Save button
- Select Login form from the Components panel
- Click the + Style button under the Styles panel
- Select Login logo as the Area
- Select Background Image as the Style Type
-
Enter the properly formatted syntax for a Base64 encoded image. For example:
`data:image/gif;base64,R0lGODlhEAAQAMQAAORHHOVSKudfOulrSOp3WOyDZu6QdvCchPGolfO0o/XBs/fNwfjZ0frl3/zy7////wAAAAAAAAAAAAAAAAAAAAAAAAAAAAAAAAAAAAAAAAAAAAAAAAAAAAAAAAAAAAAAACH5BAkAABAALAAAAAAQABAAAAVVICSOZGlCQAosJ6mu7fiyZeKqNKToQGDsM8hBADgUXoGAiqhSvp5QAnQKGIgUhwFUYLCVDFCrKUE1lBavAViFIDlTImbKC5Gm2hB0SlBCBMQiB0UjIQA7` -
Enter Technical Help description, and click Save
- Log out of Vinyl and refresh your browser. You should now be able to see the custom image appear on the Vinyl login screen.
To Create a Base64 Encoded Background Image
-
To generate the proper Base64 encoding for your image, we recommend using the online site: https://www.base64-image.de/

-
Drag and drop or click the "Or Click Here" button to upload your JPG, PNG or GIF image file
- After your file is finished processing, click on the resultant Show Code button
-
Click the Select all button in the For use in
<img>elements section
-
Click the Copy to Clipboard button
- This is the properly formatted image code syntax you will paste into the Background image value in Vinyl on your custom Login theme
To Use a Vinyl Hosted Image
- Navigate to the IDE > Look and Feel
- Add the image you want to use to a Collection that your application has access to
- After you've added the image, click on the corresponding Open Record icon
- Scroll to the Relative URL field and click the Copy button
- Follow the instructions above for "To Create a Custom Login Theme"
- At step 12, input the copied to clipboard syntax for your hosted image. It will look something like
/service/image/ImageID, where ImageID represents the unique value copied to your clipboard. For example:/service/image/2bc0d8a0-2cd7-4e8d-b074-eebfb1b9b6d2 - Review the image path Value and if it does not start with
./manaully adjust as needed - Enter Technical Help and Save
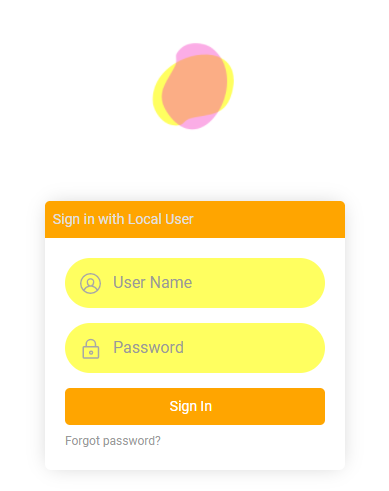
Additional Customization Examples
Many areas of the Login form can be customized, beyond the logo described previously. To customize other areas of the Login form you can leverage the different available Component – Subcomponent styles available in the Look and Feel > Themes area of Vinyl. Some examples are described below.
Advanced aspects of customization may require you to work with custom Theme Interfaces. For example, if you want to target one but not all buttons appearing on the login form you could write a custom Interface to target just one of the buttons.
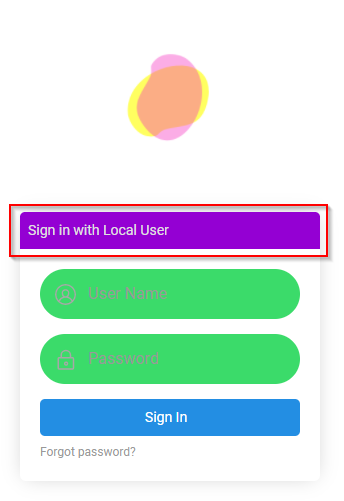
Target the Login Form Header
- Navigate to the Custom Login Theme defined for your Login form
- Select Login form from the Components panel
- Click + Style from the Styles panel
- Select Login Form Header as the Area
- Select the appropriate Style Type for the customization. For example: "Background Color" if you're looking to change the color of the region
-
Provide the appropriate Value information. For example:
darkviolet- If your Theme has defined Primary, Secondary, and Complementary colors defined you may need to append
!importantto the Value. For example:darkviolet!important
- If your Theme has defined Primary, Secondary, and Complementary colors defined you may need to append
-
Click Save
- Exit out of Vinyl and refresh your web browser to test results
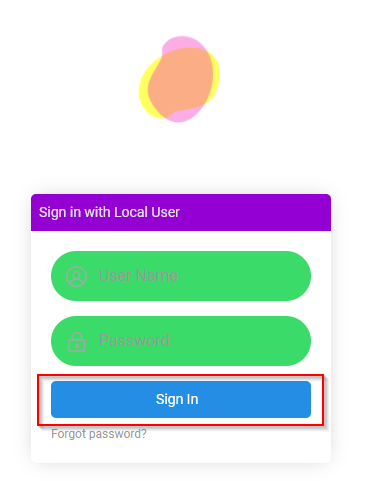
Target the Sign In Button
- Navigate to the Custom Login Theme defined for your Login form
- Select Controls form from the Components panel
- Click + Style from the Styles panel
- Select Button as the Area
- Select the Style Type as appropriate to customization. For example: "Background Color" if you're looking to change the color of the region
-
Provide the appropriate Value information. For example:
#ffa500- If your Theme has defined Primary, Secondary, and Complementary colors defined you may need to append
!importantto the Value. For example:#ffa500!important
- If your Theme has defined Primary, Secondary, and Complementary colors defined you may need to append
-
Click Save
- Exit out of Vinyl and refresh your web browser to test results
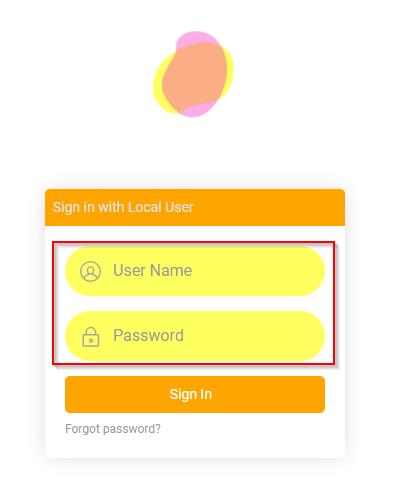
Target the Form Controls
- Navigate to the Custom Login Theme defined for your Login form
- Select Controls from the Components panel
- Click + Style from the Styles panel
- Select Form Control as the Area
- Select the Style Type as appropriate to customization. For example: "Background Color" if you're looking to change the color of the region
-
Provide the appropriate Value information. For example:
#ffff60- If your Theme has defined Primary, Secondary, and Complementary colors defined you may need to append
!importantto the Value. For example:#ffff60!important
- If your Theme has defined Primary, Secondary, and Complementary colors defined you may need to append
-
Click Save
- Exit out of Vinyl and refresh your web browser to test results