Vinyl upgrade guide
Introduction
This is the instruction guide for upgrading an existing installation of Vinyl to version 3.1+. If you are installing for the first time, please refer to the installation instructions for your Vinyl version and server system.
This guide assumes that the root directory for the currently installed version of Vinyl is C:\inetpub\wwwroot\Vinyl and that the system already has the prerequisite software and framework installed and configured.
Prerequisites
Microsoft .NET Framework 4.8 or higher is required for Vinyl 3.1 or higher. Earlier versions of .NET Framework are not supported with Vinyl 3.1 or higher. This prerequisite should be checked if you are upgrading from Vinyl 3.0 or lower and confirmed prior to upgrading to the current version of Vinyl.
To check the .NET version currently installed:
-
Powershell command to check .NET version:
Get-ChildItem "HKLM:SOFTWARE\Microsoft\NET Framework Setup\NDP\v4\Full\" | GetItemPropertyValue -Name Release | ForEach-Object -
If Powershell command does not work, follow Microsoft's article to check and determine version:
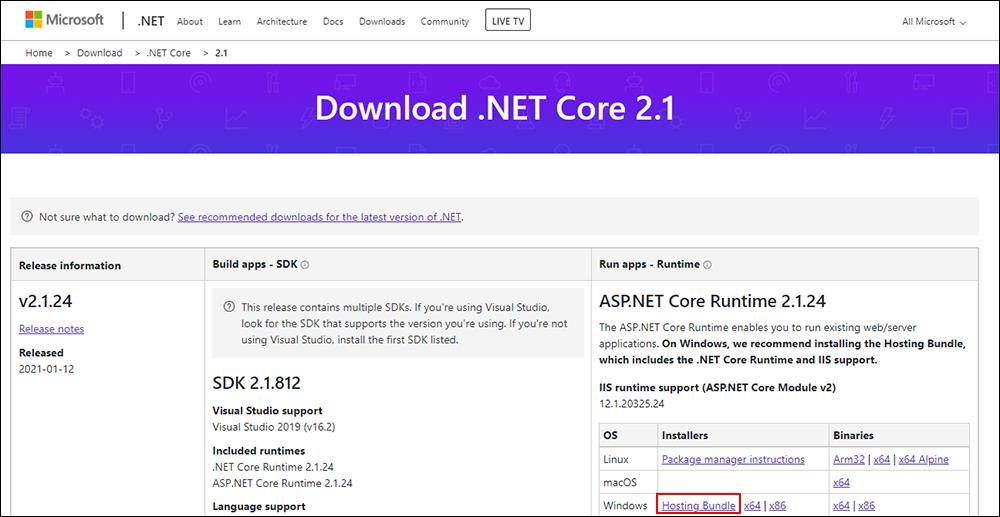
You must also ensure that ASP.NET Core Runtime Hosting Bundle for 2.1 is installed. Download the Hosting Bundle.
Changes from previous release
-
.NET Framework 4.8 is required (see above)
-
ASP.NET Core Runtime hosting bundle is required (see above)
Directory structure changes
There are directory path structure changes in Vinyl 3.1 from prior versions of Vinyl. This is important to note when upgrading and may impact existing Data Source paths previously configured. The exact directory path used will depend on where Vinyl has been installed in your environment and may differ from this documentation.
After upgrading review any Data Source paths configured that rely on a directory path directive and make any required updates to reflect the 3.1 changes. For example: Local File System
-
Logs are now in
{Vinyl Install Path}\Vinyl\logsvs.{Vinyl Install Path}\Vinyl\App_Data- For Elastic Beanstalk the recommended path is:
C:\inetpub\AspNetCoreWebApps\Vinyl\logs
- For Elastic Beanstalk the recommended path is:
-
For all other environments the recommended path is:
C:\inetpub\wwwroot\Vinyl\logs -
Data directory is now in
{Vinyl Install Path}\Vinyl\datavs.{Vinyl Install Path}\Vinyl\App_Data- For Elastic Beanstalk the recommended path is:
C:\inetpub\AspNetCoreWebApps\Vinyl\data
- For Elastic Beanstalk the recommended path is:
-
For all other environments the recommended path is:
C:\inetpub\wwwroot\Vinyl\data -
Encryption keys on disk are now in
{Vinyl Install Path}\Vinyl\keysvs.{Vinyl Install Path}\Vinyl\App_Data\keys- For Elastic Beanstalk the recommended path is:
C:\inetpub\AspNetCoreWebApps\Vinyl\keys
- For Elastic Beanstalk the recommended path is:
-
For all other environments the recommended path is:
C:\inetpub\wwwroot\Vinyl\keys -
Configuration is now in appsettings.json vs configuration in web.config as well as the Config directory. Vinyl ships with appsettings.default.json – rename to appsettings.json if you do not already have a file named appsettings.json.
-
You will be copying the contents of the temporary directory directly to the
C:\inetpub\wwwroot\Vinylfolder, or toC:\inetpub\AspNetCoreWebApps\Vinylif you are on Elastic Beanstalk
AWS elastic Beanstalk changes
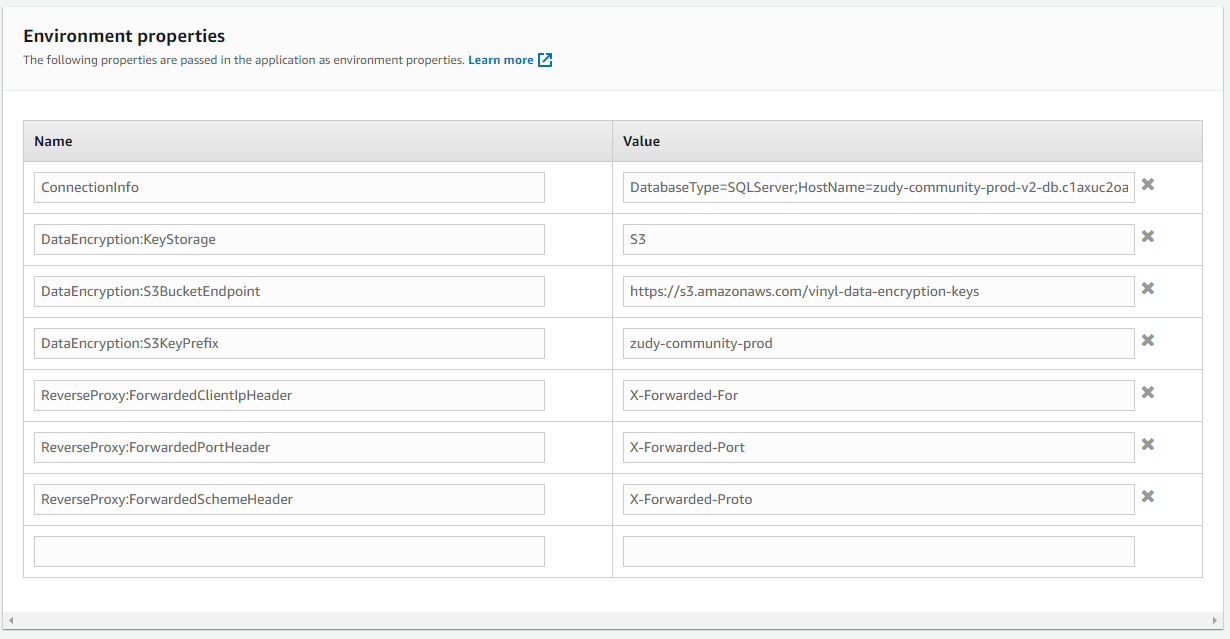
Some of the Environment properties in Elastic Beanstalk have changed. Here are screenshots showing the old version and the new version:
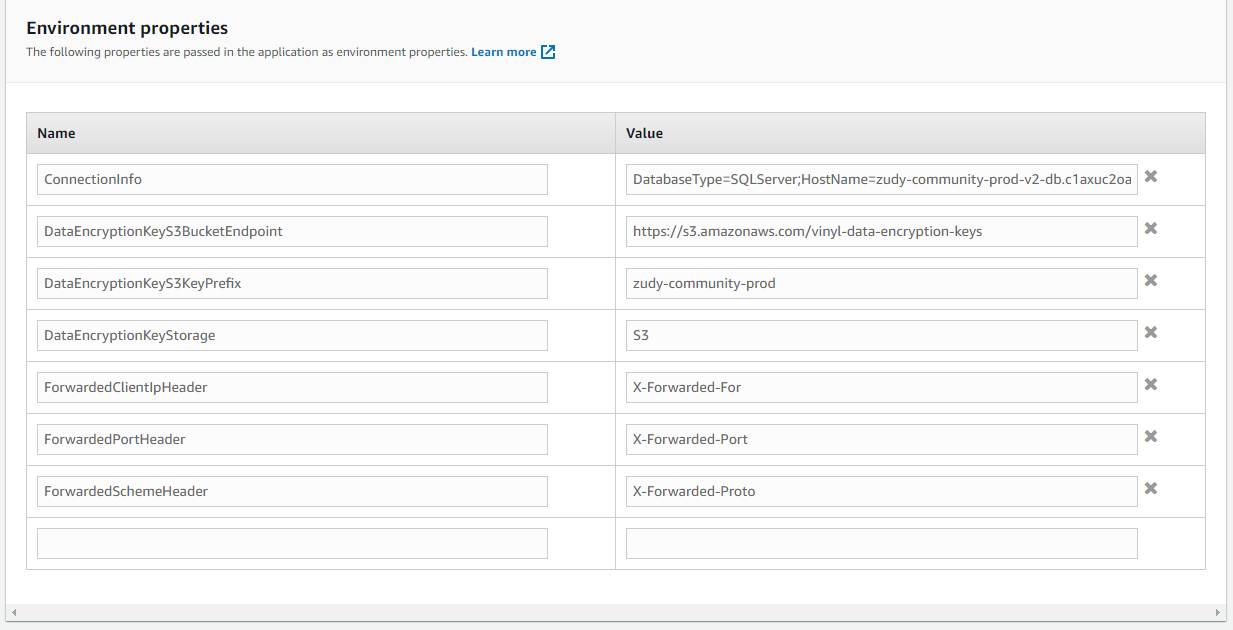
Unchanged
- ConnectionInfo
Renamed
(Old Value → New for 3.1 and Recommended Value)
- DataEncryptionKeyStorage → DataEncryption:KeyStorage
- DataEncryptionKeyS3BucketEndpoint → DataEncryption:S3BucketEndpoint
- DataEncryptionKeyS3KeyPrefix → DataEncryption:S3KeyPrefix
- ForwardedClientIpHeader → ReverseProxy:ForwardedClientIpHeader
- ForwardedPortHeader → ReverseProxy:ForwardedPortHeader
- ForwardedSchemeHeader → ReverseProxy:ForwardedSchemeHeader
- SharedStateProvider → SharedState:Provider
- RedisConnectionString → SharedState:RedisConnectionString
- RedisPrefix → SharedState:RedisPrefix
The latest platform is recommended (Windows Server 2019/2.6.2):
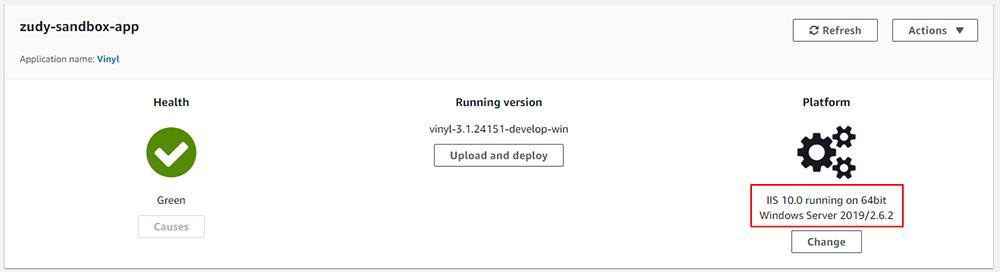
If using Elastic Beanstalk and you are not already running Windows Server 2019/2.6.2 you will need to rebuild your AMI image and/or use the latest Jitterbit base image.
On-premise configuration changes
All configuration settings can now be set inside C:\inetpub\wwwroot\Vinyl\appsettings.json
Vinyl 3.1 will still read the connection.xml file for connection properties if it is located here: C:\inetpub\wwwroot\Vinyl\connection.xml
Upgrade instructions
Preparing for upgrade
-
Make a note of the current Vinyl version you are running, in case you need to restore to this version.
-
Stop IIS. You can do this by entering the IIS Manager, selecting the appropriate web server, and clicking the Stop button at the top right of the Actions pane.
-
Backup your database(s) in case you need to recover them later.
Deploying new software
-
Download the archive (
vinyl-3.1.xxxxx.zip).- To obtain the correct .ZIP file, if your environment is Elastic Beanstalk, Linux, or if you have included additional third party Plugins please email vinylinfo@jitterbit.com. Otherwise the .ZIP file is available from the Vinyl Community Forum under Vinyl Releases.
-
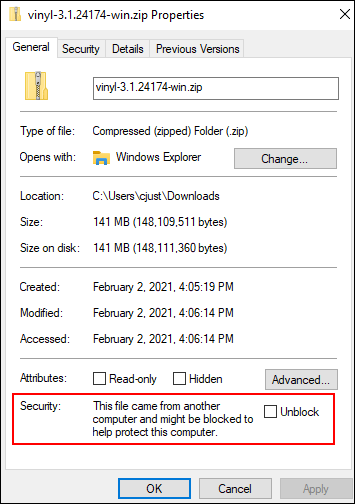
After moving the file to the web server, ensure that the "mark of the web" (MOTW) is removed from the zip file, by right clicking on the file and checking properties and selecting "Unblock" if necessary
-
Move the contents of your previous Vinyl root directory to a backup folder.
-
Extract the new archive to a temporary directory (e.g.
C:\vinyl-3.1.xxxxx) -
Copy the contents of the website directory to the Vinyl application root directory (e.g.
C:\inetpub\wwwroot\Vinyl).Note
You will be copying the contents of the temporary directory directly to the
C:\inetpub\wwwroot\Vinylfolder. This is different from prior releases of Vinyl. -
Updating
C:\inetpub\wwwroot\appsettings.jsonfile with connection information OR Copy the Connection.xml file from your backup directory into the Vinyl root directory. (C:\inetpub\wwrwroot\Vinyl– this is different from prior releases of Vinyl). -
If you have any customizations in the Config directory, you will make these changes to appsettings.json. Contact support if you have any questions.
-
Delete the temporary directory you created.
Configuration
-
Open the IIS Manager
-
Expand the Vinyl folder.
-
Right click the data folder and choose the Edit Permissions... option.
-
Select the Security tab.
-
Click the Edit button to launch the Permissions for data dialog box.
-
Click the Add... button to launch the Select Users or Groups dialog box.
-
Provide the name
IIS AppPool\Vinylin the bottom field. -
Check Allow Full Control in the Permissions field, then click the OK button to close the Permissions for data dialog box.
-
Click the OK button to close the data Properties dialog box.
-
Repeat steps 3-9 for the directories keys and logs as well.
Note
This step is critical to complete for a successful upgrade.
-
Restart IIS by selecting the server and clicking the Start button in the Actions pane.
Suggested test sequence
-
Launch your web browser.
-
Navigate to
http://localhost/Vinyl/. -
Vinyl will automatically update the database(s). The system will begin responding normally once the upgrade completes.
Note
An upgrade that takes 5 minutes is normal; larger upgrades might take longer, and smaller upgrades might run faster.