Google Calendar Connection Guide
Overview
This guide describes the system requirements and instructions for connecting Vinyl to a Google Calendar database server.
To connect your servers, you must have Vinyl 3.3+ installed.
System Requirements
Database Server
Google Calendar Server
Client Web Browser
-
Chrome: 84+
-
Firefox: 73+
-
Safari: 13.0.1+
-
Edge: 84+
Connection Instructions
Configure Google Calendar from Google Console
-
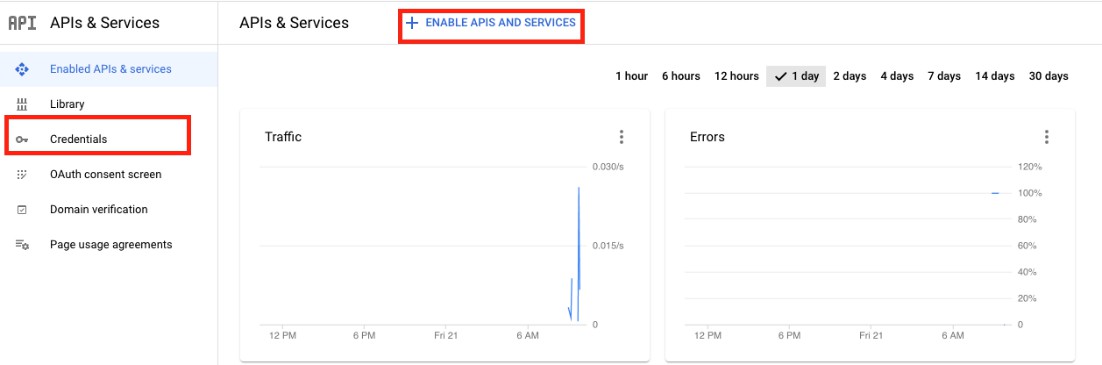
Navigate to Google Console: https://console.cloud.google.com/apis/dashboard
-
Enable Google Calendar API by clicking on "Enable APIs and Services" and searching for Google Calendar
-
From the dashboard, setup OAuth under "Credentials"
-
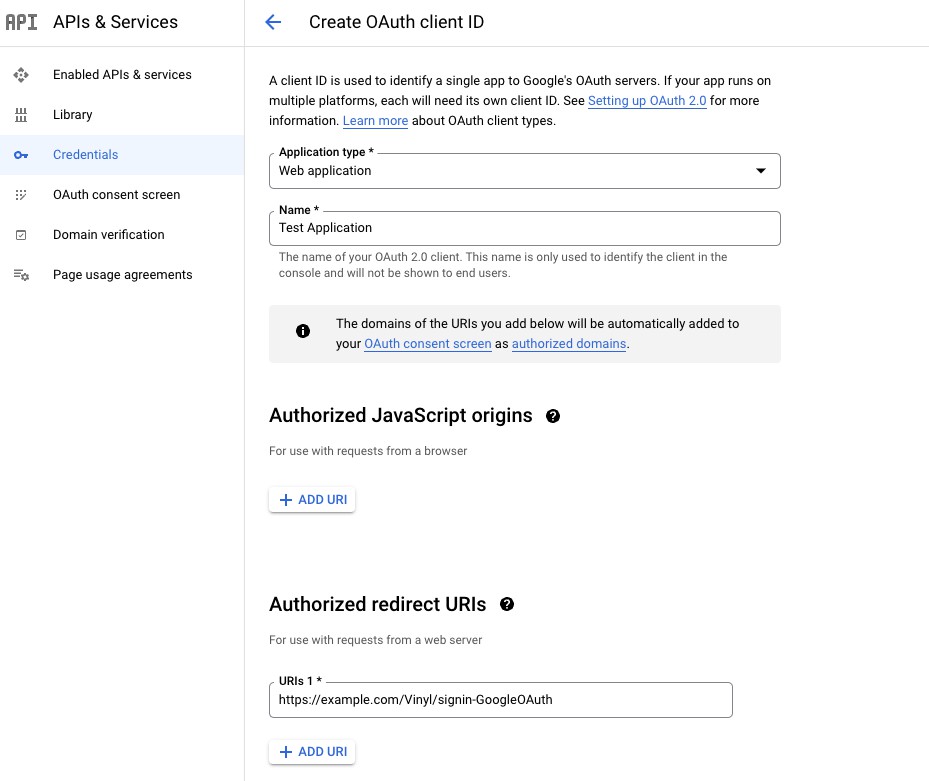
Click "Create Credentials" at the top of the screen and choose "OAuth client ID"
-
Choose Application type "Web Application" and give your application a name
-
Add an Authorized redirect URI back to the security provider created next
-
Click "Create" and make note of the Client ID and Client Secret
Note
The redirect URI in this example uses the Security Provider named GoogleOAuth.
Adding an OAuth Security Provider
-
Navigate to the Vinyl IDE
-
From the Connect menu, click on the Security Providers button
-
Click on + User Authentication under User Authentication
-
Provide the following details:
-
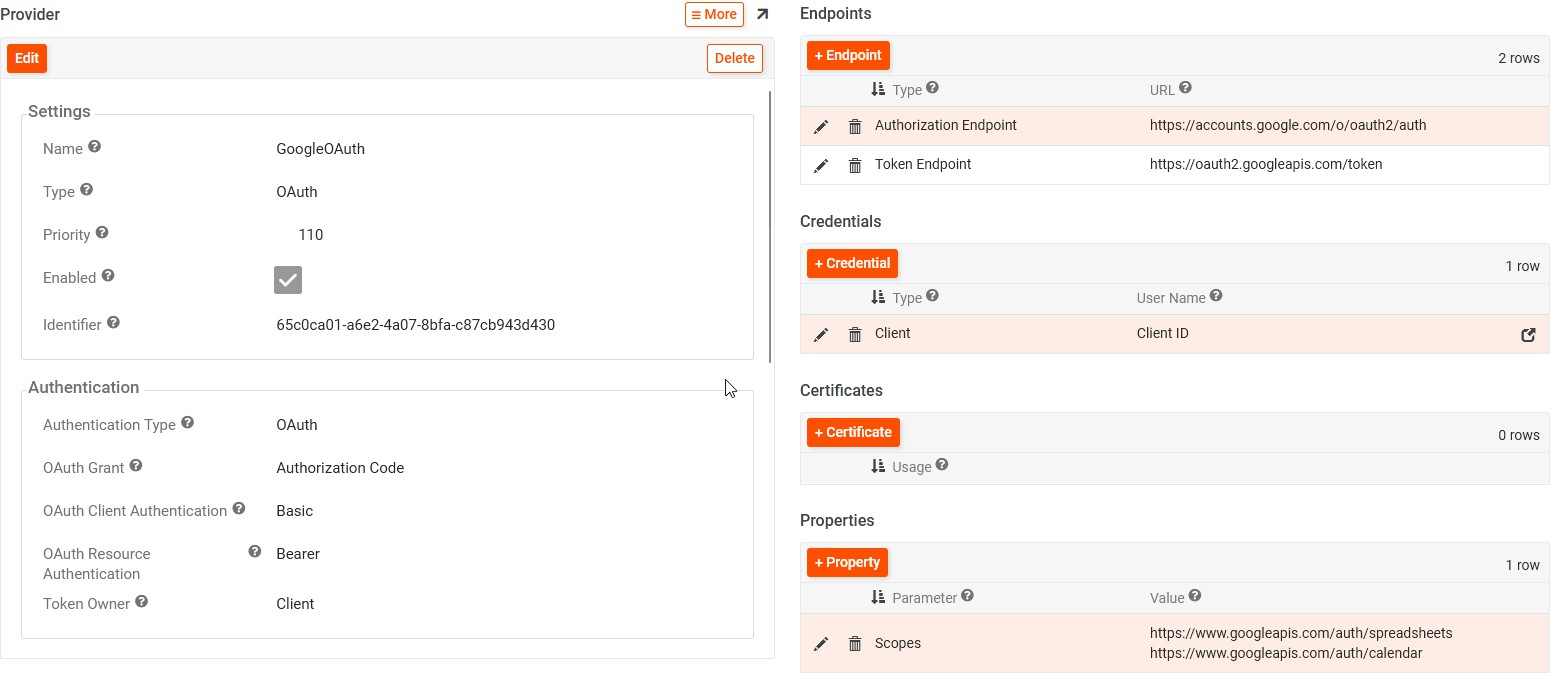
Name: GoogleOAuth (must be named this to match redirect)
-
Type: Select Oauth from the dropdown menu
-
Authentication Type: OAuth
-
OAuth Grant: Authorization Code
-
OAuth Client Authentication: Basic
-
OAuth Resource Authentication: Bearer
-
Token Owner: Depends on intended usage. Use Client if it will be one calendar for the entire organization, otherwise use User if the calendar will be connected for individual users who need to modify events on their Google Calendars.
-
Redirect on Challenge: check to enable
-
Endpoints:
-
Authorization Endpoint: https://accounts.google.com/o/oauth2/auth
-
Token Endpoint: https://oauth2.googleapis.com/token
-
-
Credentials:
-
Type: Client
-
User Name: Client ID from Google Console
-
Password: Client Secret from Google Console
-
-
Properties:
-
Other scopes are enumerated in Google's Documentation. Multiple scopes can be added, and must be separated by a space.
-
-
Click Save.
Create a Google Calendar Data Server
-
Navigate to the Vinyl IDE
-
From the Connect menu, click on the Data Servers button
-
Click the + Server button
-
Provide the following information:
-
Name: Recognizable Name
-
Type: Select Google Calendar from the dropdown menu
-
Security Provider: Select the Security Provider created in previous step
-
-
Click Save
-
Click Test Connection from the Testing section, to test the OAuth connection and redirect URL
Import Data Source
-
Navigate to Vinyl IDE.
-
Click on Data Servers from the Connect menu
-
Under Cloud Database find the Google Calendar Database created in the previous step
-
Select the Google Calendar and click the Details button from the right-hand panel
-
Click the Import button
-
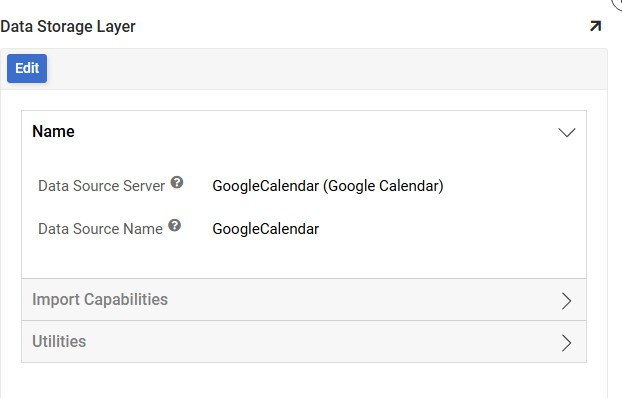
Click to expand Import Capabilities
-
Optionally, click the Edit button and define an Import Pattern to instruct Vinyl what records to bring in from Google Calendar
-
Click the Import button, then Proceed
-
Vinyl will run the import in the background
-
After import completes, expand the Utilities and click on Tables to view imported data from Google Calendar Server
-
The Tables imported from this server are now available for use in your Vinyl application
Create a Google Calendar REST API Connection
-
Navigate to the Vinyl IDE
-
Click on Data Servers from the connect menu
-
Under Web Services click REST API in the Type dropdown
-
For URL, input
https://www.googleapis.com/calendar/v3 -
Click to expand Security Settings and select the Google Calendar Security Provider created in the previous steps
-
Click to expand Testing and make sure Allow Challenge is checked
-
Click Save and close the page
-
For the Data Server you just created, click Details. This will take you to the page seen below:
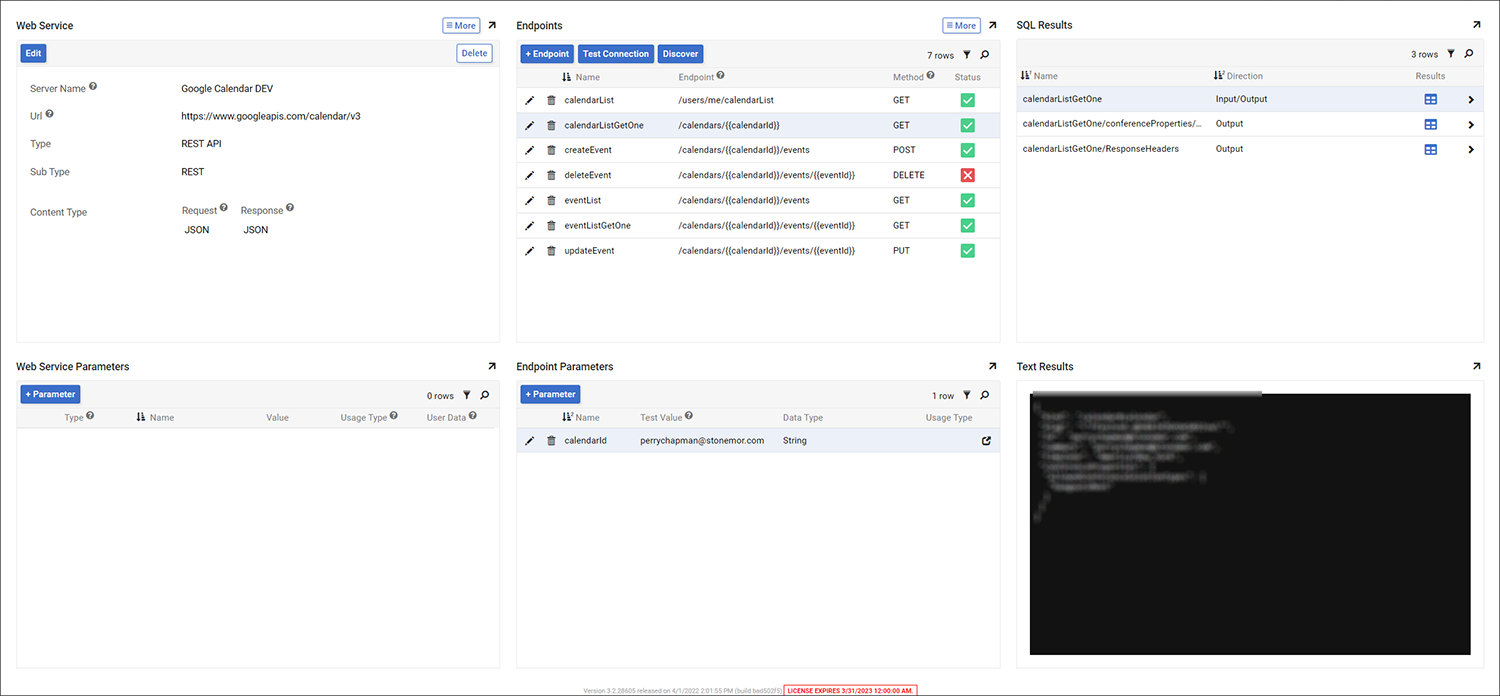
-
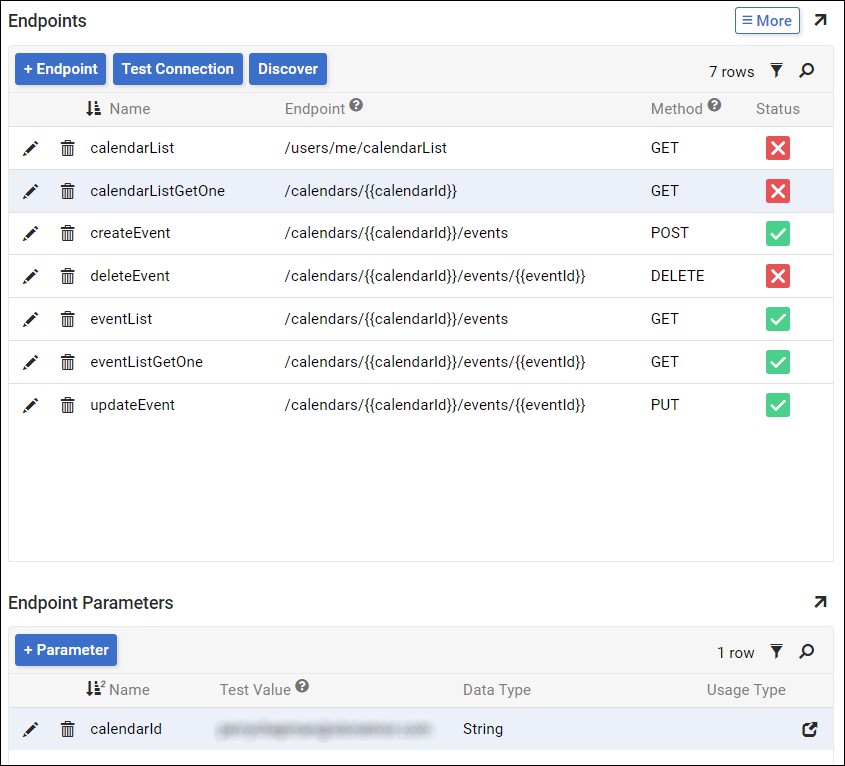
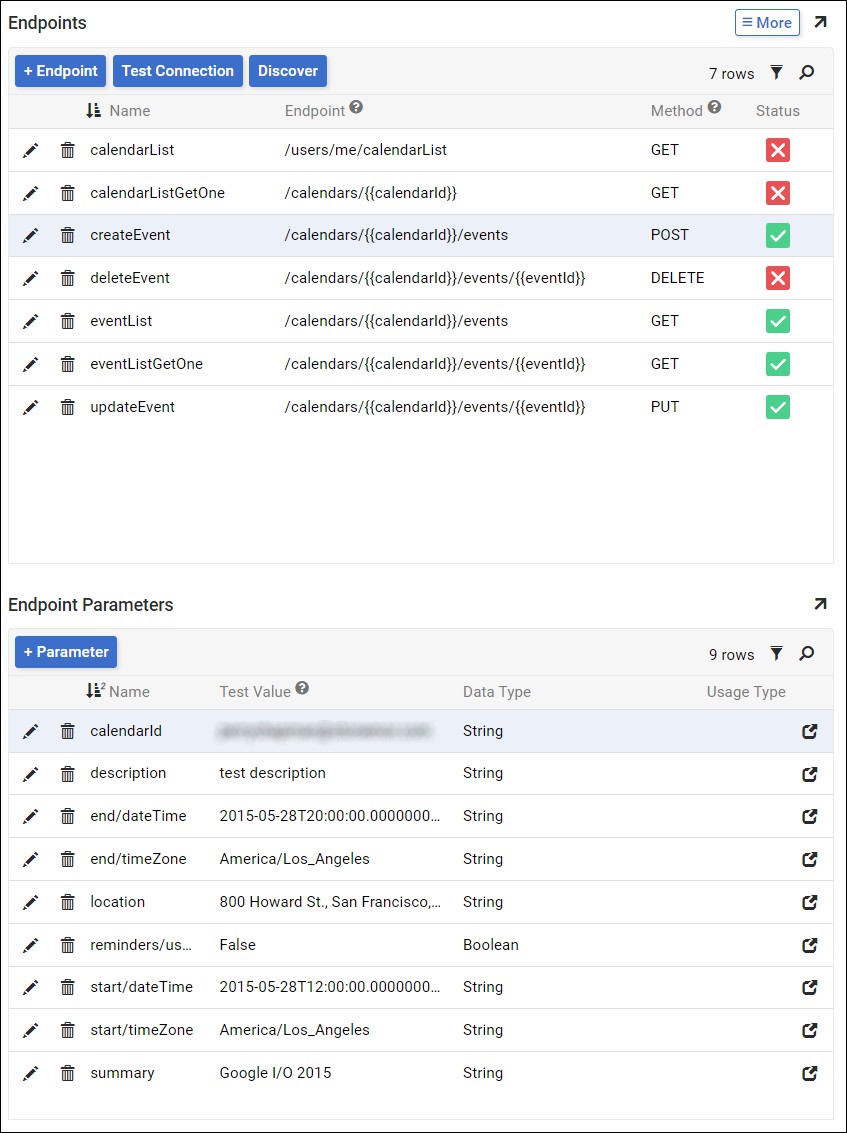
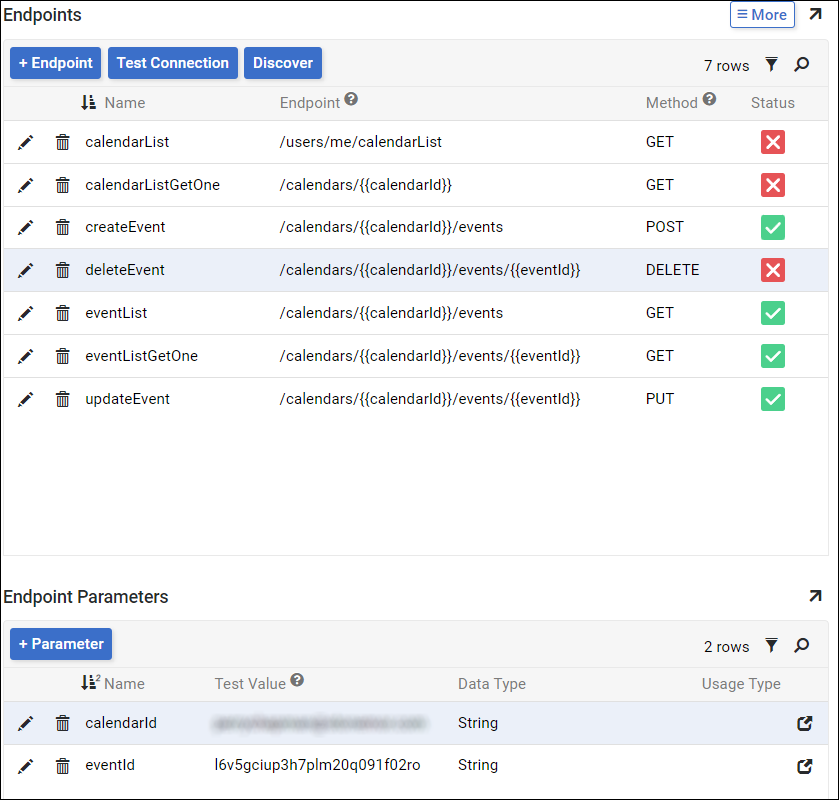
Add the following Endpoints and Endpoint Parameters:

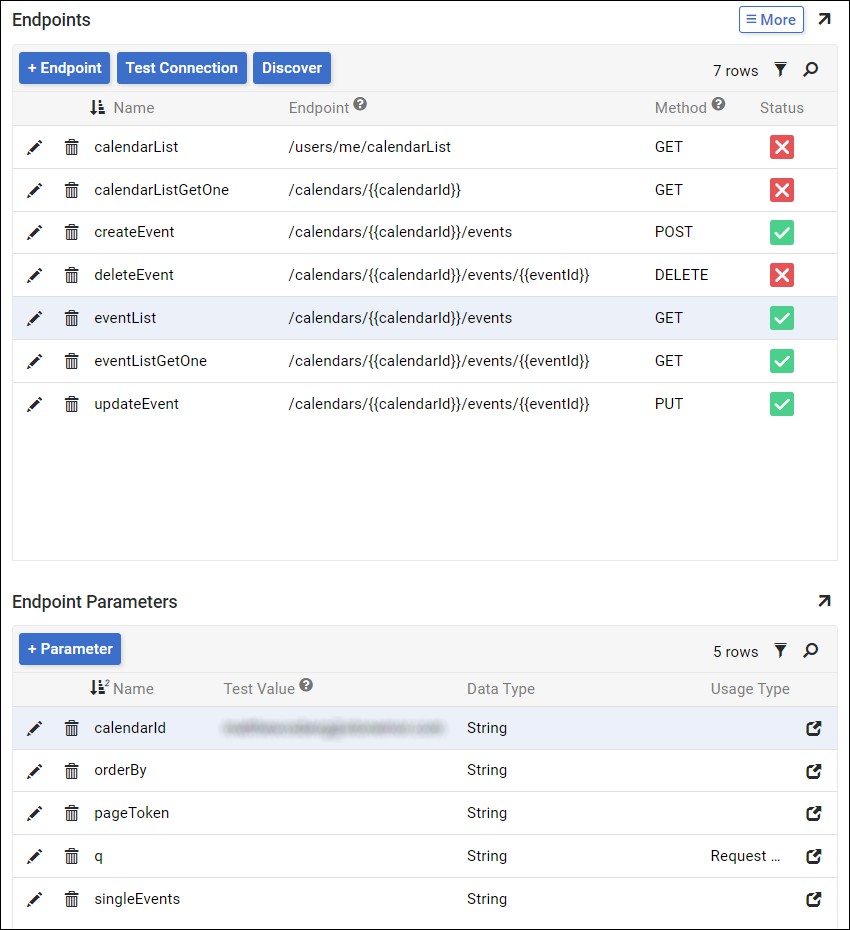
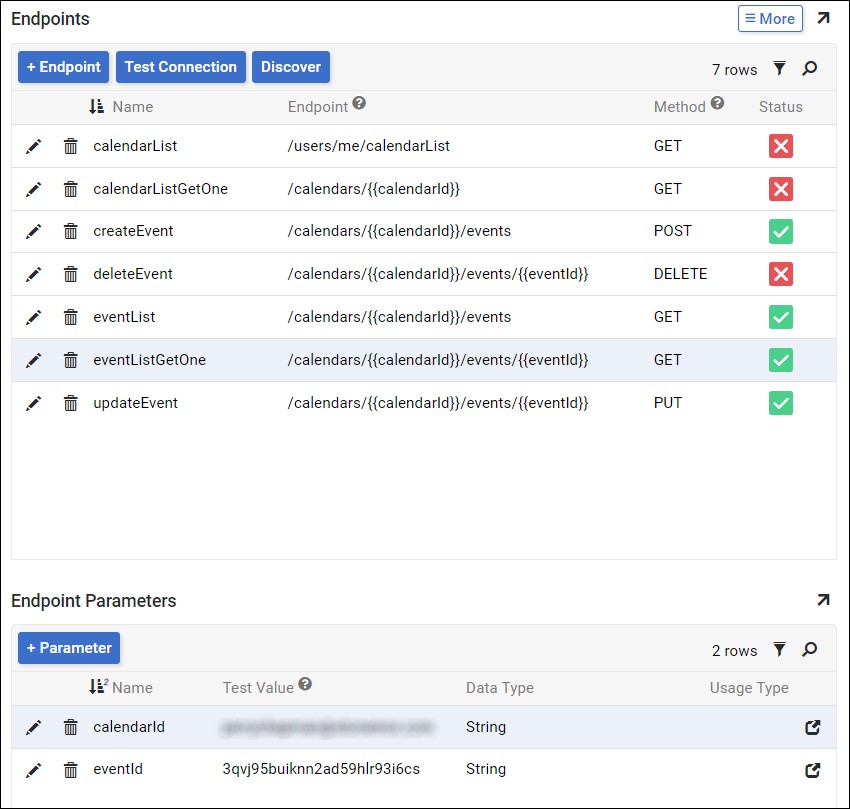
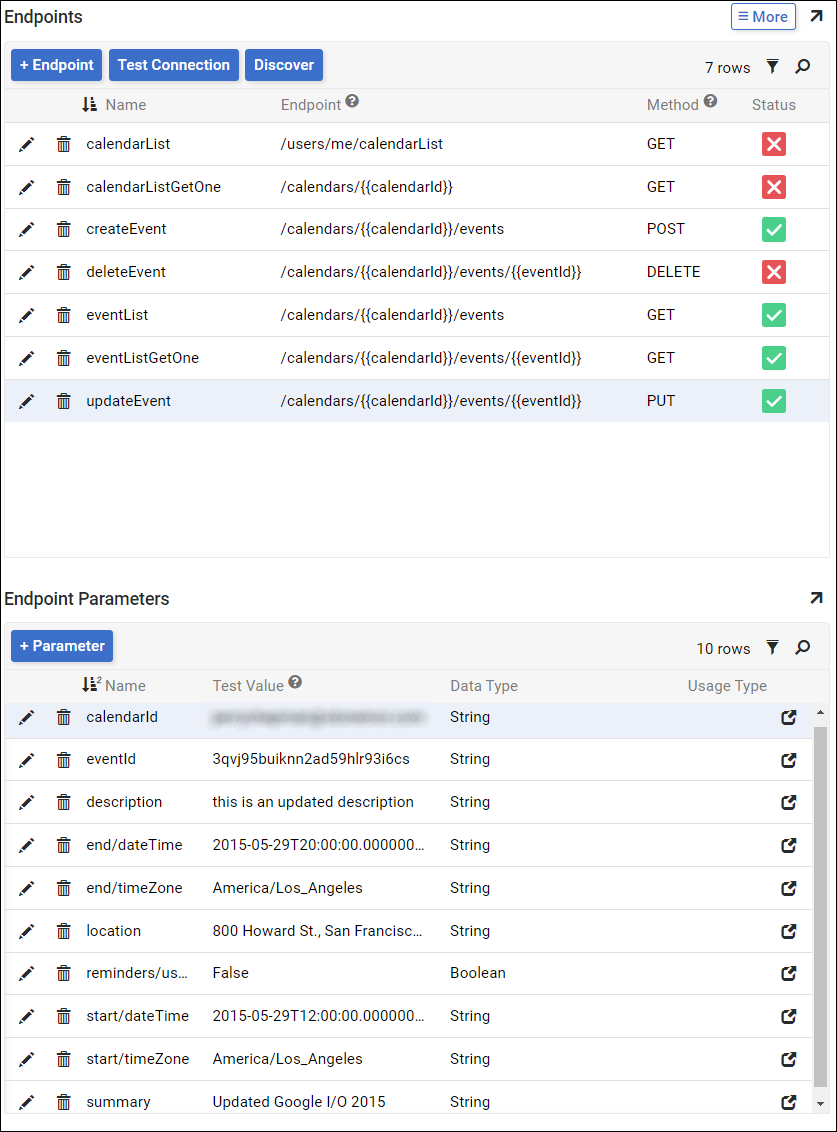
-
For each Endpoint click Test Connection. If this is the first time performing this, Vinyl will redirect to the Google Challenge Provider. Login with your Google account and click Accept on the following page. You will be taken back to Vinyl after performing these steps.
-
For each Endpoint click Discover. This will import all tables for each Endpoint to Vinyl for use in your application.