Infor M3 Connection Guide
Overview
This guide provides an overview of using Vinyl to connect with Infor M3 (or M3). Infor M3 is a cloud-based ERP system providing many manufacturing and distribution-specific APIs.
Specifically, we will review components used to refresh the Access Token to M3 on a periodic basis. In this scenario, the Refresh Token must be refreshed every 2 hours to execute API calls against M3.
System Requirements
The following DLLs are required to be installed on the Vinyl server to establish the Infor M3 connection:
-
Refresh Token DLL
-
Invoke Transaction DLL
Refresh Token Configuration
Param Table
Within the Vinyl application itself, you need to build a table named Param (exact name required) with the following columns defined:
| Name | Data Type |
|---|---|
| ParamID | UUID |
| Url | NVarchar(2000) |
| RestTableId | UUID |
| AccessToken | NVarchar(2000) |
| * NotifyEmail | NVarchar(255) |
| * isTokenRefreshed | Bit |
| * Environment | NVarchar(10) |
Note that the Names provided must be exact as the API references them by Name.
*Optional columns that can be defined, but are not required for configuration.
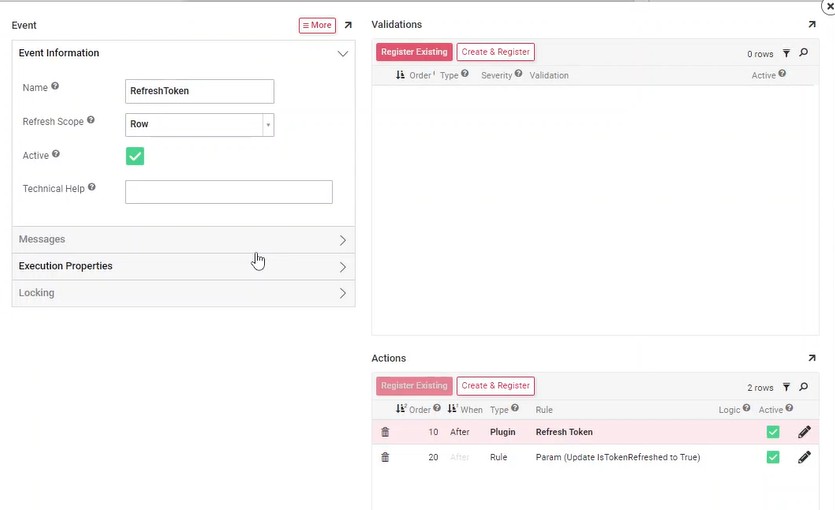
Create a Refresh Token Event
This custom Event must be created on the Param (Source) business object named RefreshToken. To leverage this functionality from within the Vinyl app, you'll need the required DLL files placed in the environment, along with the Plugin and Assembly records added to the Vinyl database.
-
Navigate to Param (Source)
-
Click Events
-
Click + Rule Event
-
Assign the Name as RefreshToken
-
Set Refresh Scope to Row
-
Click Save
-
Under Actions, click Register Existing
-
Set Type to Plugin
-
Set the Plugin to Refresh Token
-
Click Save
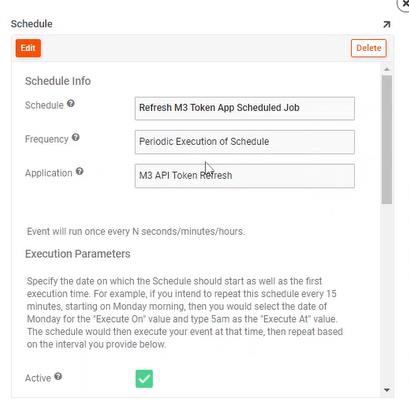
Create a Scheduled Job to Refresh the Token
-
Navigate to the Vinyl IDE
-
Click Monitoring from the Runtime menu
-
Click Schedules
-
Click + Schedule and create:
-
Name: Provide an identifiable name. Example: M3 API Token Refresh
-
Frequency: Periodic Execution of Schedule
-
Application: Name of app assigning job to
-
Recurs every: 90 Minutes
-
-
Click Save
-
Confirm the Event associated with the Schedule has a single Event assigned
Identify the Infor M3 APIs to Use
This step assumes Admin credential access to Infor M3:
-
Login and click Administration Tools
-
Click on M3 Metadata Publisher
-
Click the M3 API Repository tab
-
Select Search API
-
Locate the desired API
-
Drill into the API Program Name to identify the required transaction structure and expected naming convention to be built within the Vinyl app. Example: PMS050MI
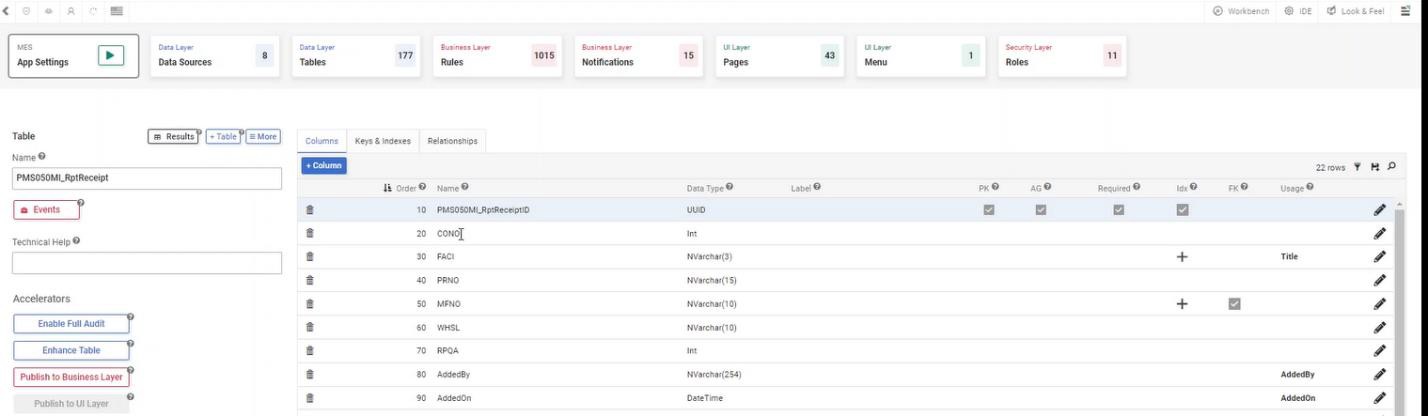
Build Vinyl Tables and Columns to Map to API
To use any of the Infor M3 APIs, you need to manually build corresponding Tables in Vinyl with the expected names for Tables and Columns. The naming convention that must be used for any Table is ProgramName_TransactionName. For example: PMS100MI_Get
All Tables must contain Columns named exactly as the Infor M3 API definition. For example: FACI, NVarchar(3)
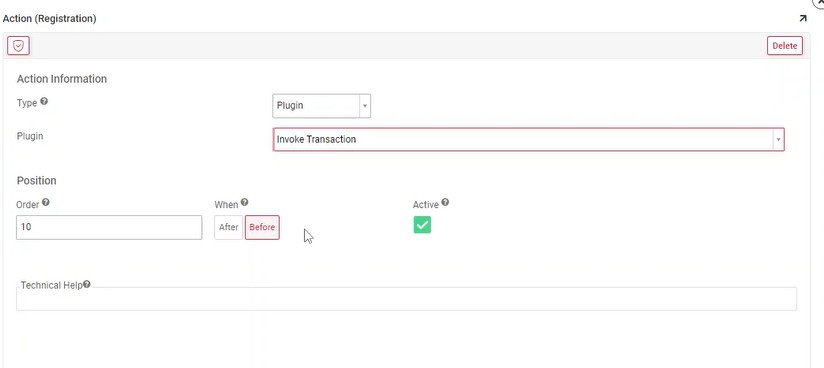
Add an Event Action to Vinyl Table
From the table built in Vinyl to map to the M3 API, you will need to add an Event Action:
-
Click Events from the Table view
-
Select the Insert Event
-
Click the pencil edit icon
-
Under Actions, click Register Existing
-
Set Type to Plugin
-
Set the Plugin to Invoke Transaction
-
Set the When value to Before
-
Click Save
Create a CRUD Rule to Insert Into Table
With the previous steps configured, you can now create a CRUD Rule to insert into the tables in the Vinyl app. Data can flow from the Vinyl app to M3 and Vinyl can receive calls back if needed as well:
-
Navigate to the Workbench > Rules
-
Click + Rule
-
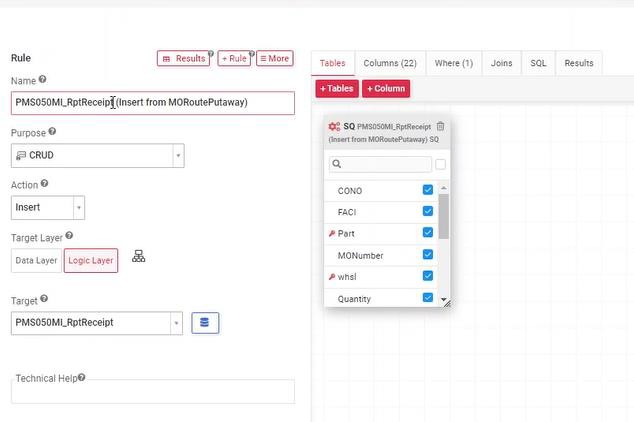
Assign the following:
-
Name: Provide an identifiable Name. Example: PMS050MI_RptReceipt (Insert from MORoutePutaway)
-
Purpose: CRUD
-
Action: Insert
-
Target Layer: Logic Layer
-
Target: select the Table to insert data into. Example: PMS050MI_RptReceipt
-
-
Click the Columns tab to review the information.
- Target should be set to the Column Name of the Target table where data will be inserted