Auto Start IIS 7.5
Confirm that the Application Initialization Module is already installed in IIS
- Open up IIS Manager
- Click on the Server
- In the main panel, click on Configuration Editor
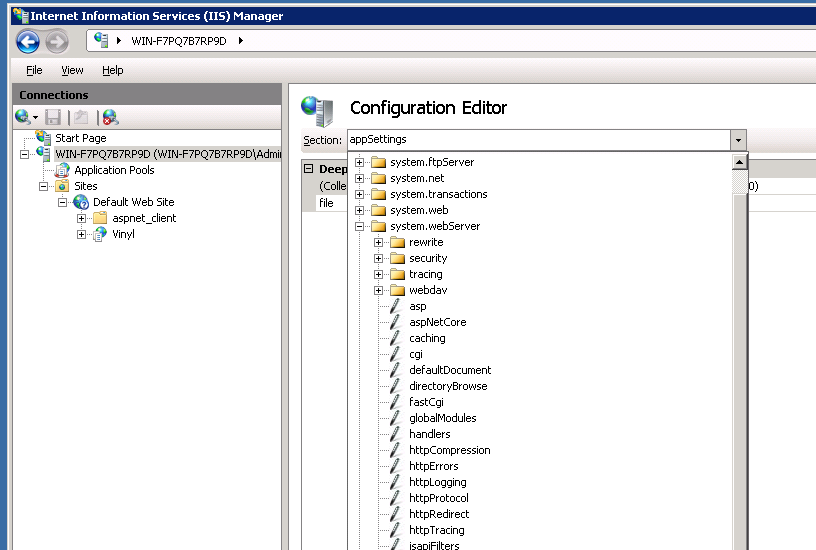
- Expand the system.webServer node.
-
If there is no ApplicationInitialization element in this node, then it needs to be installed.

-
(in above screenshot, Application Initialization is not installed)
-
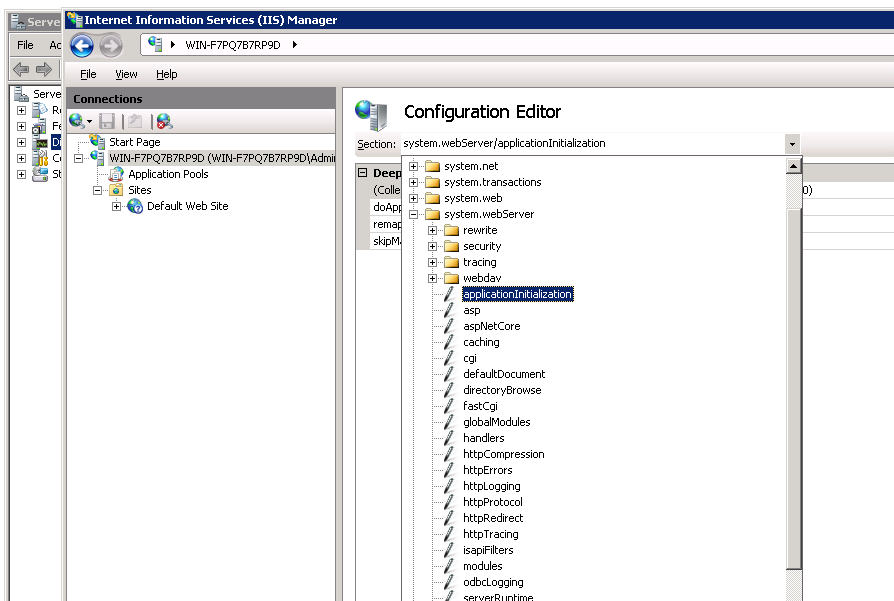
(in the screenshot below, Application Initialization is installed)

-
-
If not installed, install application initialization.
Caution
Server restart will be required after installation.
-
Close IIS Manager
-
Download the installation package from Microsoft using one of the following links:
-
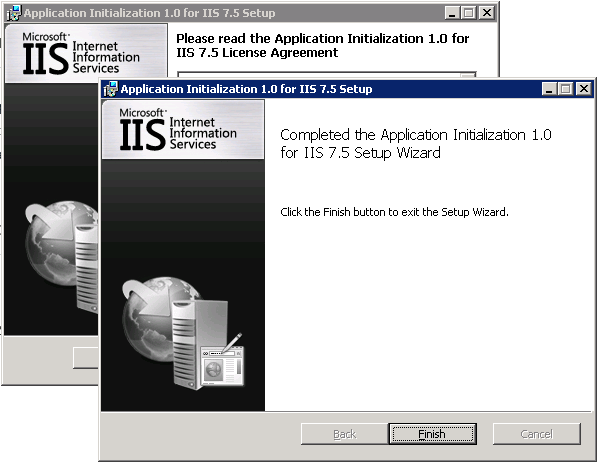
Run this file. There are no options, click install, then Finish.

-
Restart the Server for changes to take place. This feature will not work without restarting the server.
- Check installation. (see step 1 above)
Important
This element will appear after the installation even if you do not restart the server. This does not mean that application initialization was fully installed. You must restart your server for the changes to take affect.
Configure Application Initialization
- Open IIS Manager
-
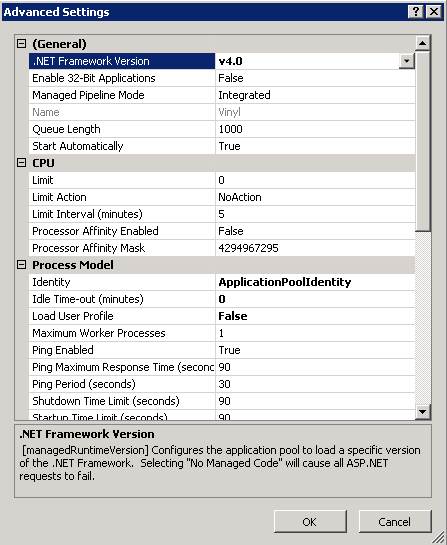
Change every application pool to have AutoStart = False except for the Vinyl application pool.
- Click on each application pool
- Choose Advanced Properties
- Set AutoStart = False
- For the Vinyl application pool set AutoStart = True
The next settings are not available in the IIS 7.5 Manager UI. They will be performed in the applicationHost.config file.
- In a standard installation the applicationHost.config should be located in:
C:\Windows\System32\inetsrv\config - SAVE A COPY OF THE THE FILE
- Open up ApplicationHost.config in a text editor
-
Locate the Vinyl Application
<applicationPools> <add name="DefaultAppPool" autoStart="false" enable32BitAppOnWin64="false" managedRuntimeVersion="v4.0" /> ... <add name="Vinyl" autoStart="true" managedRuntimeVersion="v4.0" /> ... </applicationPools> -
Change the Vinyl node by adding startMode="AlwaysRunning":
<applicationPools> <add name="DefaultAppPool" autoStart="false" enable32BitAppOnWin64="false" managedRuntimeVersion="v4.0" /> ... <add name="Vinyl" autoStart="true" managedRuntimeVersion="v4.0" startMode="AlwaysRunning" /> ... </applicationPools> -
Locate the Vinyl Application:
<site name="Default Web Site" id="1"> ... <application path="/" applicationPool="DefaultAppPool"> <virtualDirectory path="/" physicalPath="%SystemDrive%\inetpub\wwwroot" /> </application> <application path="/Vinyl" applicationPool="Vinyl"> <virtualDirectory path="/" physicalPath="%SystemDrive%\inetpub\wwwroot\Vinyl" /> </application> ... </sites> -
Change the Vinyl node by adding preloadEnabled="true":
<site name="Default Web Site" id="1">
    ...
    <application path="/" applicationPool="DefaultAppPool">
        <virtualDirectory path="/" physicalPath="%SystemDrive%\inetpub\wwwroot" />
    </application>
    <application path="/Vinyl" applicationPool="Vinyl" preloadEnabled="true">
        <virtualDirectory path="/" physicalPath="%SystemDrive%\inetpub\wwwroot\Vinyl" />
    </application>
    ...
</sites>
Application Initialization is now configured correctly. Following are links indicating how to test the behavior or trouble shoot some common issues that have been encountered.
Set Idle-Timeout to 0
