Intercom Integration with Vinyl
Integrating Intercom with Vinyl Apps
This guide will cover the simple steps required to add Intercom, a 3rd party messaging application, to any Vinyl app. The end result is that your Vinyl application will be connected to Intercom, and you will be able to chat directly with users through the app. You can respond to user messages when you are logged into the Intercom website, send email replies to their chat window, or even reply via Slack. Total configuration time is approximately 10 minutes.
For additional Intercom documentation or help, please see the Intercom Developer Hub, Intercom Help Center or Community Forum.
How to Configure Vinyl App Integration
-
Log into the Intercom website using your Intercom account credentials
-
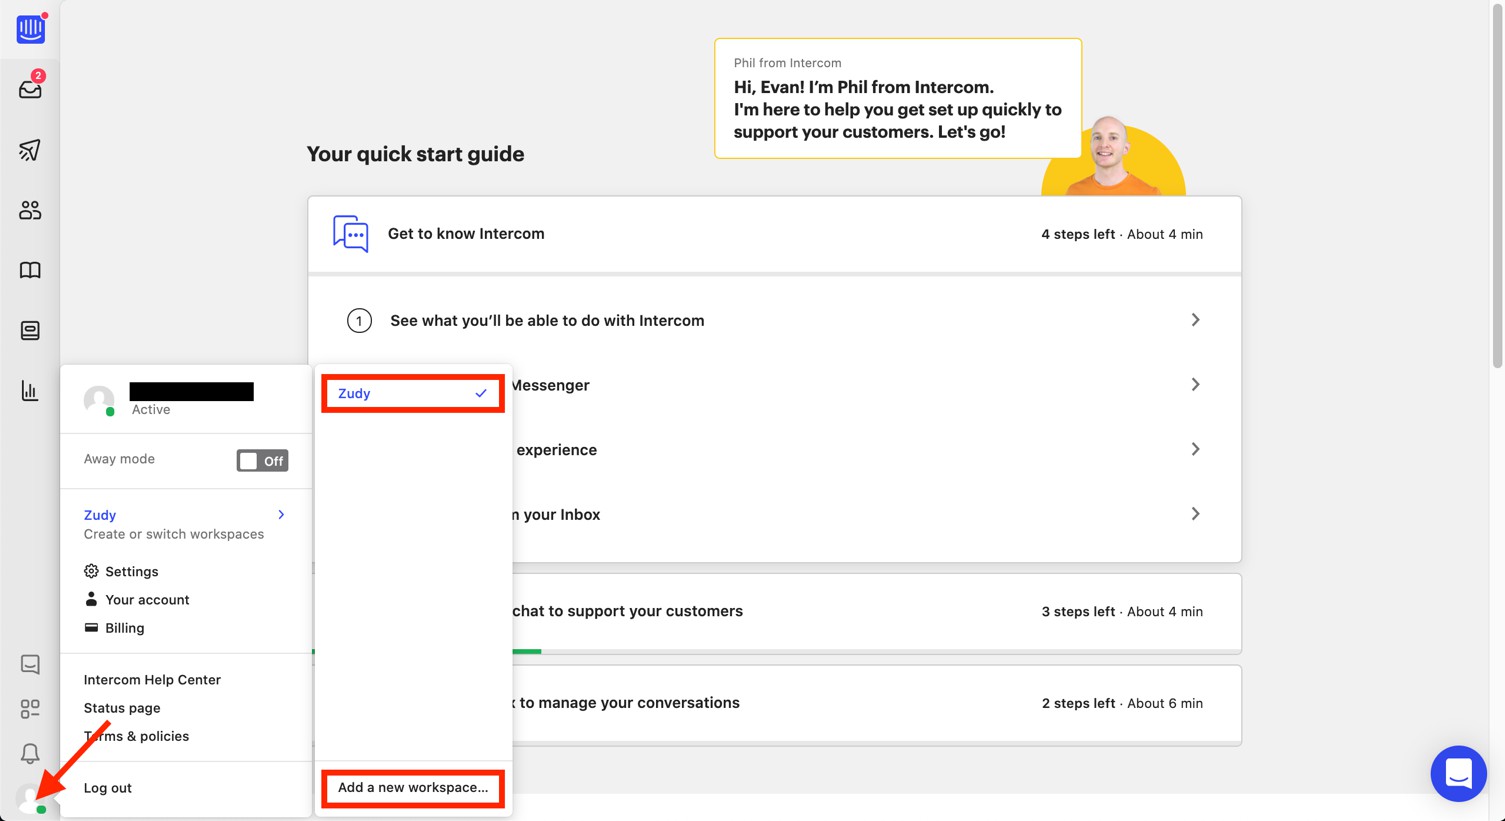
Click the profile icon in the bottom left -> Jitterbit (or your account name) -> Add a new workspace…
Note
-
You should create a 'Prod' version (for the Prod environment) and a 'Test' version (for Dev and QA environments).
-
You must complete setup of the workspace, including adding a credit card, in order for the integration to work and the Intercom icon to display properly in Vinyl.
-
-
Make sure your app is 'checked'.
-
Make note of the AppID in the workspace URL (the AppID can also be found in the premade widget Javascript code block).

-
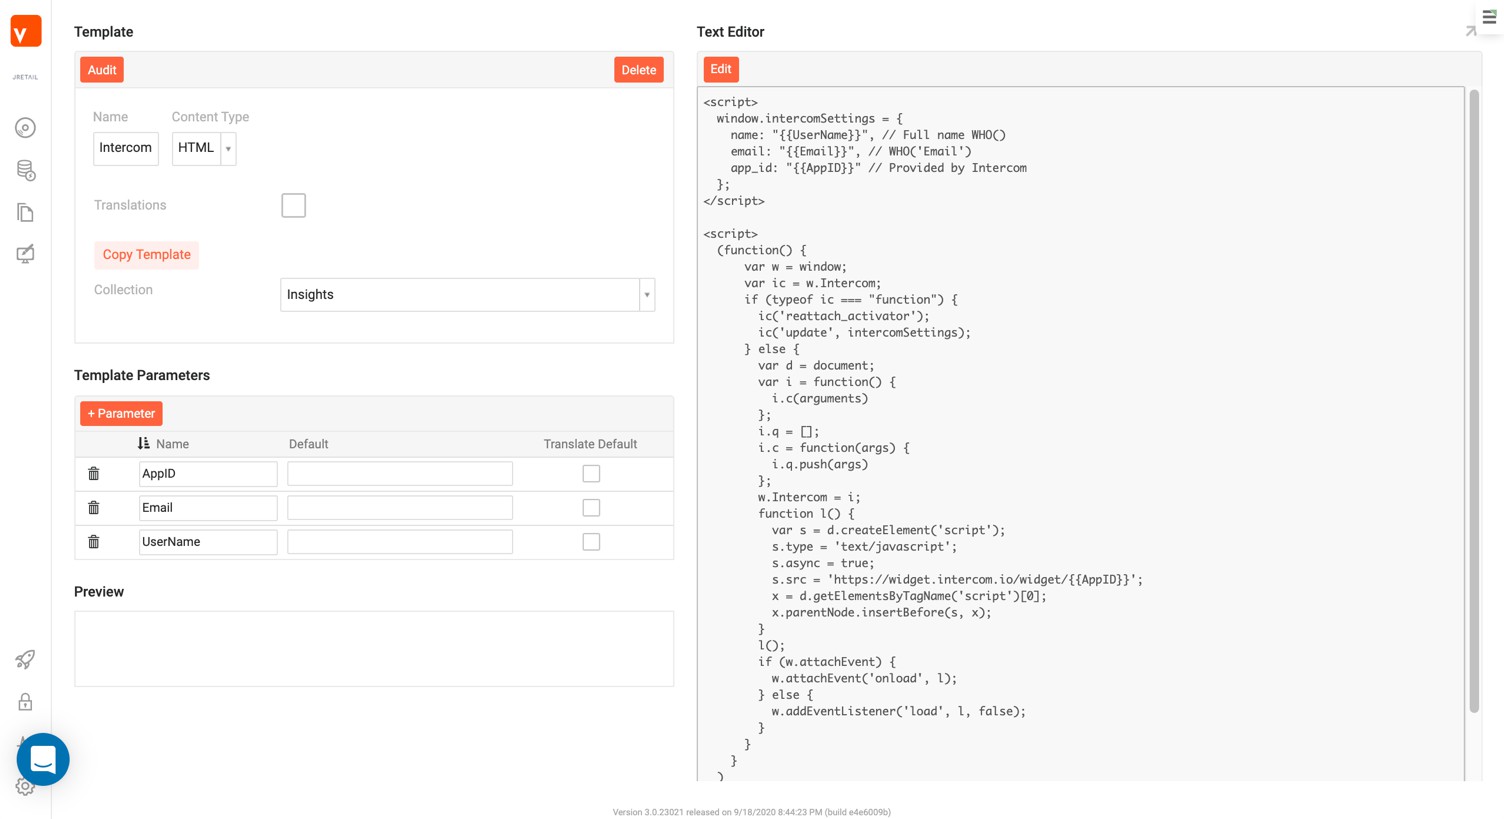
In Vinyl, create a new HTML Template for Intercom, connected to a Collection the app has access to, and create entries for the following three Parameters:
-
AppID
-
Email
-
UserName
-
-
Paste the following code into the Content (text) area of the template:
<script> window.intercomSettings = { name: "<UserName>", // Full name WHO() email: "<Email>", // WHO('Email') app_id: "<AppID>" // Provided by Intercom }; </script> <script> ( function(){ var w=window; var ic=w.Intercom; if(typeof ic==="function"){ ic('reattach_activator'); ic('update',intercomSettings); } else{ var d=document; var i=function(){i.c(arguments)}; i.q=[]; i.c=function(args){i.q.push(args)}; w.Intercom=i; function l(){ var s=d.createElement('script'); s.type='text/javascript'; s.async=true; s.src='https://widget.intercom.io/widget/<AppID>'; x=d.getElementsByTagName('script')[0]; x.parentNode.insertBefore(s,x); } l(); if(w.attachEvent){ w.attachEvent('onload',l); } else{ w.addEventListener('load',l,false); } } } ) () //Manually Call the Listener if the page is loaded </script> -
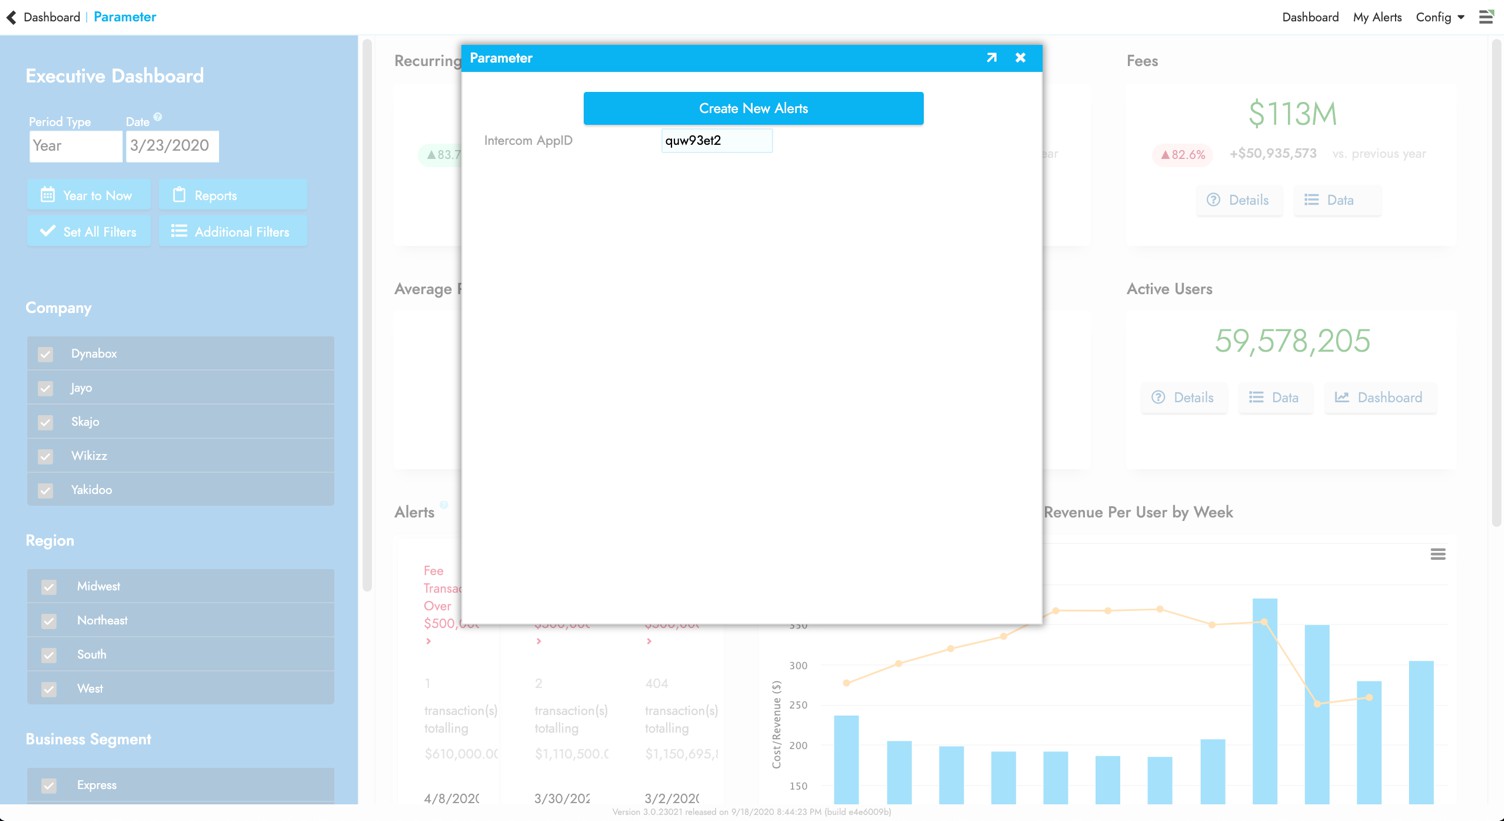
Add a field to your Parameter table to store the Intercom App ID. Take the string value created in Intercom and paste it in this location.
-
Add the Param fields IntercomAppID, WHO() and WHO('Email') to the underlying data object used on the application Home or Splash page, and to any other "entry" point of the app.
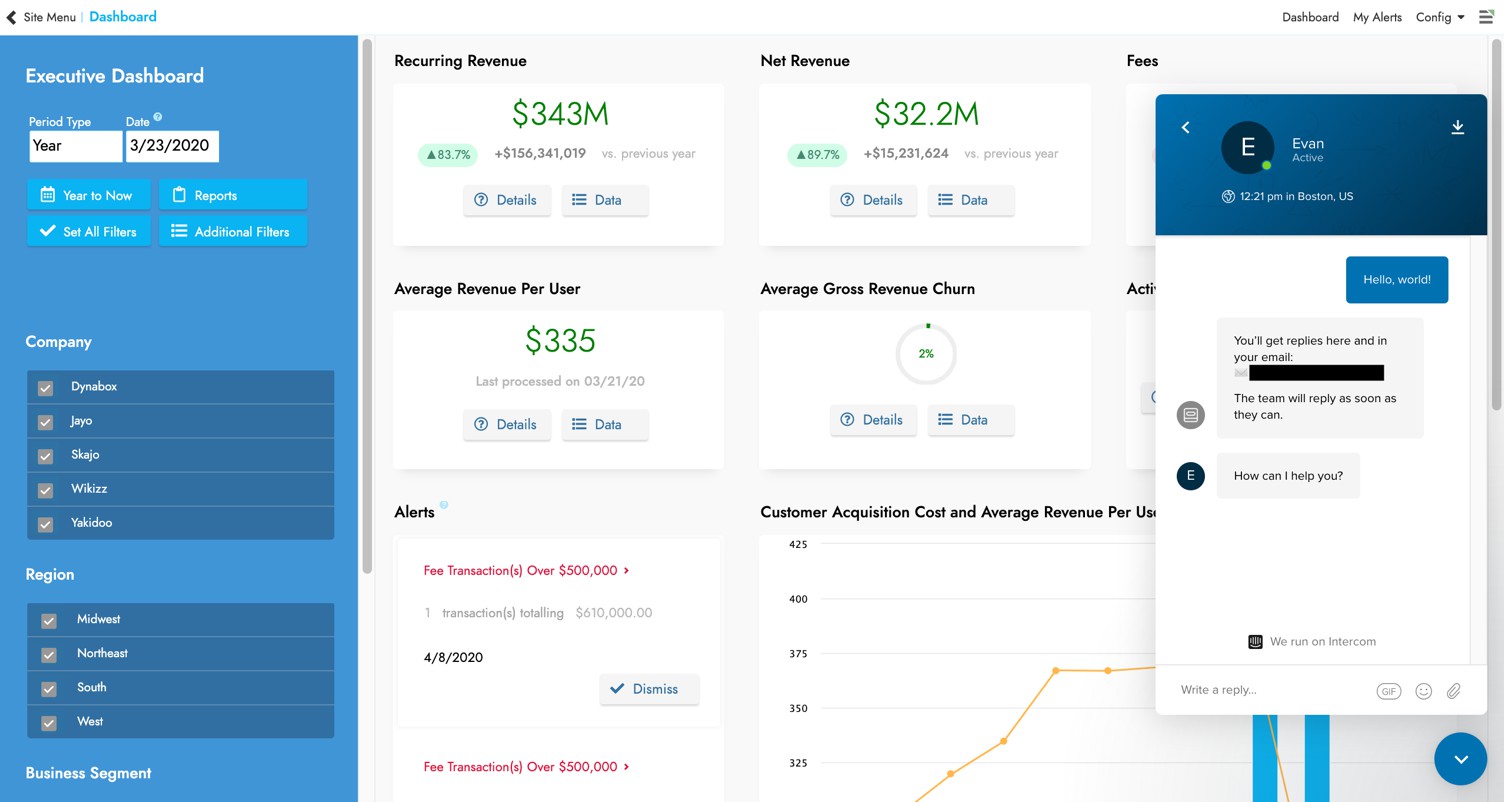
If the user enters through a page that has this Intercom template, every subsequent page will show the 'Chat' icon in the bottom right. However, if they enter the app through a page that does NOT have the HTML template, they will not see the icon or have Intercom functionality.
Important
User Email is a mandatory field – INTERCOM INTEGRATION WILL NOT WORK IF THE USER HAS NO EMAIL IN THEIR PROFILE SETTINGS
-
Add an HTML Control to the page where you're configuring Intercom integration (typically Home or Splash page). Connect the Template Information > Template to the HTML Template created.
-
Click the Binding icon for the HTML Template (from the Control detail) and create entries mapping:
Template Parameter Control or Column Name AppID IntercomAppID Email UserEmail UserName UserName -
Refresh your page and you should now see the Intercom icon
Slack Integration
Out of the box you can configure Intercom to send notifications to a Slack channel.
-
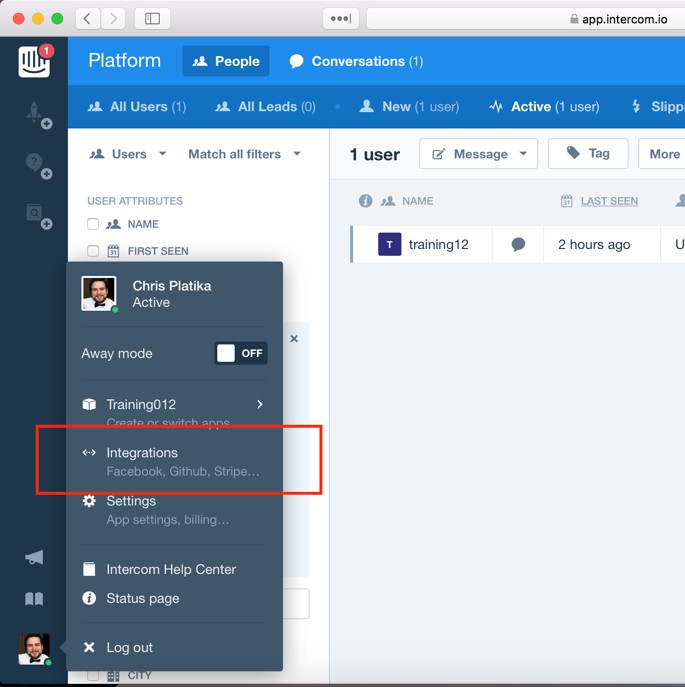
From the Intercom website account, click the profile picture Icon in the bottom left. Make sure your App is checked and then click on Integrations.
-
Scroll down and locate the Slack option and click Integrate
-
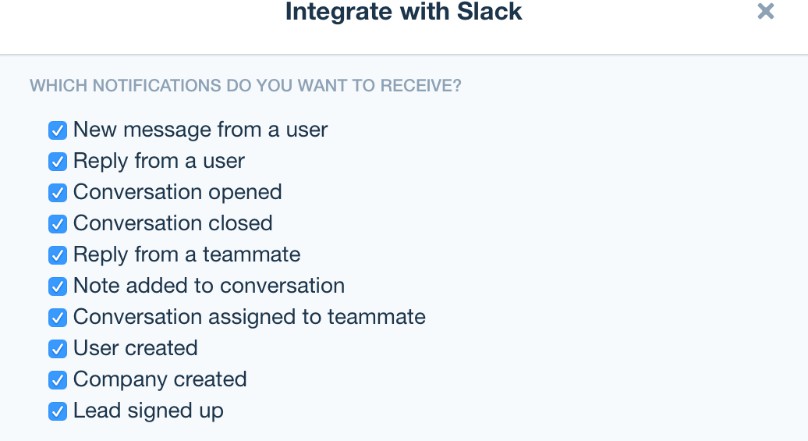
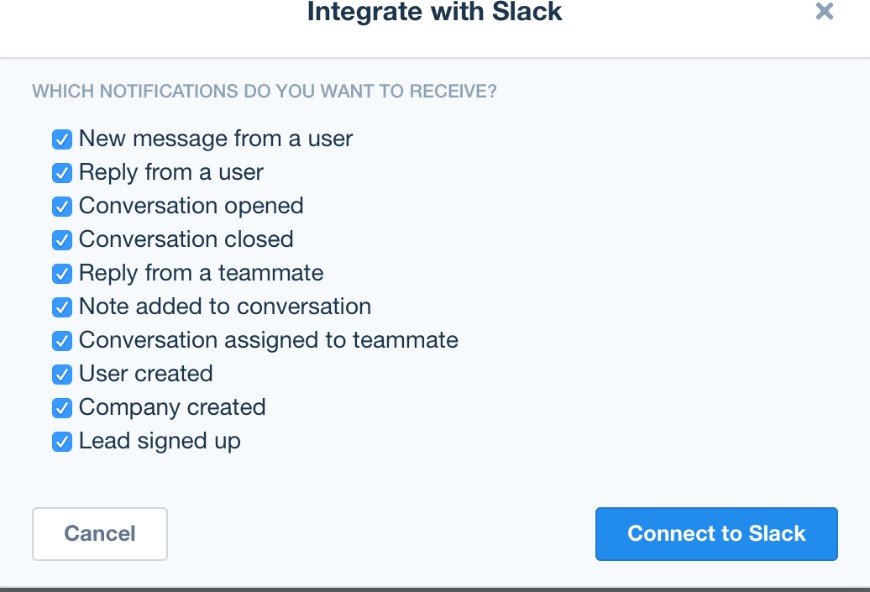
Choose which Notifications you want forwarded to the Slack Channel, and then click the Connect to Slack button.
-
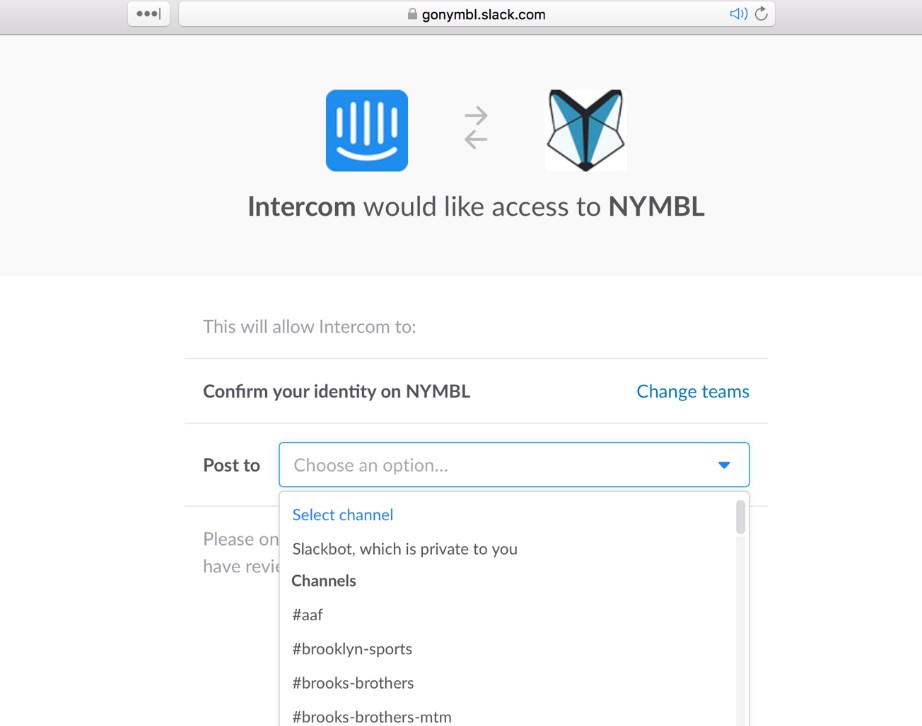
Sign in to the team's Slack channel. Choose which channel you want the notifications to go to. For testing purposes you should select the Slackbot option and the notifications will only appear to you.
-
You should now receive notification that Intercom has been added, and any new messages will show up in the selected channel.
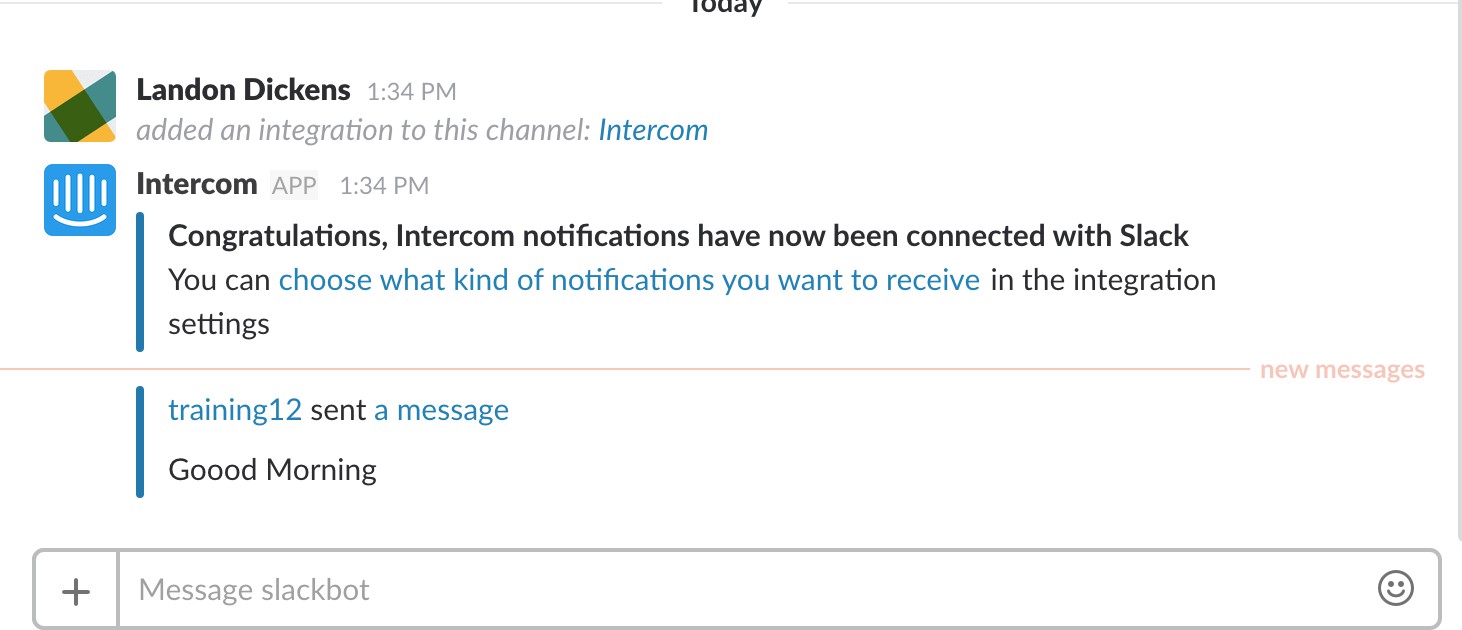
-
To reply you need to click on the link 'a message' in the app which will take you to the Intercom website. Currently you would need an additional piece of software to allow you to reply directly from Slack.
Tips and Troubleshooting
-
General guidance is to log into the Intercom website account, and test the messaging functionality between it and your app. The Intercom dashboard and website offers a lot of stats and relevant data, such as who is actively logged into the app, message history, etc.
-
Please note that the Intercom button seems to generally work fine in Chrome on both Windows and Mac. Safari on Mac seems to be very inconsistent. Make sure to test your implementation using multiple browsers and ideally different operating systems as well.
-
As with all Vinyl apps we recommend you create a 'Prod' version (for the Prod environment) and a 'Test' version (for Dev and QA environments)