Microsoft Dynamics CRM Connection Guide
Overview
This guide describes the system requirements and instructions for connecting Vinyl to Microsoft Dynamics CRM.
To connect your servers, you must have Vinyl 3.3+ installed.
System Requirements
Active Account
- Microsoft Dynamics CRM
Client Web Browser
-
Chrome: 84+
-
Firefox: 73+
-
Safari: 13.0.1+
-
Edge: 84+
Connection Instructions
Prerequisites
Before you setup a connection from Vinyl to the Microsoft Dynamics CRM, you should perform the following steps:
-
Verify you have an active Dynamics CRM account
-
Verify you can log into an active Azure account with permission to configure connections
Register an App in Microsoft Azure
The method used to authenticate from Vinyl to Dynamics CRM is OAuth 2.0. We will configure the OAuth flow using Microsoft Azure.
-
Navigate to the Azure Active Directory admin center portal
-
Under Manage, select App registrations > New registration
-
Provide a Name. For example: Vinyl Dynamics CRM
-
Select who can use the application
-
Click Register
When the registration is complete, the Azure portal will display the app registration on the Overview screen. Note the value in Application (client) ID as the OAuthClientID and the Directory (tenant) ID as the AzureTenantID.
Add a redirect URI
The redirect URL represents the location where Microsoft will redirect the user's client and pass
the security tokens after authentication.
-
Navigate to the registered app in Azure Active Directory
-
Click Add a Redirect URI to enter the value. For example:
http://localhost/auth-response
Add a Client Secret
Client secrets are also referred to as an application password. The registered app in Microsoft Azure requires a client secret record to be created for each Vinyl environment the connection is being used in. If your Vinyl configuration has a development, QA, and Production environment you will need 3 corresponding client secret records.
Client secrets have an associated Expires date, and the maximum length they can be set for is for 2 years.
Generating a client secret record provides you with a client secret Value and Secret ID. The Value is encoded and only available to copy and use once (otherwise a new token would need to be generated to capture a new Value).
-
Navigate to the registered app in Azure Active Directory
-
Under Manage, select Certificates & secrets
-
Click New client secret
-
Provide a Description. For example: Vinyl Production
-
Select an Expires value. For example: 730 days (24 months)
-
Click Add
-
Note the Value as it will become encoded. You will need it as the OAuthClientSecret
Assign API Permissions
The registered app in Microsoft Azure needs permissions assigned to Dynamics CRM. This should be configured based on how you want to integrate it with Vinyl.
-
Navigate to the registered app in Azure Active Directory
-
Under Manage, select API permissions
-
Click Add a permission
-
Click Dynamics ERP
-
If you plan for your application to connect without a user context, select Application Permissions (OAuthGrantType=Client). Otherwise, use Delegated Permissions (OAuthGrantType=Code)
-
Click Add a permission and define permissions per your business requirements
For more detail, see Quickstart: Register an application with the Microsoft identity platform
Link the Registered App to Dynamics CRM
For this configuration step, you should have the Application (client) ID value for the app registered above copied somewhere handy for usage, like your clipboard.
-
Navigate to Dynamics CRM
-
Create an Application User
-
Enter the Client ID value from the registered app. This is the Application (client) ID value in Microsoft Azure.
-
Assign the new user a role
Adding a Server
-
Navigate to the Vinyl IDE
-
From the Connect menu, click the Data Servers button
-
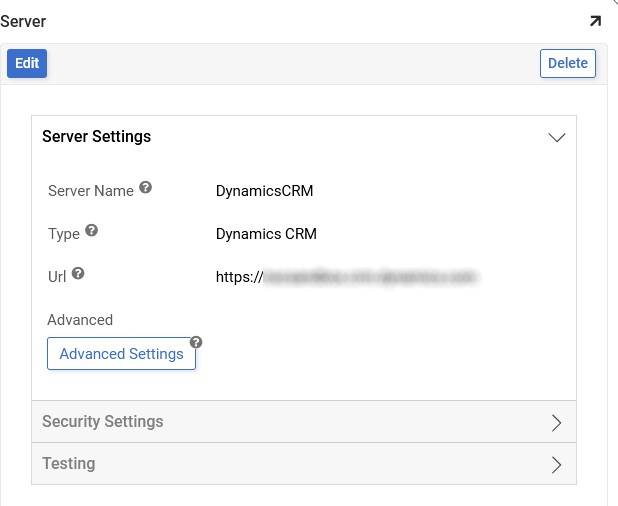
Click the + Server button on the Data Servers panel. This will bring up the Server page. Provide the following information:
-
Server Name: An identifiable and unique server name. For example: Dynamics CRM
-
Type: Select Dynamics CRM from the dropdown menu
-
Url: Enter the Url for accessing Dynamics CRM, must start with http:// or https://
-
-
Click the Save button
-
Click the Advanced Settings button.
-
Provide the following information and corresponding values in the Advanced field, separating each value with a semi colon:
-
AzureTenant – Tenant Id value for Azure service
-
InitiateOAuth – property to initiate the process to obtain/refresh the OAuth access token on connection. For example: GETANDREFRESH
-
OAuthClientID – Id value assigned when app is registered with OAuth server
-
OAuthClientSecret – value assigned when app is registered with OAuth server
-
OAuthGrantType – grant type for the OAuth flow. For example: CLIENT
-
OAuthSettingsLocation – location of settings file where OAuth values will be saved. For example: C:\inetpub\wwwroot\Vinyl\App_Data\CData\DynamicsCRM;
-
Advanced Settings Example:
AzureTenant=<TenantID>;
InitiateOAuth=GETANDREFRESH;
OAuthClientId=<ClientID>;
OAuthClientSecret=<ClientSecret>;
OAuthGrantType=CLIENT;
OAuthSettingsLocation=C:\inetpub\wwwroot\Vinyl\App_Data\CData\DynamicsCRM;