Microsoft Exchange Connection Guide
Overview
This guide describes the system requirements and instructions for connecting VinylTM to Microsoft Exchange as a Data Server. This connection makes use of the Client Credentials OAuth flow.
Client credentials refer to a flow in OAuth where there is no direct user authentication taking place. Instead, credentials are created for just the app itself. All tasks taken by the app are done without a default user context. This makes the authentication flow a bit different from the standard. All permissions related to the client Oauth flow require Administrator consent.
To connect your servers, you must have Vinyl 3.3+ installed.
System Requirements
-
Microsoft Exchange
-
Azure Portal
Client Web Browser
-
Chrome: 84+
-
Firefox: 73+
-
Safari: 13.0.1+
-
Edge: 84+
Limitations and Supported Features
-
To use the Microsoft Exchange connector you must be running Vinyl Version 3.2.31151 released on 12/22/2022 3:15:01 PM (build 002ff986) or later.
-
There may be limitations around the Microsoft Exchange primary key IDs with SQL Server database. The primary key is a long alphanumeric string and will cycle through a-z, 0-1, A-Z incrementally for new emails. The issue with this is that SQL Server is, by default, case insensitive so two emails with PKs "1234a" and "1234A" are the same to Vinyl. A workaround is to leverage the column changeKey, that in combination with id will always be unique.
Connection Instructions
Prerequisites to Configure in Azure Portal
Before configuring the Microsoft Exchange Data Server connection in Vinyl, you will need to first configure the following information from your Azure portal.
-
Create a custom OAuth App within the Azure Portal: https://cdn.cdata.com/help/CEH/ado/pg_oauthcustomappcreate.htm
-
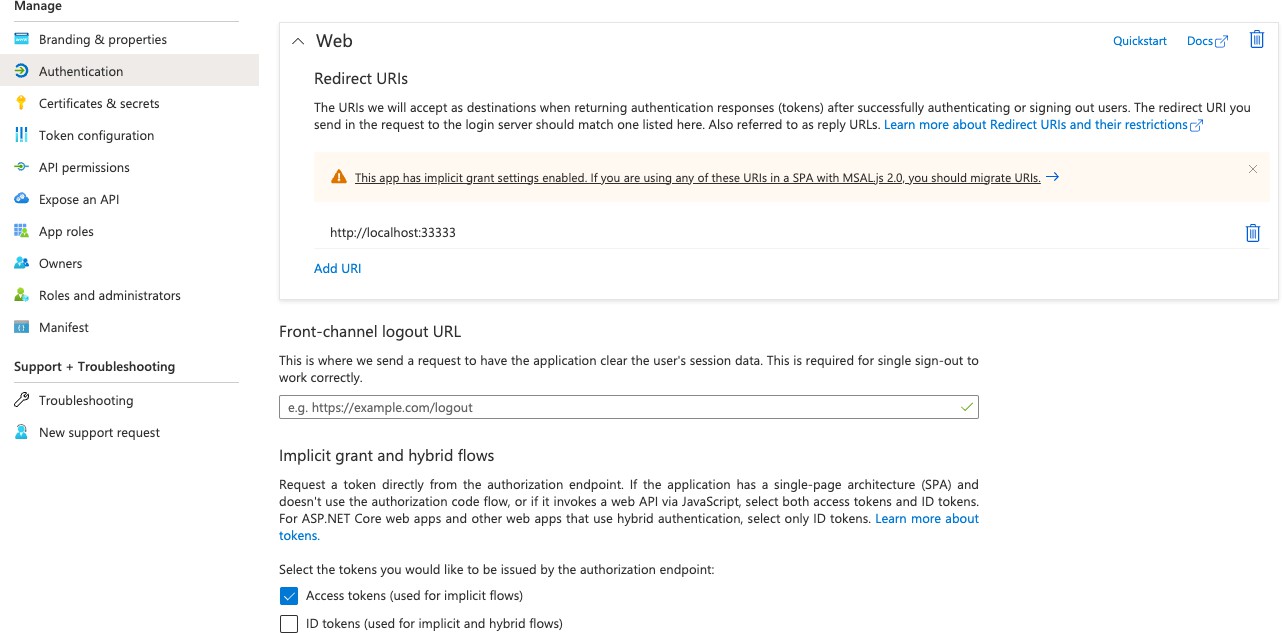
On the app registration, select Access tokens (used for implicit flows) in the Authentication section.
-
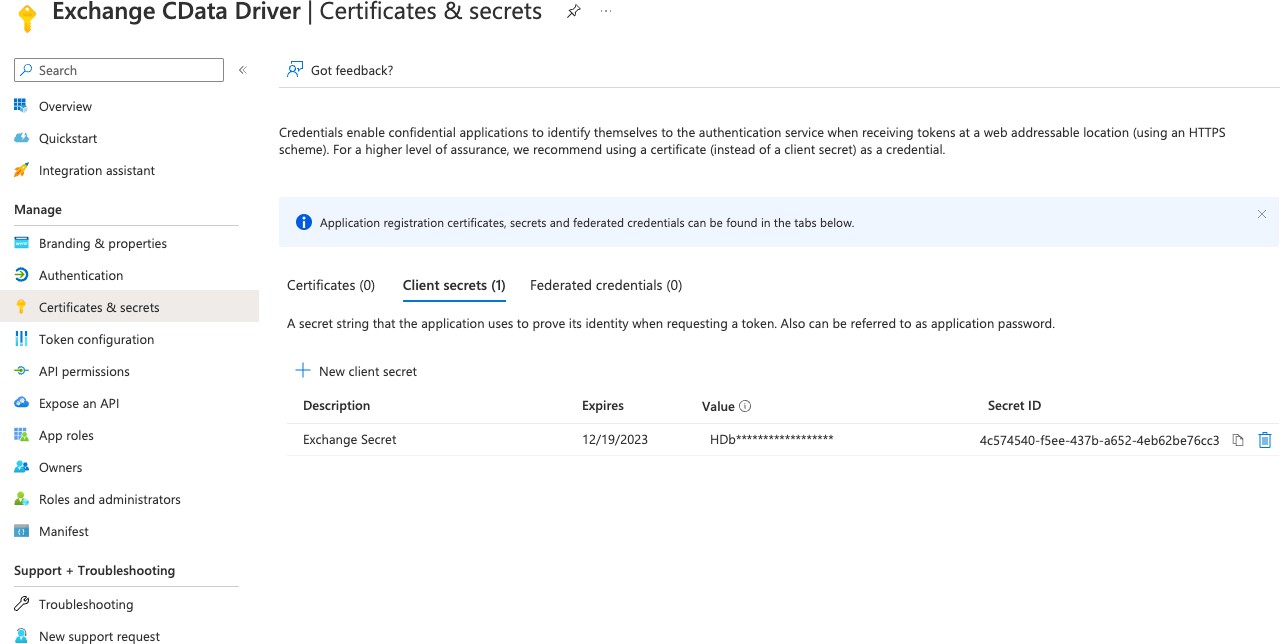
Navigate to Certificates & secrets and create a client secret value
Note
Be sure to copy the Client secret value and store it where you can access it* when configuring the Vinyl steps.
-
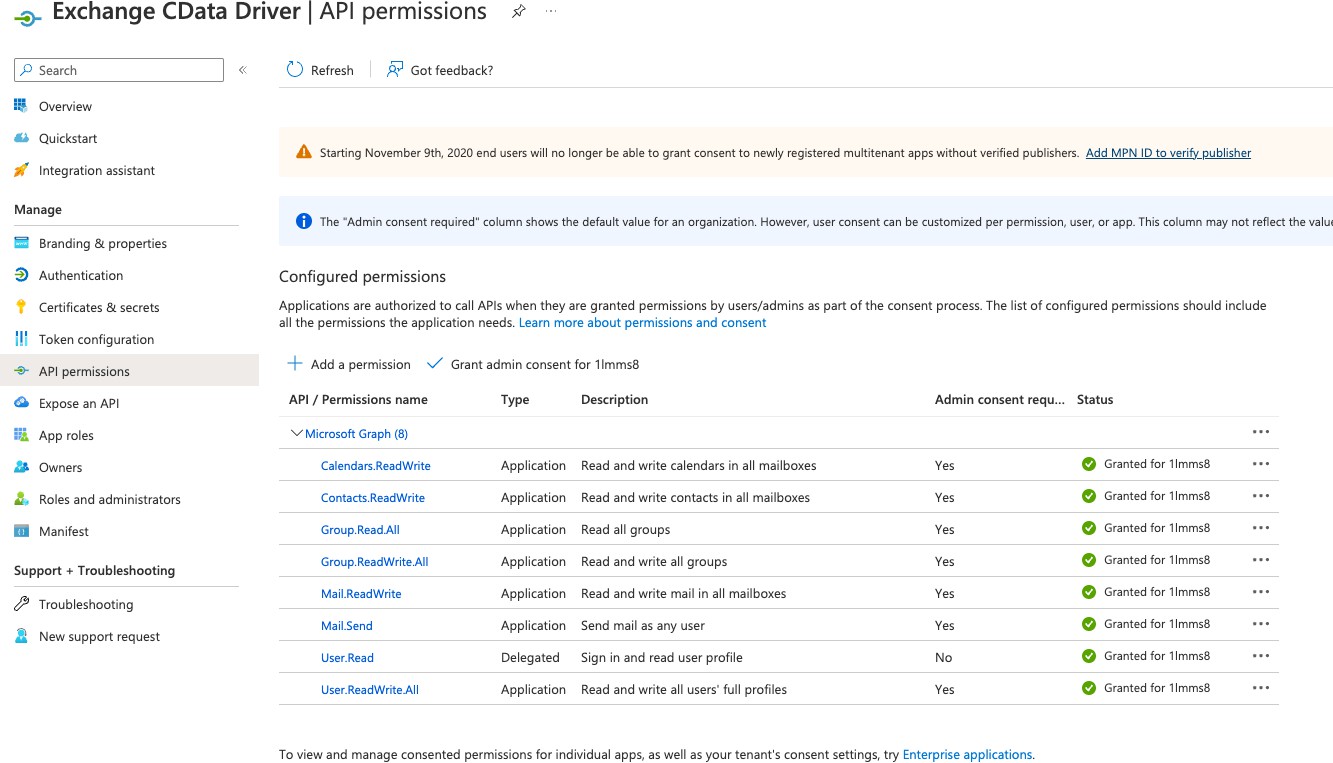
Navigate to API permissions and select Microsoft Graph permissions. There are two distinct sets of permissions - Delegated and Application permissions. The permissions used during client credential authentication are under Application Permissions. Select the applicable permissions you require for your integration.
-
Configure the following API permissions, as well as grant admin consent to these permissions.
Configure in Vinyl
Create an OAuth Security Provider
-
Navigate to the Vinyl IDE
-
Click the Security Providers button
-
Click the + User Authentication button
-
Assign the Name as something identifiable. For example: Microsoft Exchange Connector
-
Set the Type to OAuth
-
Set the Authentication Type to OAuth
-
Set the OAuth Grant to Client Credentials
-
Set the OAuth Client Authentication to Basic
-
Set the OAuth Resource Authentication to Bearer
-
Set the Token Owner to Client
-
Click the + Endpoint button and create a record:
-
Type = Token Endpoint
-
URL = https://login.microsoftonline.com/{{ TenantID }}/oauth2/v2.0/token
Note
Replace the TenantID in the URL string provided accordingly

-
-
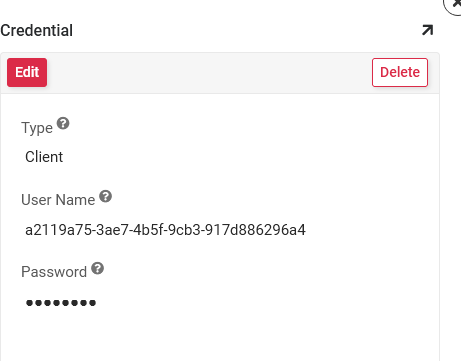
Click the + Credentials button and create a record using the Application (client) ID value created in Azure. This information is stored on the Azure application's Overview page:
-
Set the Type to Client
-
Provide the User Name. This is the Application (client) ID value found on the Azure application Overview page.
-
Provide the Password. This is the Client Secret value created previously.
-
Click the Save button
-
-
Click the + Property button and create a Scopes record:
-
Set the Parameter to Scopes
-
Set the Value to the default permissions value for Microsoft Graph

-
-
Check the Enabled field in Provider Settings to enable this as a security provider
Create the Microsoft Exchange Data Server
-
Navigate to the Vinyl IDE
-
Click the Data Servers button
-
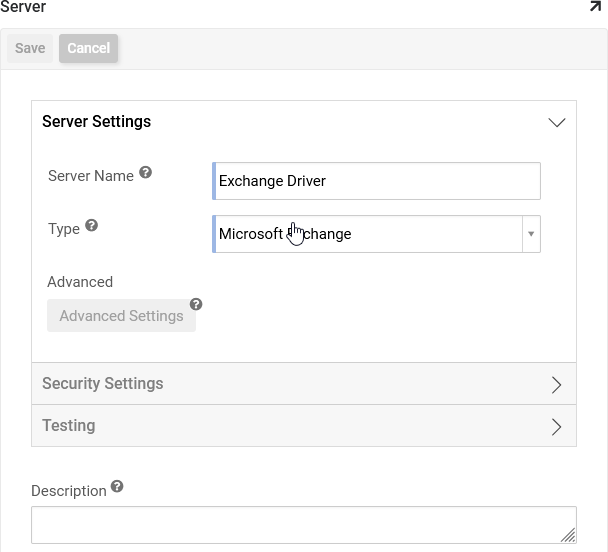
Click the + Server button
-
Assign a Server Name. For example: Exchange Driver
-
Set the Type to Microsoft Exchange
-
Click to expand the Security Settings
-
Set the Security Provider to the Security Provider we created. For example: Microsoft Exchange Connector
-
Click the Save button
-
Click to expand the Server Settings
-
Click the Advanced Settings button
-
In the Advanced field, you need to specify a User from the Tenant to whom you wish to access Outlook resources. The format should be: UserID={{ UserEmail }}
- If you have multiple Tenants configured, here you will need to specify which tenant as well. If not specified, your default Tenant will be used.

Link Exchange Data Server to Application
In this section, we will link the Exchange Data Server source we created to our Vinyl app.
-
From your Vinyl app, navigate to the App Workbench
-
Click the Data Sources tile
-
Click the + Source button
-
Select Link to existing source
-
Click Next
-
Locate the Exchange Driver
-
Check the Selected field
-
Click the Link 1 Source button
-
Click Done
-
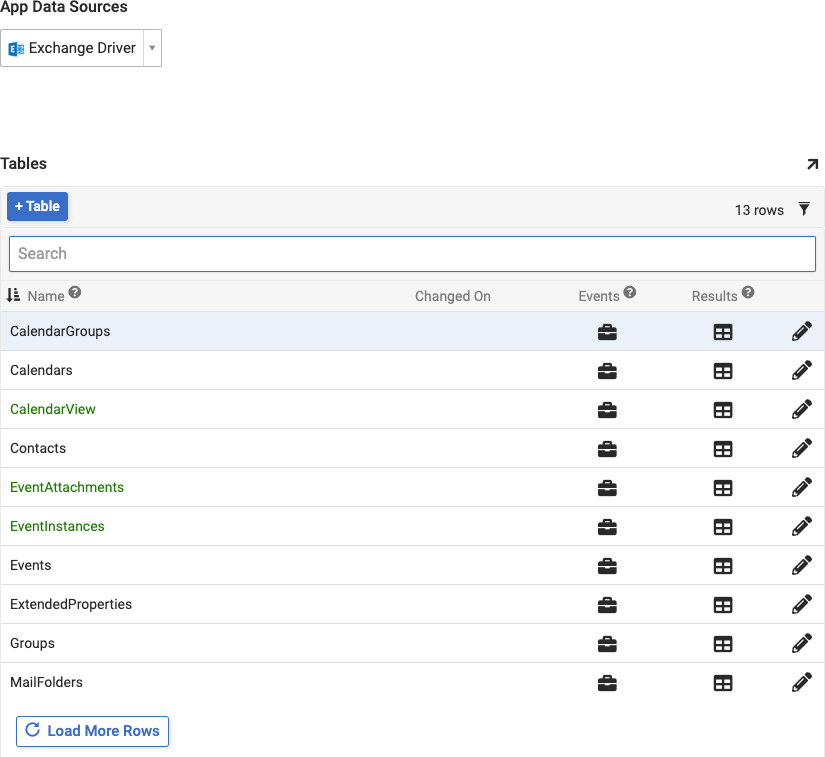
Click the Tables tile
-
Select the Exchange Driver as the App Data Sources value
-
Confirm you can now view all Tables associated with the Exchange Driver data source for the specified user