Microsoft SharePoint OAuth Connection Guide
Prerequisites
- You must be on Vinyl version 3.3 or later
- You must have a Microsoft Azure account
Create an OAuth Security Provider
Here you will create an OAuth security provider in Vinyl.
- Navigate to the Security Providers section from the IDE, and create a new security provider using the + Data Source Authentication button
-
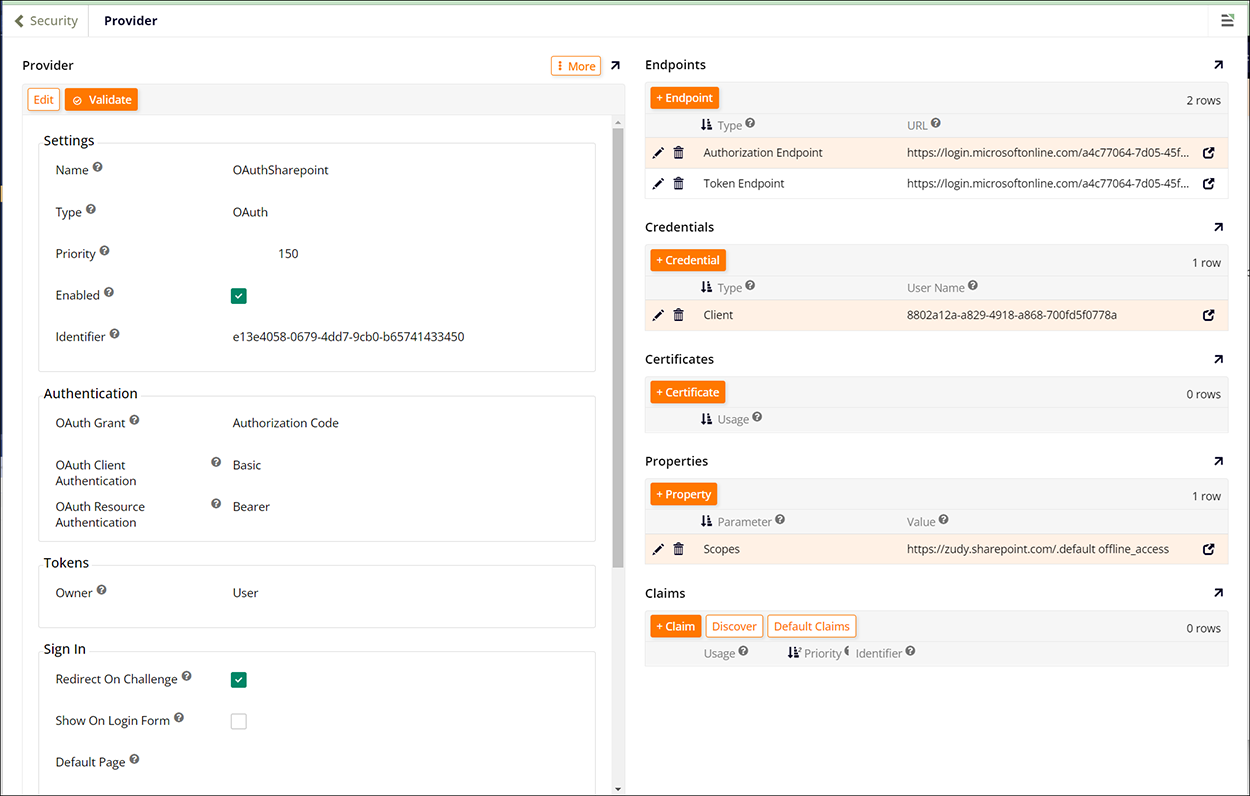
Provide the following details:
- Name - Identifies the Security Provider and appears in the URL. Example: OAuth
- Type - OAuth
- Enabled - check to enable this security provider
- OAuth Grant - Authorization Code
- OAuth Client Authentication - Basic
- OAuth Resource Authentication - Bearer
- Redirect on Challenge - True
-
Click Save
Create Microsoft Azure App Registration
Next you will register an app in Microsoft Azure and further configure the OAuth security provider in Vinyl.
- Navigate to portal.azure.com and login
-
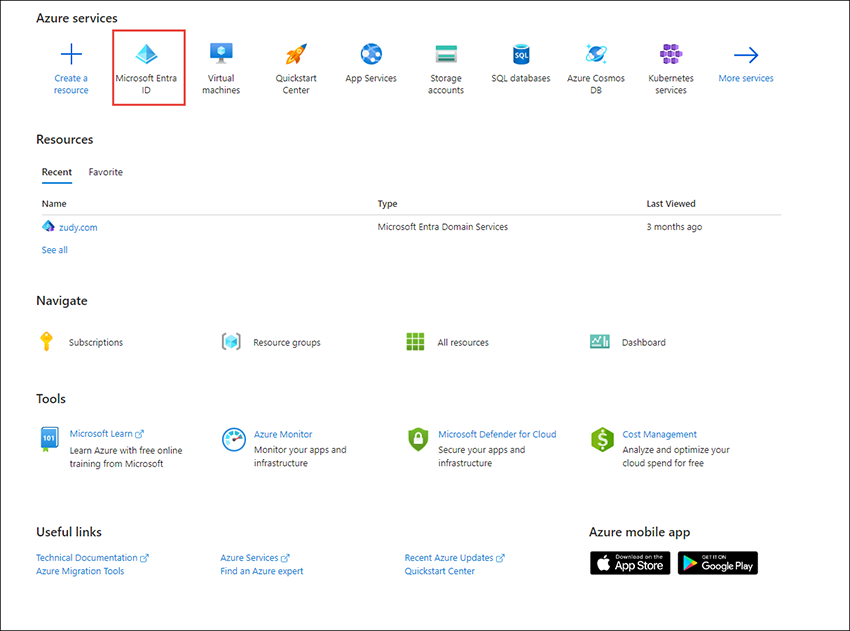
Click on Microsoft Entra ID
-
Navigate to App registrations
- Click New registration
- Assign an App Name. Example: OAuth
-
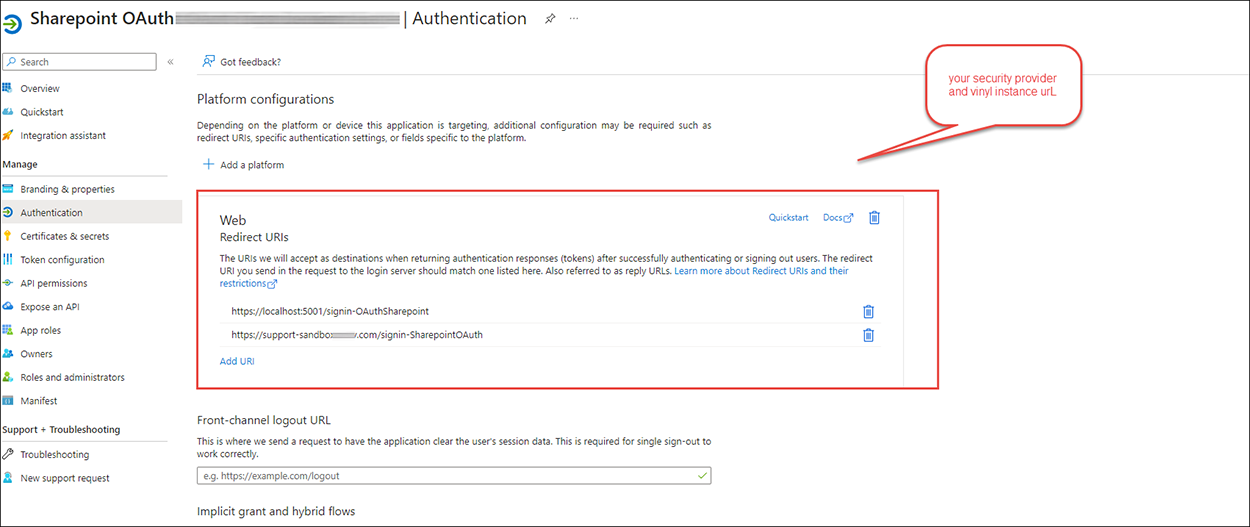
In the Redirect URI (Optional) section:
- Select Web from the Select a platform list
- Enter the URI for the security provider on the Vinyl instance. The format of the redirect URL should be
https://<Vinyl-Instance>/signin-<Security-Provider-Name>.
-
Click Register
- Click API permissions
- Click Add a permission
- Click the SharePoint tile
- Select the Delegated permissions option
- Expand AllSites
-
Check to enable the following permissions:
- AllSites Manage
- AllSites Read
- AllSites Write
-
Exand Project under permissions
- Check to enable ProjectRead and ProjectWrite
- Click the Add Permissions button
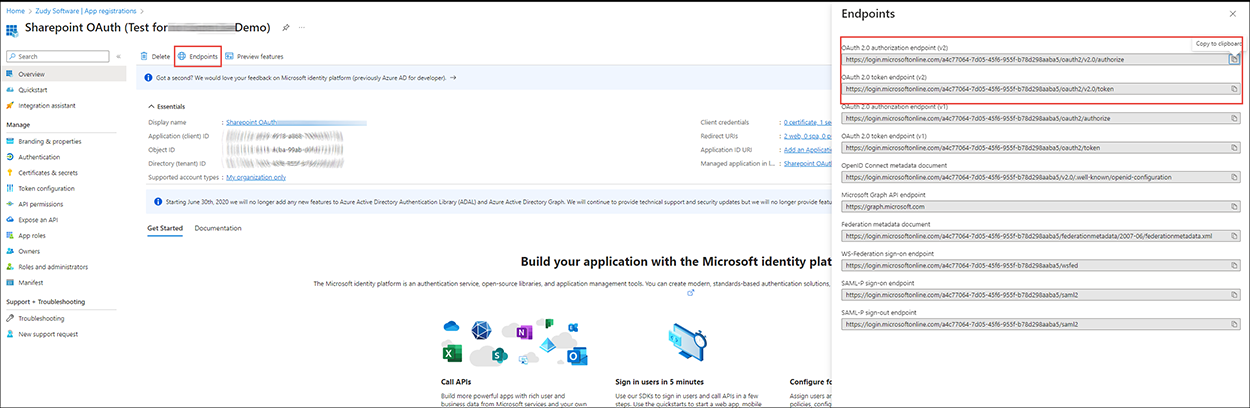
- Click Overview
-
Click the Endpoints tab
- The Endpoints screen contains values needed during the security provider Endpoints configuration in Vinyl
-
Click Add a certificate or secret under Client credentials
- Click + New client secret
- Enter a Description
- Select an expiration date
-
Click the Add button
- The Client secret Value will be needed for Credential configuration in Vinyl
-
Navigate back to the provider detail in Vinyl
-
Click + Endpoints on the Enpoints panel and configure the following endpoints:
- Authorization Endpoint:
https://login.microsoft.com/<Directory ID>/oauth2/v2.0/authorize/ - Token Endpoint:
https://login.microsoft.com/<Directory ID>/oauth2/v2.0/token/
- Authorization Endpoint:
-
Click + Credential:
- Type - Client
- User Name - Application (client) ID from Microsoft Azure
- Password - Client secret Value from Microsoft Azure
-
Click Save and exit the popup
- Click + Property from the Properties panel
- Enter the URL in the Value field. The value for the URL should be
https://<companyname>.sharepoint.com/.default offline_access - Click Save
- Close the popup
Create a Microsoft SharePoint Datasource
Lastly you will create a Microsoft SharePoint datasource in Vinyl and import the SharePoint data.
- Navigate to the IDE
- Click Data Servers
- Click the + Server button
- Enter a name in the Server Name field. Example: SharePoint
- Select Microsoft SharePoint from the Type list
-
In the Url field, enter the full path to the company SharePoint directory you're accessing. The format of the URL should be
https://<companyname>.sharepoint.com/sites/<directory>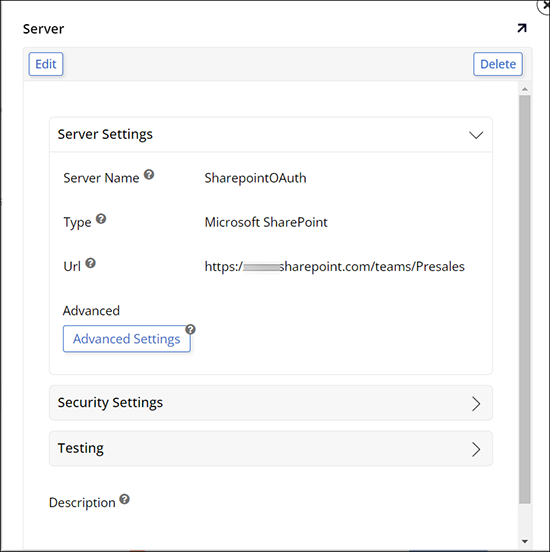
-
Expand Security Settings
- Select the OAuth security provider configured from the Security Provider list
- Click Save
- Close the popup
- Click Details in the right panel
- Click the Import button
- Follow the OAuth Flow
- Click Views tab
- Click the Import Schema button on the schema you are looking to import. Example: Lists
- Navigate to the IDE
- Click Data Servers
- Click Details in the right panel
- Click the Logic button
- Click Results icon for the imported content to confirm the data