MongoDB Connection Guide 3.3
Overview
This guide describes the system requirements and instructions for connecting Vinyl to a Mongo database server.
To connect your servers, you must have Vinyl 3.3+ installed.
System Requirements
Database Server
Mongo Database Server
Client Web Browser
-
Chrome TM 60 or newer
-
Firefox ® 55 or newer
-
Safari ® 11.0.2 or newer
Connection Instructions
Adding a Server
-
Navigate to the Vinyl IDE
-
From the Connect menu, click the Data Servers button
-
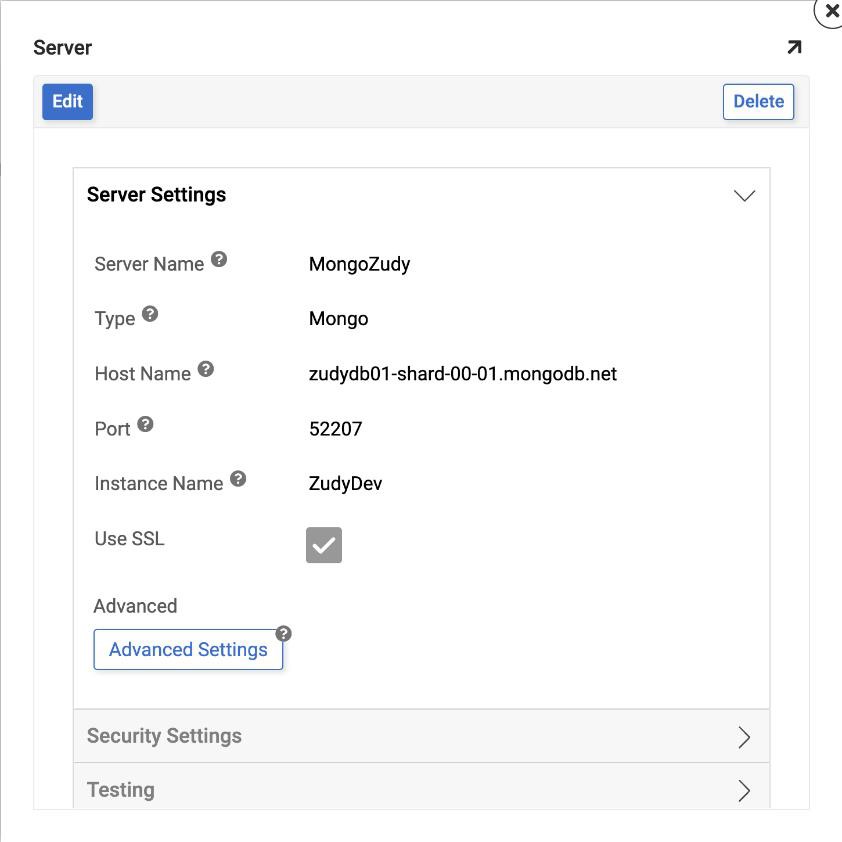
Click the + Server button on the top left of the Data Servers panel. This will bring up the Add Server page.
-
Server Name: Identifiable name for server connection
-
Type: Mongo
-
Host Name: Host URL associated with MongoDB Database instance
-
Port: Will populate with 27017 but double check server settings to see if it is different from default port (in this example, objectrocket.com uses 52207 instead of default)
-
Instance Name: Name of your Mongo instance
-
Use SSL: Check server settings, like Port, this can vary
-
User Name/Password: Credentials associated with MongoDB Database instance
-
-
Click Save to complete server connection
-
From Testing, click Test Connection to ensure connection works properly
Importing Database
-
Navigate to the Vinyl IDE
-
From the Connect menu, click the Data Servers button
-
Locate the Mongo data server connection created and select it
-
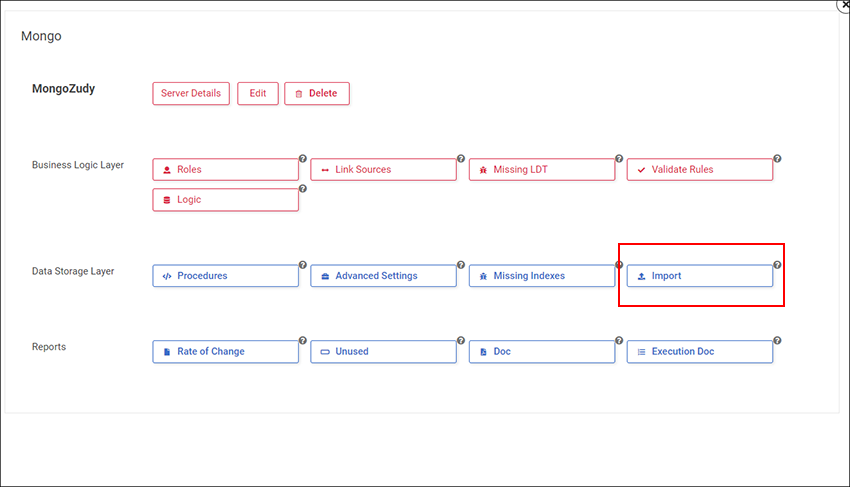
Click the Details button from the Mongo data server entry in the right-hand panel

-
Click the Import button
Create a Seed Record for the Database
-
In the Dev Mongo database instance add a seed record fully populating all columns
-
RDP on the App Server and create a folder that won't be erased for storing an output of your schema
-
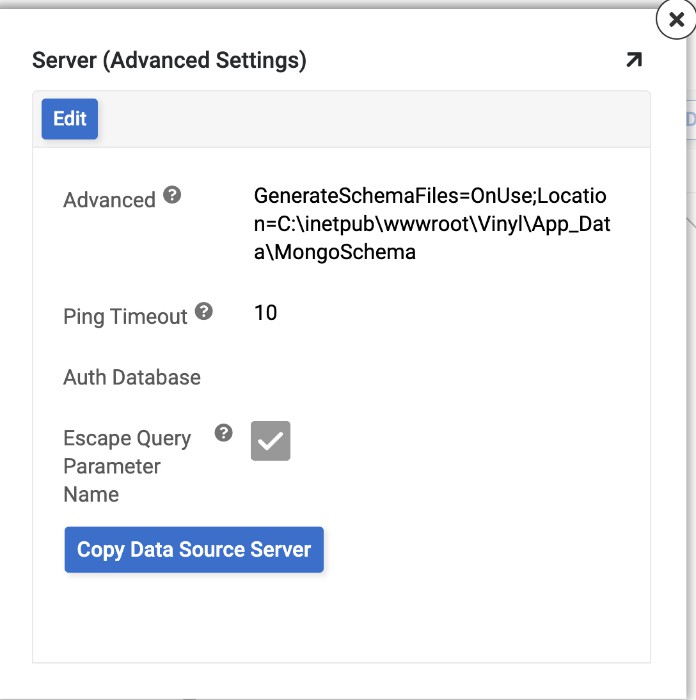
In Vinyl Dev, go to the IDE > Data Servers and locate the entry for the Mongo Data Server. Click Details > Advanced Settings and add the following Parameters to the Advanced field, making sure to point to the folder created in Step 2: GenerateSchemaFiles=OnUse;Location={{ YourFilePath }}
-
Stop and Start IIS
-
In Vinyl run the Results of each of the collections. Back in your App Server folder you should see a {{ collectionname }}.rsd file generated.
-
Open the {{ collectionname }}.rsd file in your preferred text editor program and verify the schema looks correct
-
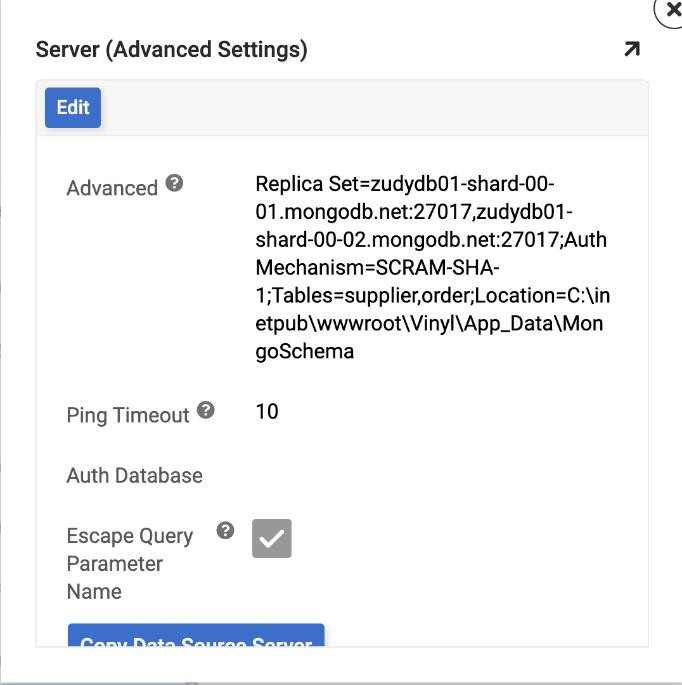
Now back in Vinyl, remove the additional Parameters added in Step 3 and replace them with the following: Tables={{ CollectionName }};Location={{ YourFilePath }}
- If you have more than one Collection, in the Table= Parameter make sure to separate these with a comma
-
Stop and Start IIS