MySQL Connection Guide
Overview
This guide describes the system requirements and instructions for connecting Vinyl to a MySQL database server.
This guide assumes you have an existing MySQL database that you are looking to connect to Vinyl.
To connect your servers, you must have Vinyl 3.3+ installed.
System Requirements
Database Server
MySQL Database Server
Client Web Browser
-
Chrome: 84+
-
Firefox: 73+
-
Safari: 13.0.1+
-
Edge: 84+
Connection Instructions
Configure a Data Server in Vinyl
-
Navigate to the Vinyl IDE
-
From the Connect menu, click the Data Servers button
-
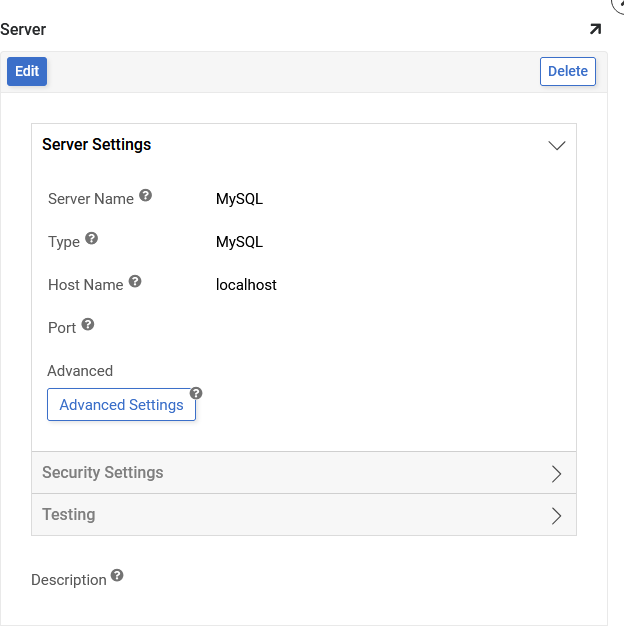
Click the + Server button on the Data Servers panel. This will bring up the Server page. Provide the following information:
-
Server Name: Identifiable and unique name for the server connection
-
Type: MySQL
-
Host Name: The host name for your MySQL server
-
Port: The port number for the server. The default port is 3306.
-
User Name: Credentials associated with MySQL server
-
Password: Credentials associated with MySQL server
-
Advanced Settings: Includes the Ping Timeout setting, which determines the amount of time (in seconds) that Vinyl will wait for a ping back from the server before declaring a timeout
-
-
Click Save to complete server connection
-
Expand Testing and click Test Connection to ensure connection works properly
Create a Data Source in Vinyl
-
Navigate to the Vinyl IDE
-
From the Connect menu, click the Data Servers button
-
Locate the MySQL Data Server created in the prior step, and select it
-
Click the + Source button
-
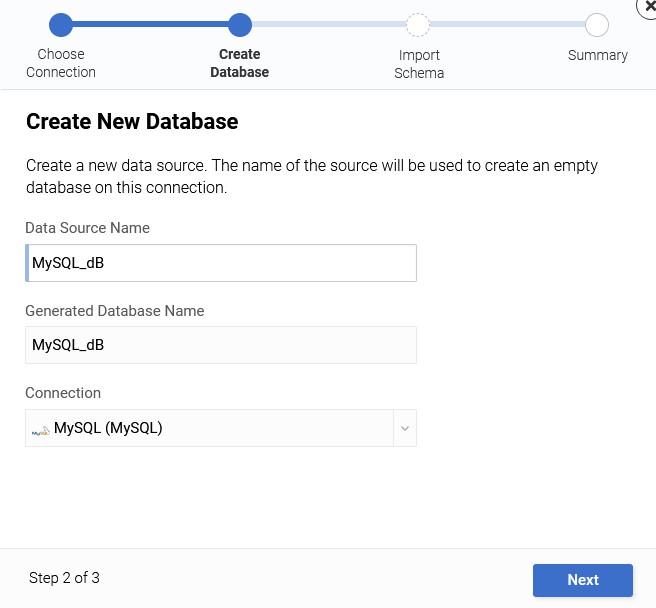
Click the + Create Database button
-
To create a new data source:
-
Provide an identifiable name for the Data Source Name
-
Confirm Connection is the MySQL server created in prior step
-
-
To connect with an existing data source on server:
- Locate the Named data source, and Select it
-
Click the Next button
-
Click the Done button
Import the Database
-
Click the Details button for the new Data Source
-
Click the Import button
-
Expand Import Capabilities
- Import Pattern: This allows users to import only certain tables by listing them in the box. Prefixes can also be used to only import a subset of tables (for example, MyApp_* will only import tables that start with "MyApp_"). If the space is left blank, it will import all tables
-
Click the Import button
-
Click Proceed to the prompt asking if you want to import physical model into logical
-
The import will be scheduled to run as a background task
-