Quickbooks Online Connection Guide 2.7
Overview
This guide describes the system requirements and instructions for connecting Vinyl to a Quickbooks Online database server.
In order to connect your servers, you must have Vinyl 2.7 installed.
System Requirements
Database Server
Quickbooks Online Database Server
Client Web Browser
-
Chrome TM 60 or newer
-
Firefox ® 55 or newer
-
Safari ® 11.0.2 or newer
Connection Instructions
Adding an OAuth Security Provider
-
Navigate to the Vinyl IDE
-
From the Connect menu, click on the Connect to your enterprise link
-
Click on Security Providers then click Create under User Authentication
-
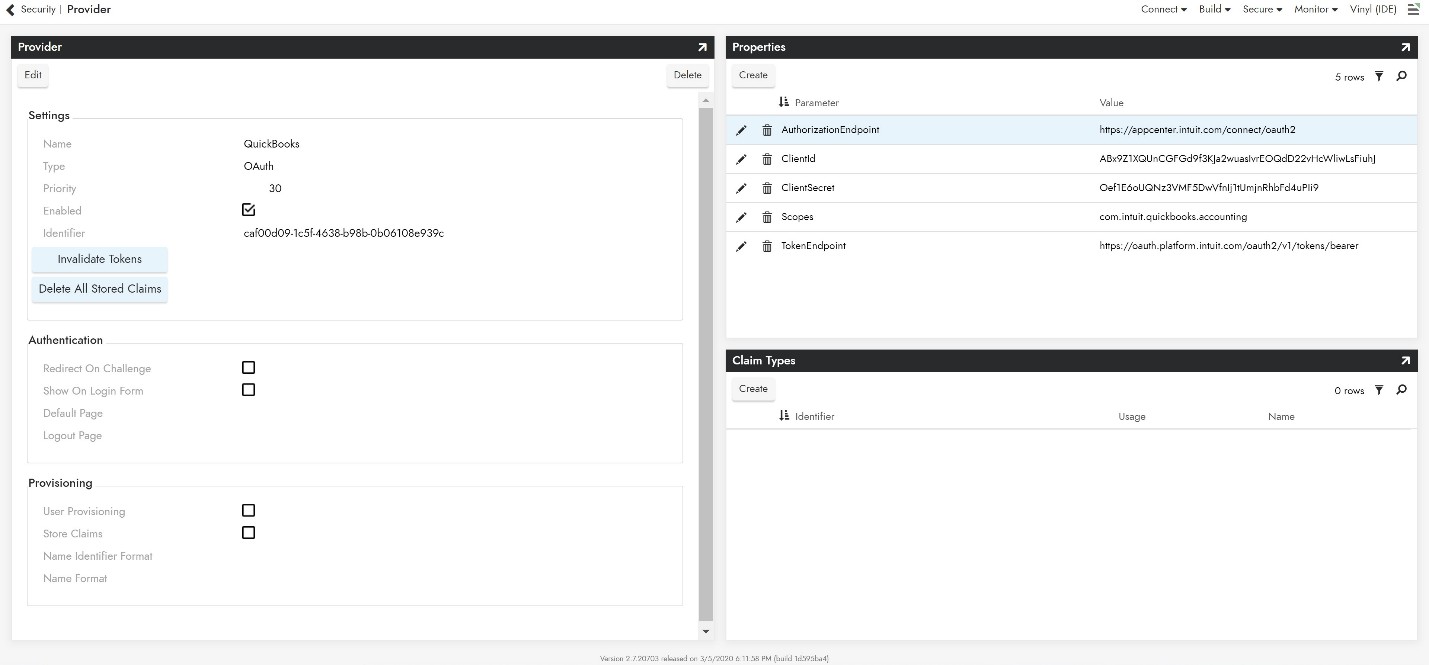
To configure Oauth Security Provider, provide the following information:
-
In Settings panel
-
Name: Recognizable name
-
Type: Select Oauth from the dropdown menu
-
-
In Properties panel
-
Authorization Endpoint:
https://appcenter.intuit.com/connect/oauth2 -
ClientId: Credentials from Quickbooks App
-
ClientSecret: Credentials from Quickbooks App
-
Scopes: com.intuit.quickbooks.accounting
-
-
Visit Google's documentation for further guidance on Scopes. Multiple scopes can be added, separate by a space.
-
Token Endpoint:
https://oauth.platform.intuit.com/oauth2/v1/tokens/bearer
-
-
Click Enabled and Redirect on Challenge.
-
Click Save.
Adding a RDBMS Security Provider
-
Navigate to the Vinyl IDE
-
From the Connect menu, click on the Connect to your enterprise link
-
Click on Security Providers then click Create under Data Source Authentication
-
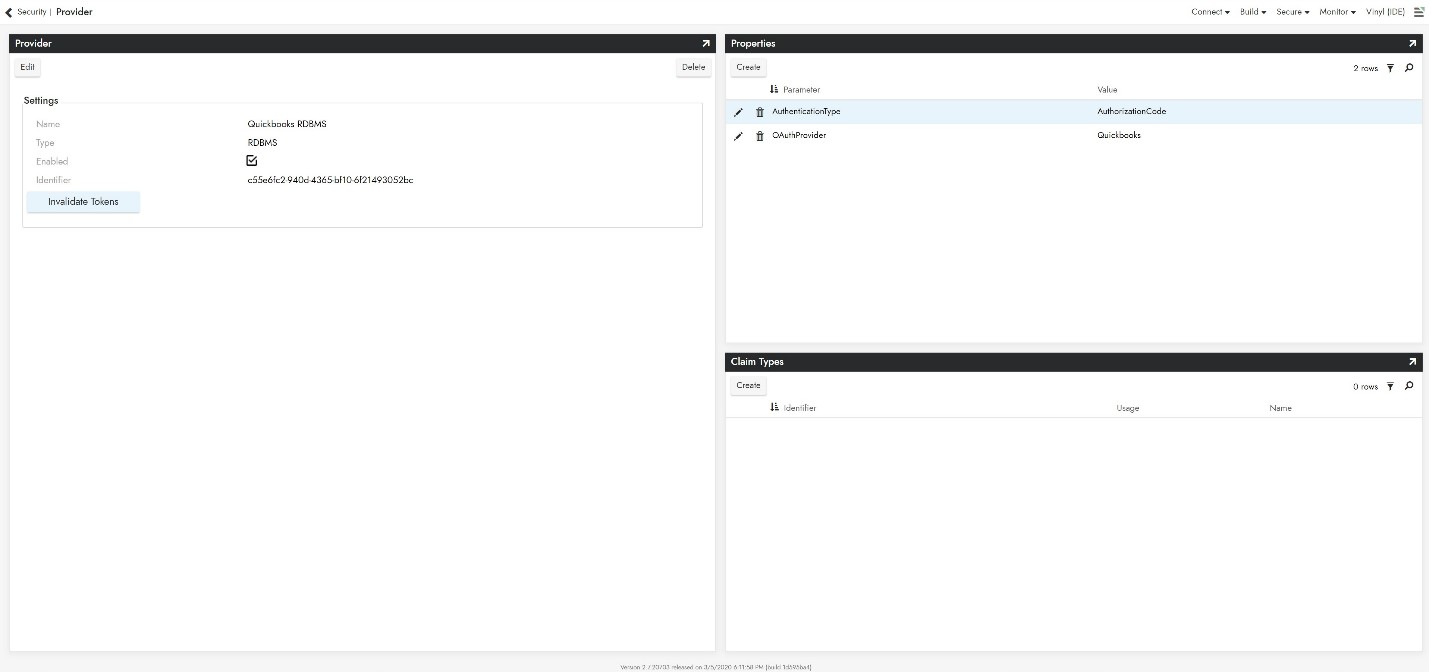
To configure Oauth Security Provider, provide the following information:
-
In Settings panel
-
Name: Recognizable Name
-
Type: Select RDBMS from the dropdown menu
-
-
In Properties panel
-
AuthorizationType: AuthorizationCode
-
OAuthProvider: Oauth Provider created in previous step
-
-
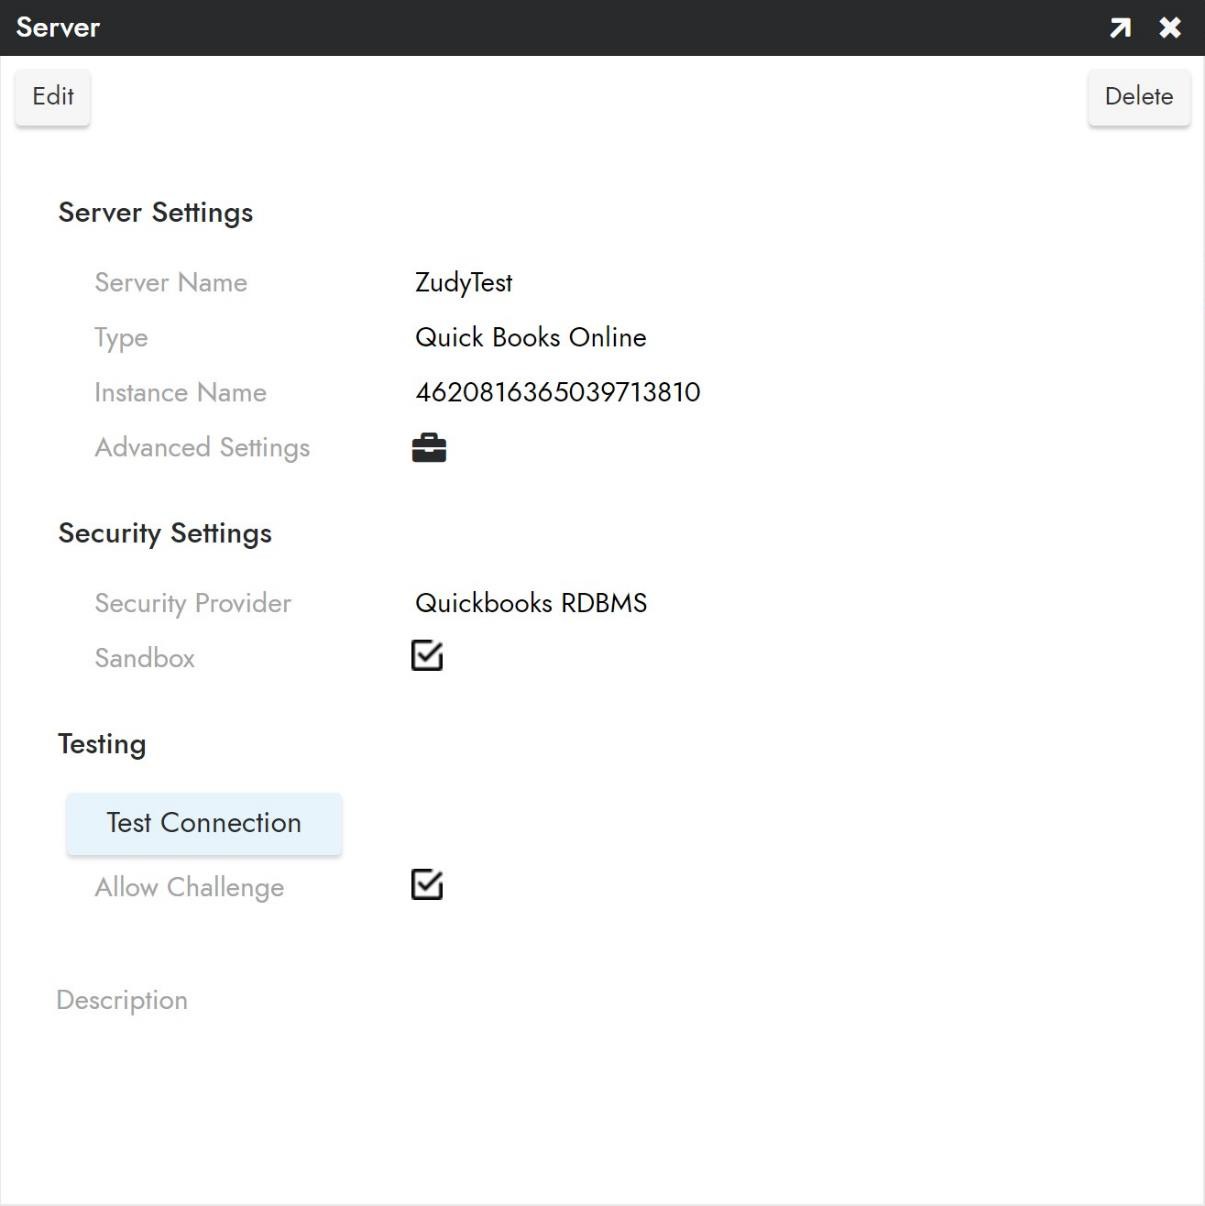
Adding a Server
-
Navigate to the Vinyl IDE
-
From the Connect menu, click on the Connect to your enterprise link
-
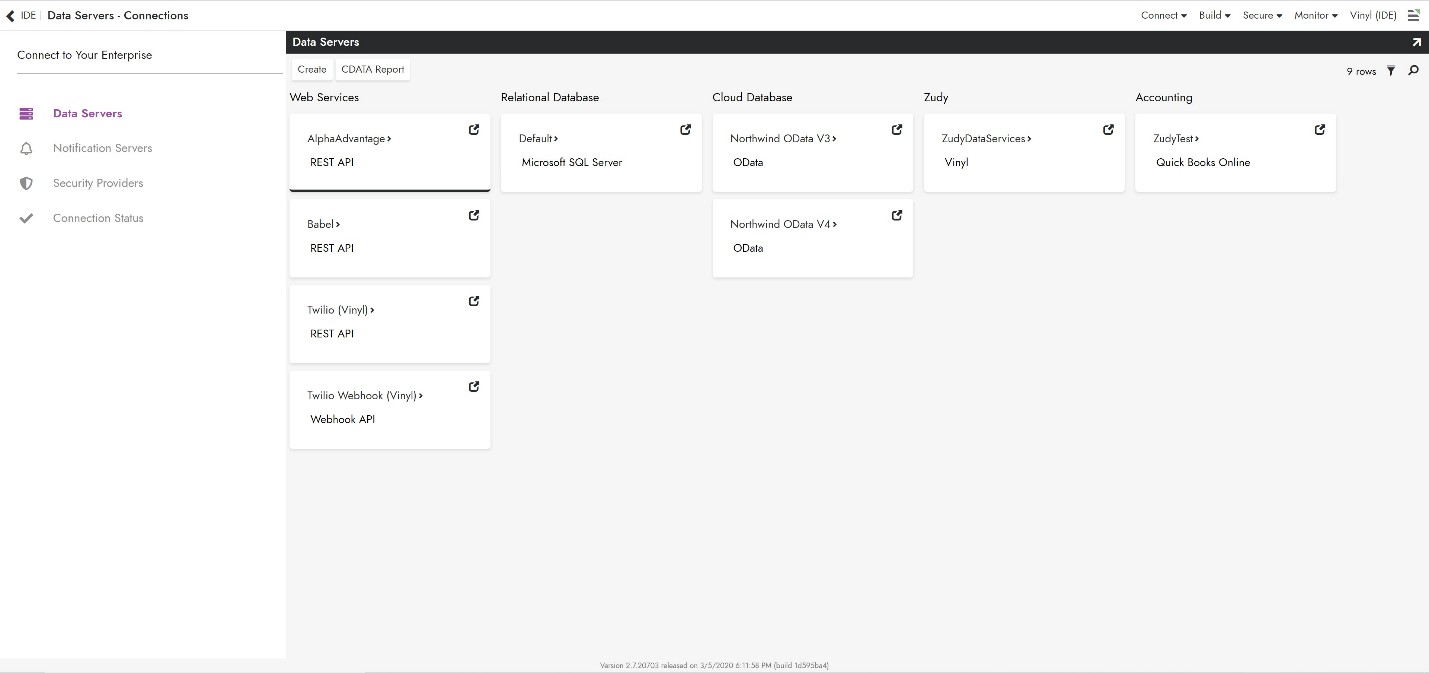
Click the Create button on the top left of the Data Servers panel. This will bring up the Add Server page.
-
To connect to an Quickbooks Online server, provide the following information:
-
Name: An identifiable and unique server name
-
Type: Select Quickbooks Online from the dropdown menu
-
Instance Name: Numeric code identifying instance- found under "company info" in developer.intuit.com
-
-
Security Provider: The RDBMS provider set up in previous step
-
After filling in all necessary credentials, click Test Connection to ensure information in preceding steps is correct, then click the Save button to save the settings.
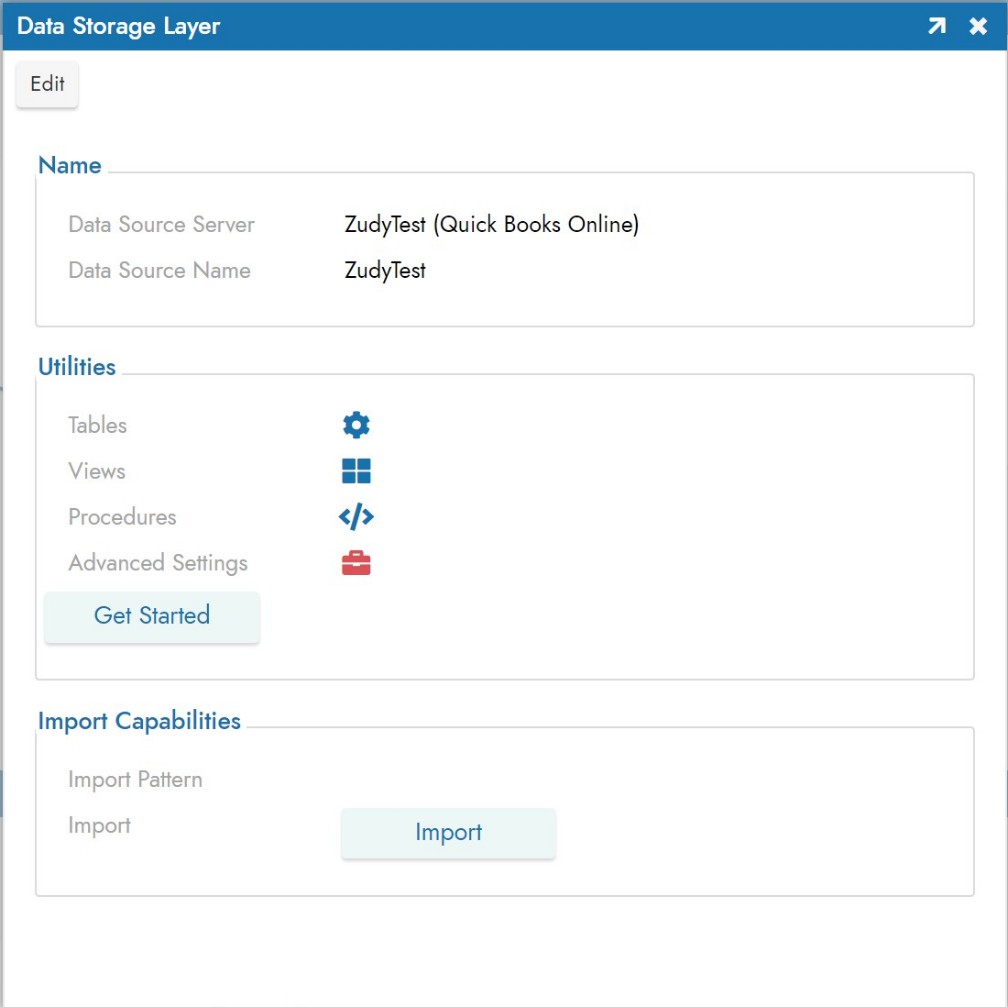
Import Data Source
-
Navigate to Vinyl IDE.
-
Click on Build Your Application then click on Data Storage Layer.
-
Under Account find the Quickbooks Online Database with the name you chose earlier.
-
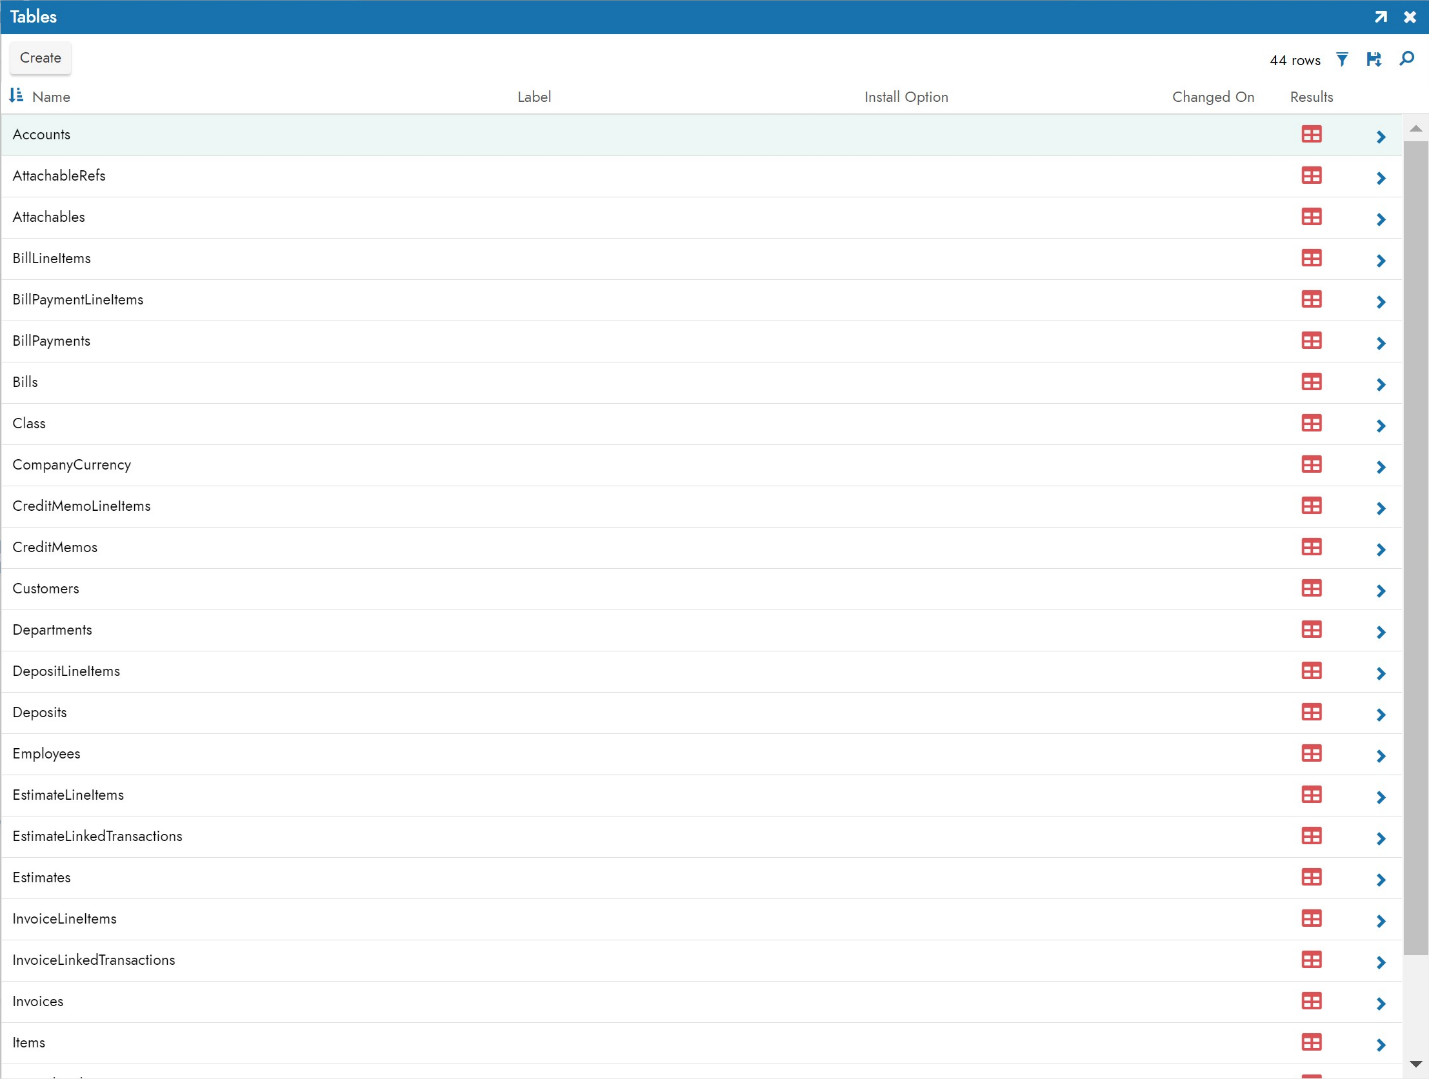
Expand the Quickbooks Online panel and under Import Capabilities click Import.
-
After import, click on Tables to view imported tables from Quickbooks Online Server.