Salesforce ADO. NET Connection Guide
Overview
This guide describes the system requirements and instructions for connecting Vinyl to a Salesforce ADO.NET data source. This connection makes use of an OAuth Security Provider, with the Authorization Code grant type.
To connect your servers, you must have Vinyl 3.3+ installed.
System Requirements
Database Server
Salesforce account with ADO.NET
Client Web Browser
-
Chrome: 84+
-
Firefox: 73+
-
Safari: 13.0.1+
-
Edge: 84+
Connection Instructions
The following step is a prerequisite and should be completed in the Salesforce app or sandbox environment.
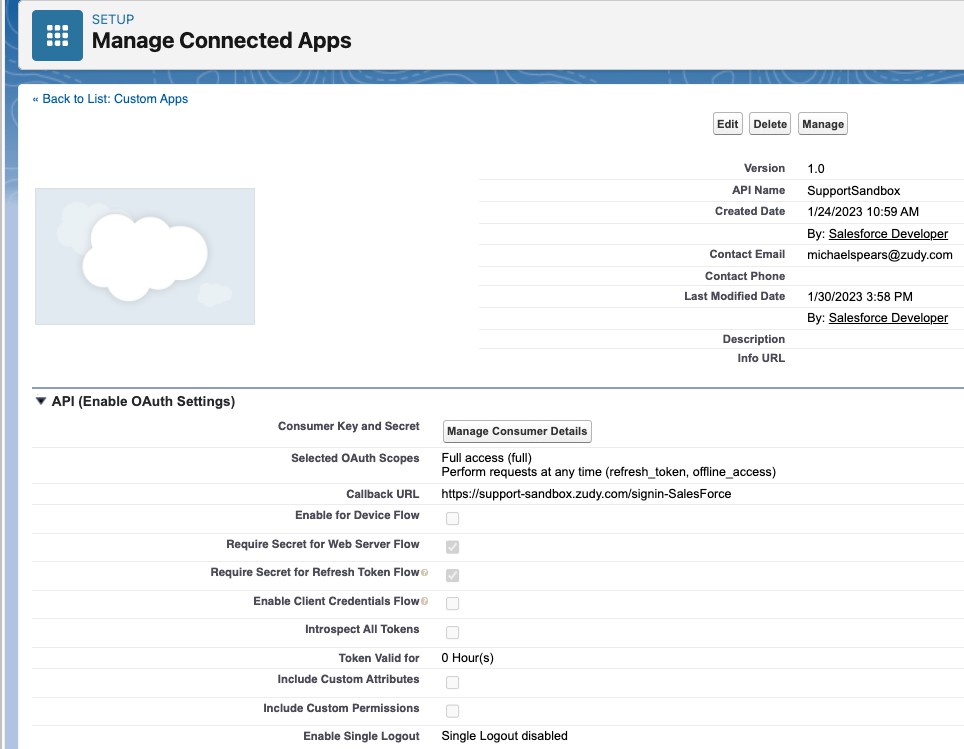
Create a Custom OAuth App in Salesforce
-
Log in to Salesforce.com or your Salesforce sandbox environment
-
From the home page, go to Platform Tools > Apps > App Manager
-
Click the New Connected App button
-
Enter a Name to display to users when they log in to grant permissions to your app, along with a contact Email address
-
Click Enable OAuth Settings
-
Enter a value in the Callback URL field. This should be the URL of your Vinyl instance with a Security Provider appended.
Note
Case sensitivity is important, so the name for the security provider that we create next must match the case sensitivity on the Callback URL.
-
Selected OAuth Scopes should be set to the scope of permissions the application should request from the user.
- Set to "Full access (full)" and "Perform requests at any time (refresh_token,offline_acesss)"
-
Click on Manage Consumer Details to view the Client ID and Secret value. Take note of these values in a location that can be easily referenced when configuring from Vinyl.
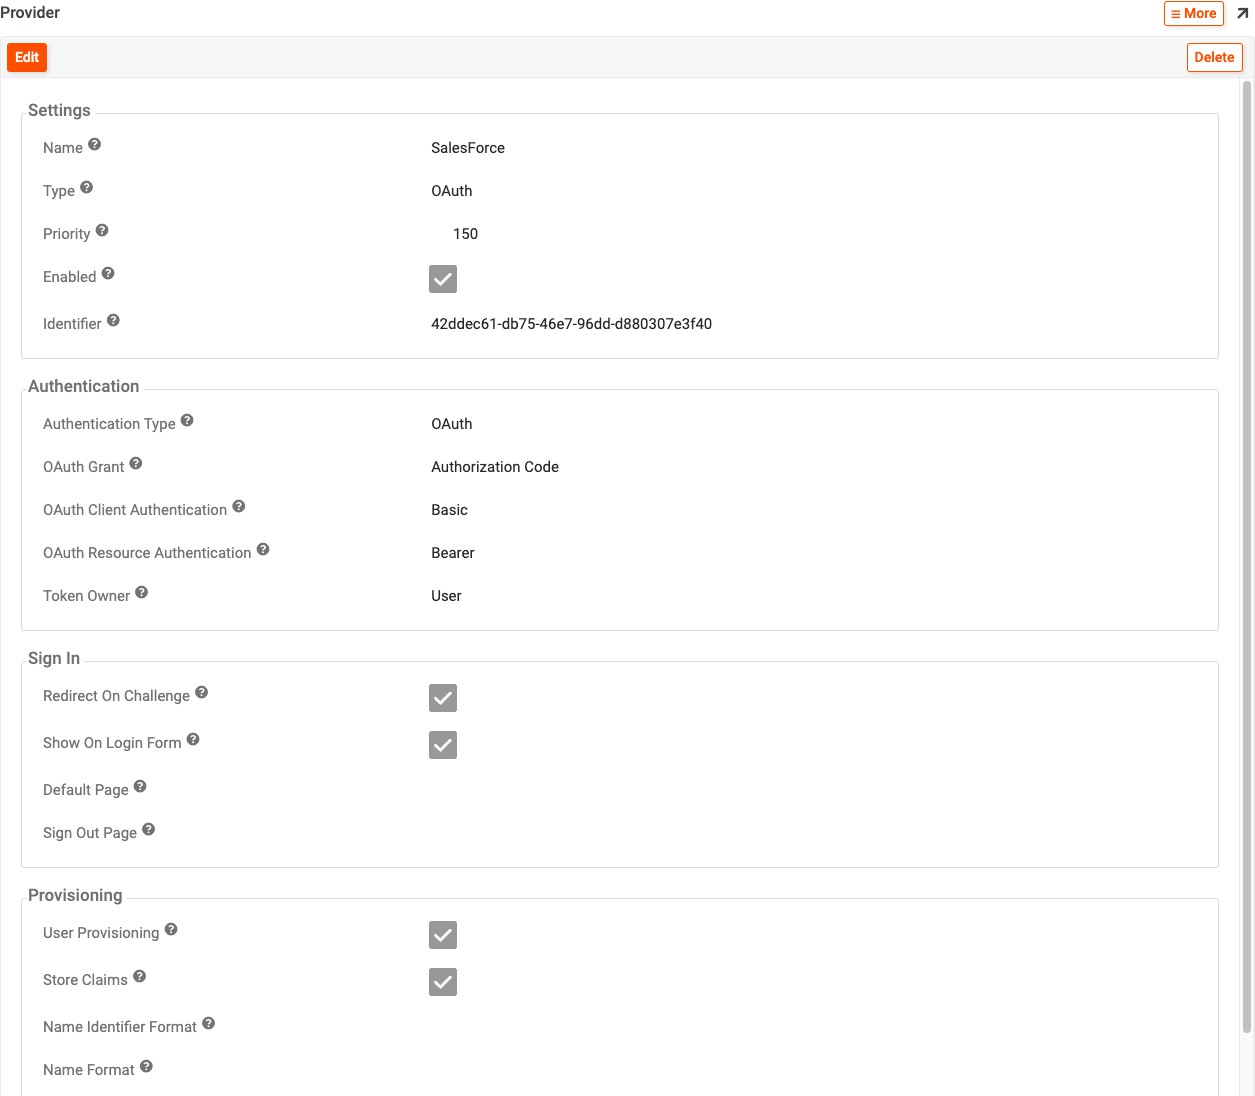
Create an OAuth Security Provider in Vinyl
-
Setup a Security Provider in Vinyl by navigating to the IDE > Security Providers
-
Click the + Data Source Authentication button
-
Provide the following details:
-
Name: Identifies the Security Provider and appears in the URL on occasion. Example: Salesforce
-
Type: OAuth
-
Authentication Type: OAuth
-
OAuth Grant: Authorization Code
-
OAuth Client Authentication: Basic
-
OAuth Resource Authentication: Bearer
-
Token Owner: User
-
Redirect on Challenge: True
-
-
Click + Endpoints and configure the following 3 records:
-
Authorization Endpoint: https://login.salesforce.com/services/oauth2/authorize
-
Token Endpoint: https://login.salesforce.com/services/oauth2/token
-
User Info Endpoint: https://login.salesforce.com/services/oauth2/userinfo
-
-
Click + Credential and create the following record:
-
Type: Client
-
User Name: Client ID from Salesforce
-
Password: Secret from Salesforce
-
-
Click + Claim and create the following 3 records for user provisioning:
-
Name: preferred_username
-
Name ID: preferred_username
-
E-mail Address: email
-

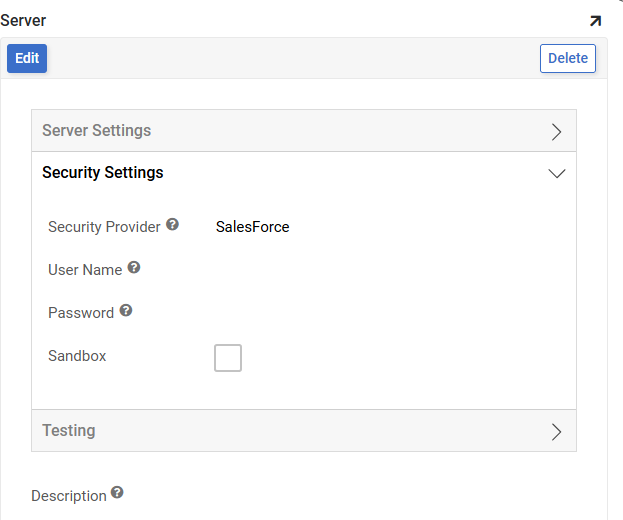
Create the Salesforce ADO.NET Data Source in Vinyl
-
Go to the Vinyl IDE and click Data Servers
-
Click the + Server button to add a new data source
-
Assign a Server Name. This name must match the Callback URL configured in Salesforce. Example: SalesForce
-
Select the Type as Salesforce ADO.NET
-
Expand the Security Settings and set the Security Provider to the one we created. Example: SalesForce
-
Lastly, if you are using a Salesforce sandbox environment, click the Advanced Settings button and configure the OAuth server URL

- Expand Testing and click the Test Connection button to ensure the configuration is working as expected.
Note
An import of the Salesforce tables will need to be performed to access them from within Vinyl.