Salesforce JWT OAuth Connection Guide
Note
This connection guide is the recommended process for Service Account authentication between Vinyl and Salesforce. See the Security Provider - Salesforce / OpenID Connect article if you are looking to configure user level Account authentication.
Prerequisites
- You must be on Vinyl version 3.1.32967 or later.
- You must have a Salesforce account with at least 1 active Salesforce user license and a sandbox environment to connect to.
Limitations
- You can only have one Salesforce JWT connection per Vinyl instance.
Creating a Certificate
Salesforce only accepts RSA SHA256 signed JWTs, so you need an x509 Certificate and its associated private key.
-
Download and install OpenSSL
-
OpenSSL is a full-featured tool for cryptography and secure communication. You can download it for free: https://www.openssl.org/
-
You can also install Git, as it has OpenSSL installed under the hood: https://git-scm.com/
-
-
After OpenSSL is installed, proceed to create a X509 Certificate and Key
-
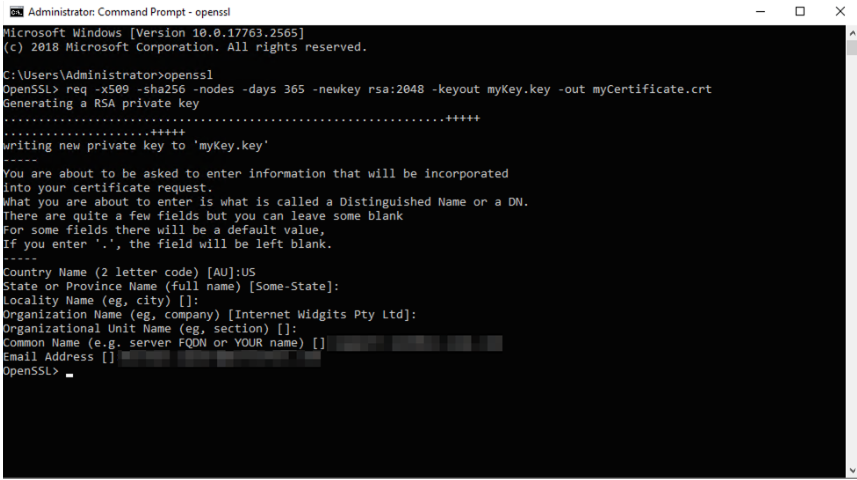
Open a terminal or command line, execute OpenSSL, and then run the following command to create a certificate and key file:
req -x509 -sha256 -nodes -days 365 -newkey rsa:2048 -keyout myKey.key -out myCertificate.crt -
You will be prompted to fill in details like Country, Common Name, or Email Address. You don't need to fill in all the information, but Common Name is mandatory.
-
-
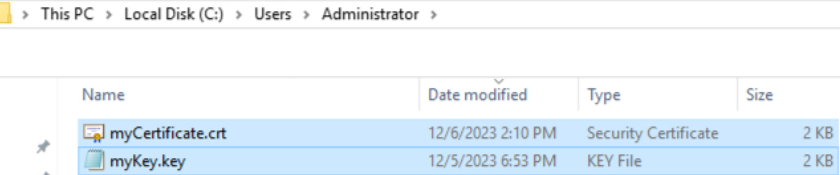
After running the above command, you should find two files created
Note
Be sure to note or copy the Certificate and Key files to a location that is easily accessible
Configuration in Salesforce
Now that we have our Certificate, we need to create a connected app in Salesforce.
Create a Custom OAuth App
- Log into Salesforce.com or your Salesforce sandbox environment
- From the home page, go to Platform Tools > Apps > App Manager
- Click the New Connected App button, and enter the following:
- Connected App Name - The name should contain the name of the system and integration, such as Vinyl Integration to easily identify it, but this can be whatever you wish
- API Name - Let Salesforce populate this based on the Connected App name
- Contact Email - Any email you desire
- Enable OAuth Settings - Check this checkbox, and then the following settings will appear
- Callback URL -
sfdc://oauth/jwt/success - Use digital signatures - Check this checkbox, then upload the myCertificate.crt file we created previously
- Selected OAuth Scopes - Choose "Manage user data via APIs (api)", "Full access (full)", and "Perform requests at any time (refresh_token, offline_access)
- Click Save and then click Continue
- Now that the connected app is created, we need to copy down the Client ID and Client Secret for this app
- On the connected app's main page, click on the button titled "Manage Consumer details". This should open a new page after completing a security prompt, that contains the Client ID and Client Secret for the app. Make note of this as we will need it later.
- Next, we need to adjust the connected app's settings to pre-approve our user
- On the connected app page, click on the "Manage" button at the top of the screen, then on the next page, click the "Edit Policies" button
- In the OAuth Policies section, changed the Permitted Users drop down from "All users may self-authorize" to "Admin approved users are pre-authorized"
- Click Save
- Once the page refreshes, you should see a "Profiles" section near the bottom. Click the "Manage Profiles" button.
- Add the profile you are connecting as, in this example we are using the System Administrator profile
- Click Save
- This completes the Salesforce configuration section
Configuration on the App Server
Now that we have created the app in Salesforce and uploaded our Certificate to it, we need to place the Key file on the app server that Vinyl is running on, to allow Vinyl to access it.
-
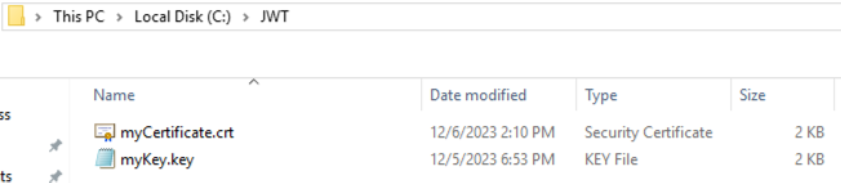
On the application or Vinyl server, create or use an existing folder to place the certificate and key file we generated previously. This example shows a folder created named JWT.
-
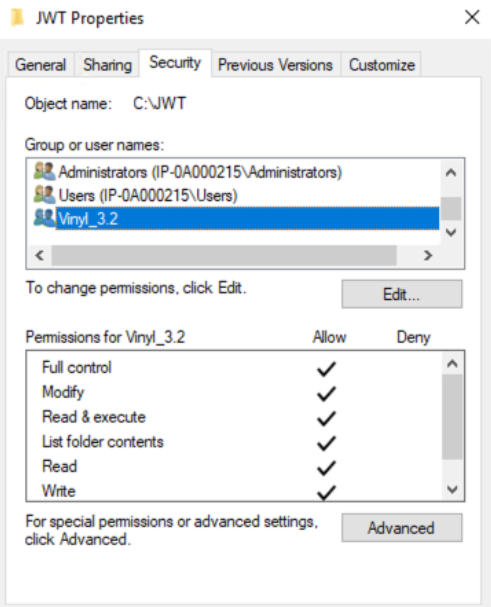
Right click on the folder these files are located in, and click on Properties then the Security tab. Make sure this folder has full control to the application pool that Vinyl is deployed in.
-
This completes the configuration on the application server
Configuration in Vinyl
Create the Salesforce ADO.NET Data Source in Vinyl
Now that we have created the app in Salesforce and uploaded our certificate to it, we can proceed to create the Salesforce data source in Vinyl.
- Go to the Vinyl IDE and click Data Servers
- Click the + Server button to add a new data source
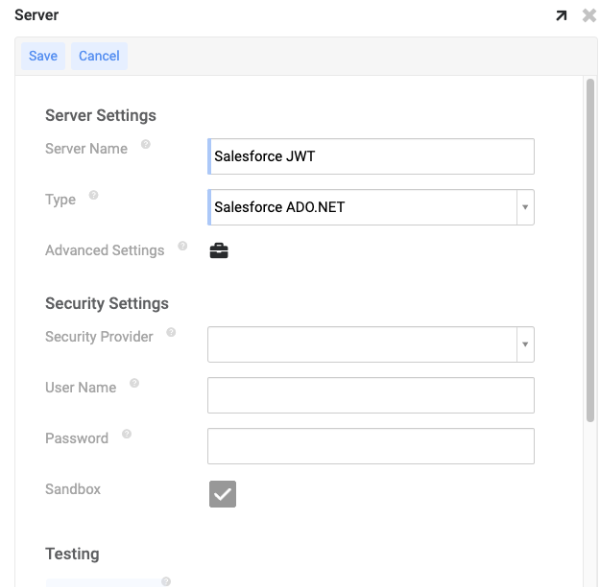
- Assign a Server Name
- Set the Type as Salesforce ADO.NET
-
Click Save. Make sure to check the Sandbox checkbox if you are connecting to a sandbox instance.
-
After the data source is saved, click the Advanced Settings briefcase icon
-
Then click Edit, and expand the Advanced section

-
Configure the following settings:
- AuthScheme - OAuthJWT
- OAuthJWTCertType - PEMKEY_FILE
- OAuthJWTCert -Location of the key file we created earlier, should be in a folder somewhere. For example: C:\JWT\myKey.key
- OAuthJWTIssuer - This is the Client ID value we got from Salesforce previously.
- OAuthJWTSubject - This should be your Salesforce email, or the email of the Salesforce user we are authenticating as.
Note
Input each setting in the Advanced field strung together in one line with no spaces, and separate each setting with a semicolon
(;). Here is an example: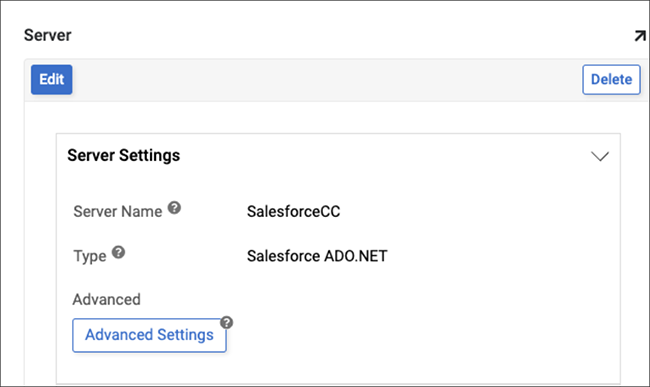
-
Now that is everything is configured, scroll down and test the connection. If everything was configured correctly, you will receive a Success message.
- You can now import tables and access data from Salesforce