SAP with SNC Connection Guide
Overview
This guide describes the system requirements and instructions for connecting Vinyl to SAP using Secure Network Communication (SNC) encrypted authentication.
For more information please see the SAP Help Portal: Configuring the ABAP Connector to use SNC.
System Requirements
Server
-
SAP Cryptographic Library is installed on server
-
sapcrypto.dll exists on server
Client Web Browser
-
Chrome TM 60 or newer
-
Firefox ® 55 or newer
-
Safari ® 11.0.2 or newer
Configuration
Before getting started configuring the Vinyl to SAP connection, first ensure that the SAP Cryptographic Library is installed and the sapcrypto.dll file exists on the server.
Download and install the SAP Crypto Library
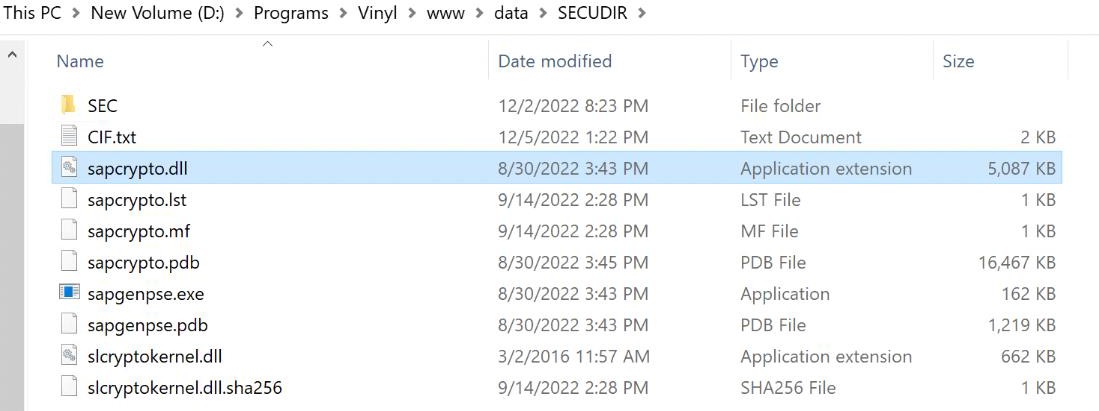
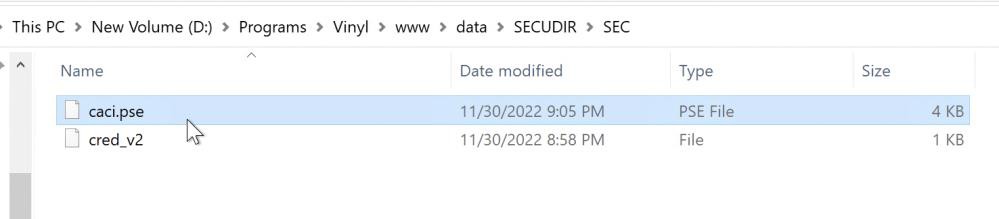
Next you will set an environment variable to a SECUDIR folder. If needed, create a SECUDIR folder in the web app folder system.
Example: SECUDIR = D:\Programs\Vinyl\www\data\SECUDIR\SEC
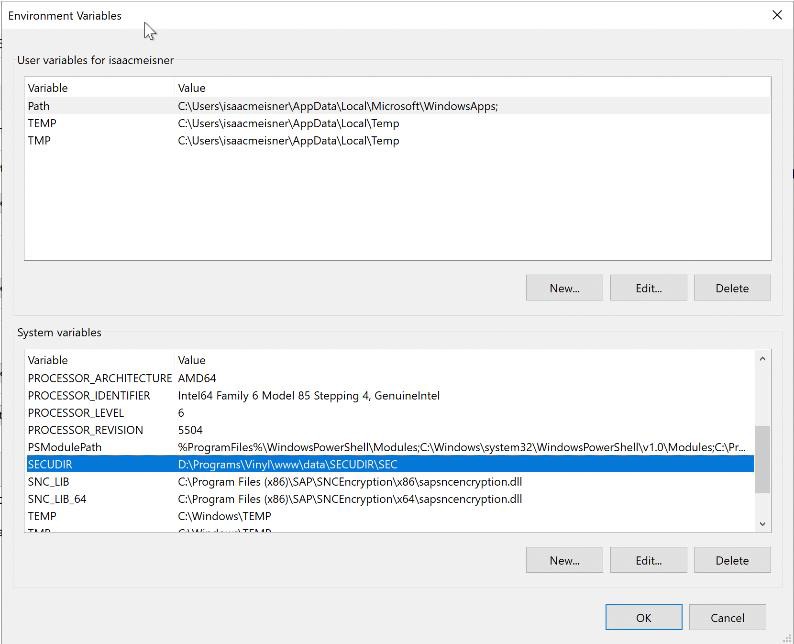
Add SECUDIR to the path.
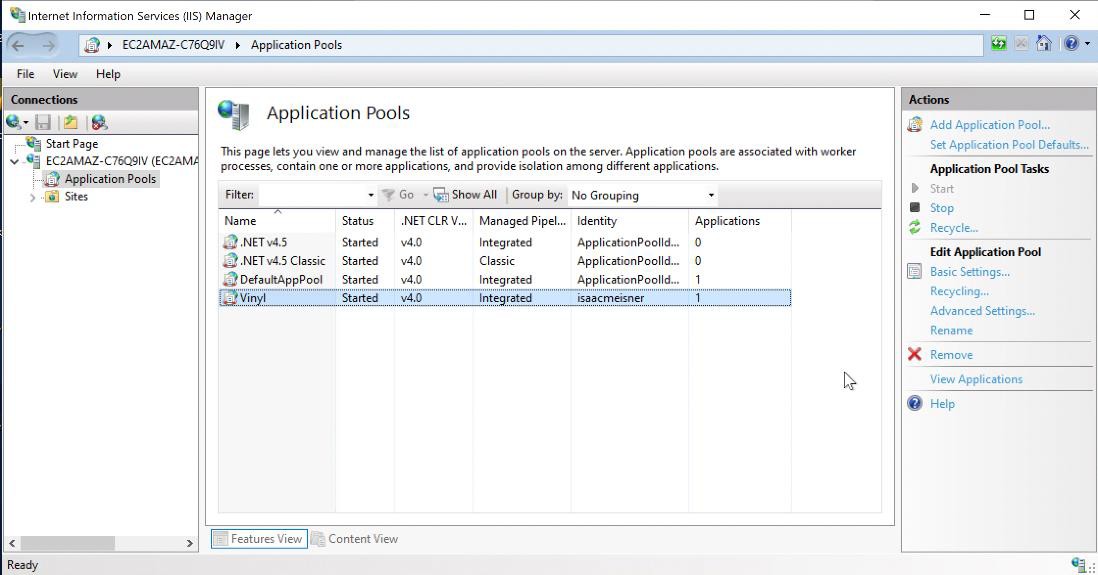
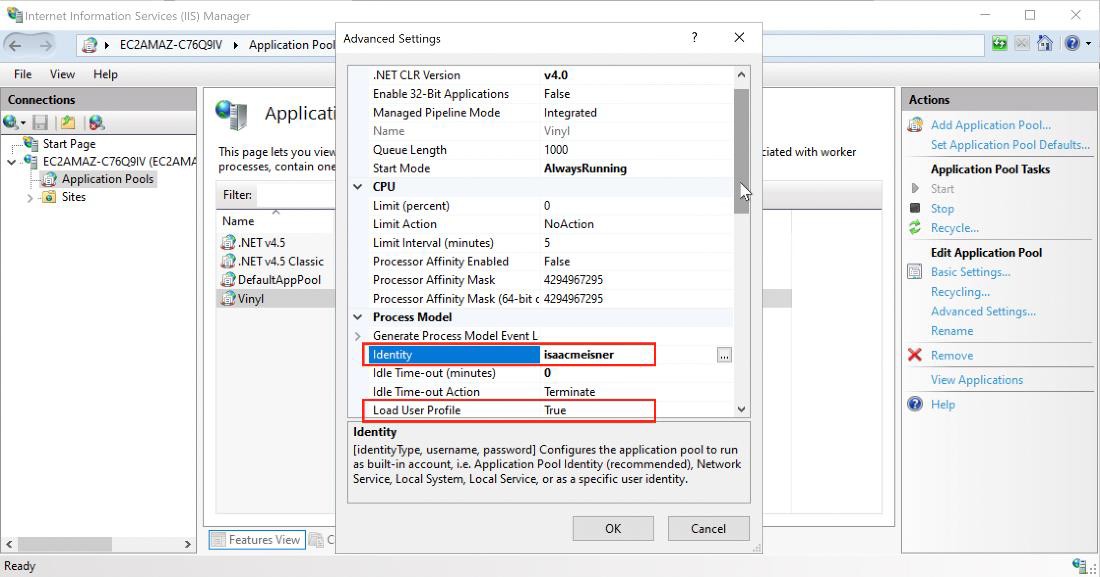
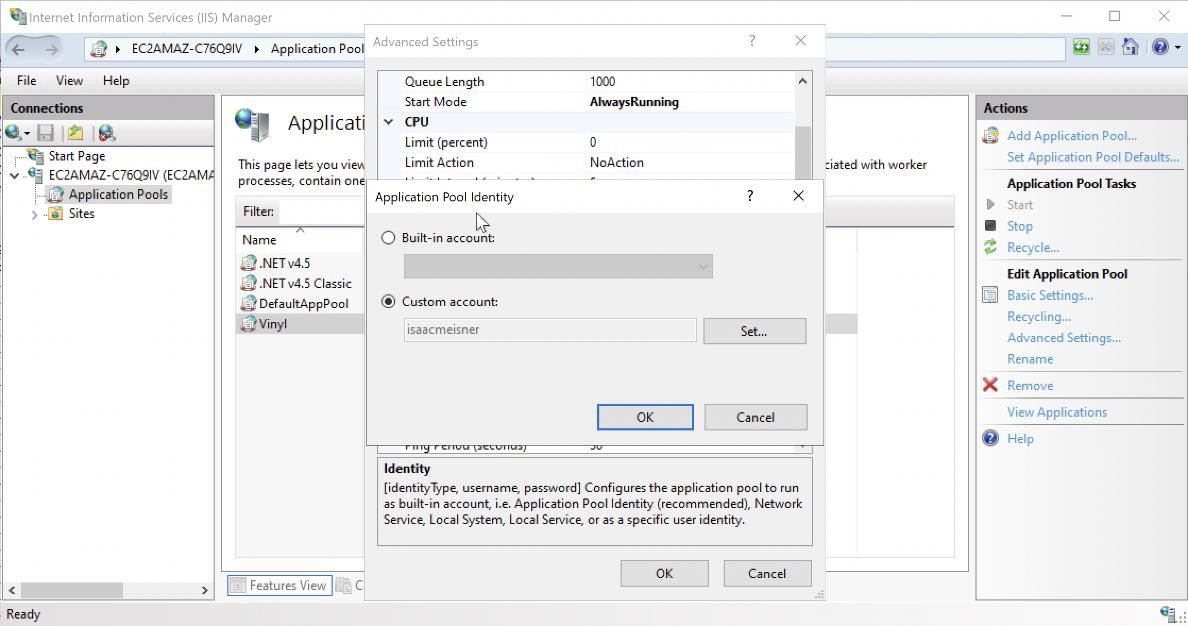
Set IIS Identity to a Windows user that will be used to set up the SAP Personal Security Environment (PSE). For this step we recommend you create a unique and dedicated windows user that will serve as the Custom Account for the IIS Identity setting. It is advised to not use a personal windows user like the screenshots are displaying.
Run Commands
Creating a Personal Security Environment
sapgenpse get_pse -p companyabc.pse -noreq "CN=COMPANYABC, OU=VINYL, O=CIF, C=US"
sapgenpse seclogin -p companyabc.pse -O {WINDOWS_USERNAME_HERE}
Exchanging the Public-Key Certificates
- This is performed to mutually trust each other's certificates.
Exporting the Identity Center's Public Key Certificate
sapgenpse export_own_cert -o {ANY_DESTINATION_FILEPATH}\companyabc.crt -p companyabc.pse
Importing the AS ABAP's Public-Key Certicficate into the Identity Center's PSE
-
Move the Certificate that was provided by SAP (i.e. CIF.txt) to the SECUDIR folder so it can be referenced
-
sapgenpse maintain_pk -a {FILEPATH_TO}\Vinyl\www\data\SECUDIR\CIF.txt -p {FILEPATH_TO}\Vinyl\www\data\SECUDIR\SEC\companyabc.pse
Helpful Commands
List the certificates:
sapgenpse maintain_pk -l
Delete the certificate:
sapgenpse maintain_pk -d 1
Get my name (username at OS level):
sapgenpse get_my_name -p companyabc.pse
Maintaining the Extended User ACL
- Create user and set SNC name from the SAP Table SM30.
Note
The page "Maintaining the Extended User ACL" from the linked SAP document lists out steps. Using table maintenance (for example, transaction SM30), maintain the USRACLEXT table.
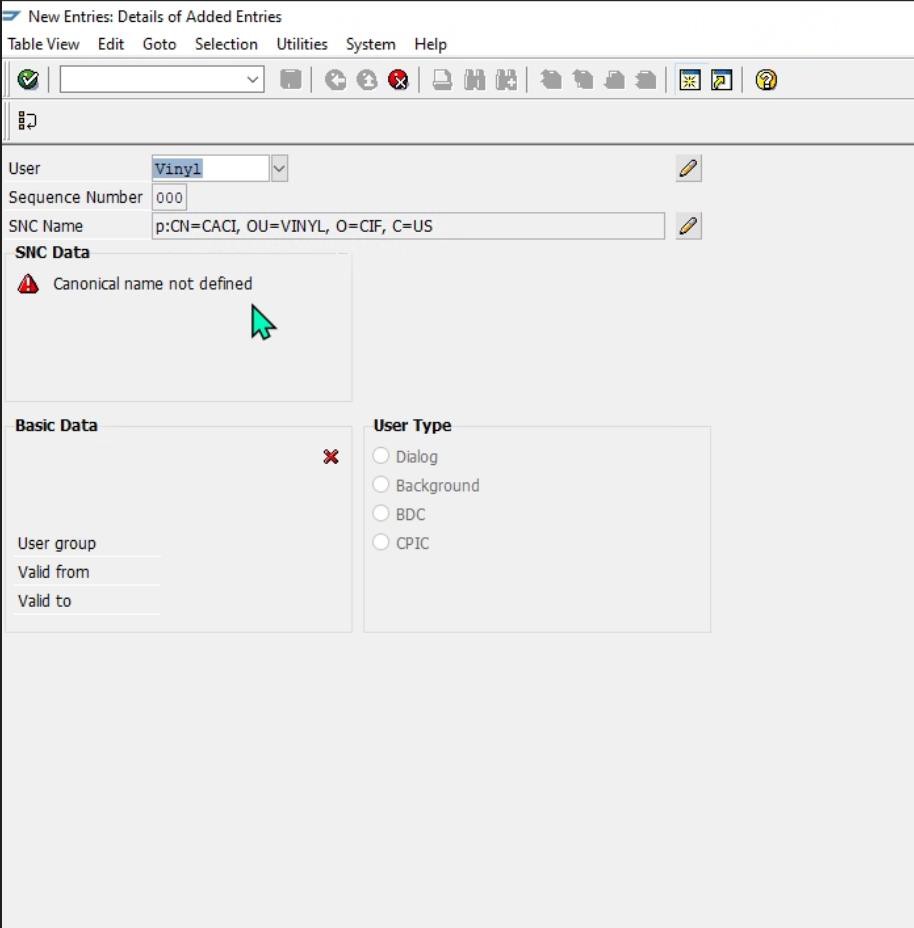
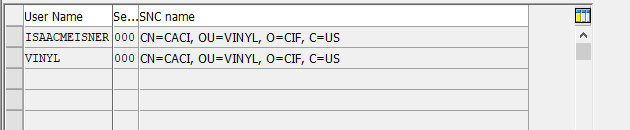
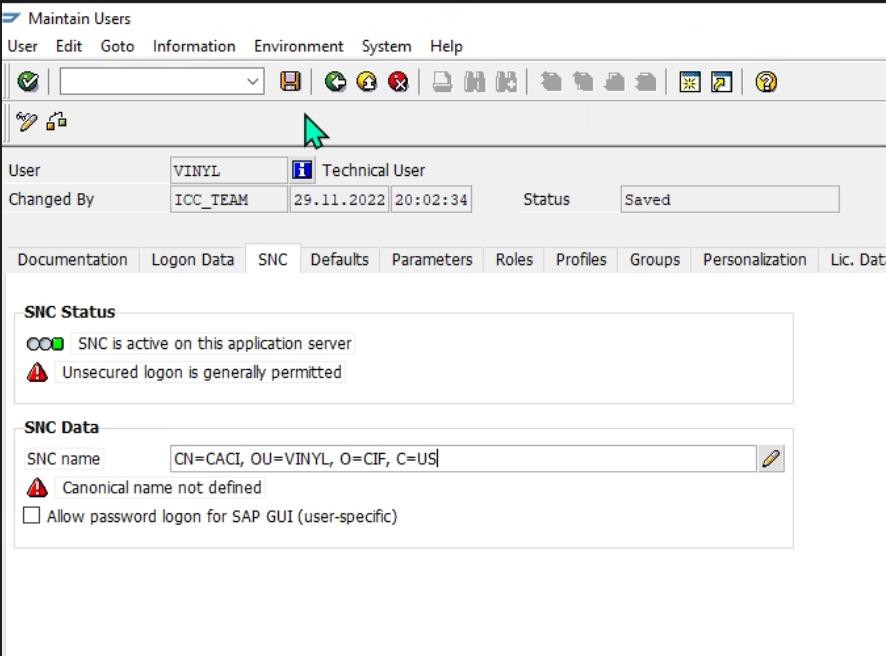
Create user, for example ISAACMEISNER, using SU01. In the SNC tab enter an SNC name, in this case CN=COMPANYABC, OU=VINYL, O=CIF, C=US.
Setting SNC parameters in Advanced Settings of Vinyl Data Server Connection:
SNC_PARTNERNAME~p:CN=CIF, O=SAP-AG, C=DE;SNC_MYNAME~p:CN=COMPANYABC, OU=VINYL, O=CIF, C=US;SNC_MODE~1;SAPROUTER~/H/35.204.6.18;SNC_SSO~0;SNC_QOP~3;SNC_LIB~D:\Programs\Vinyl\www\data\SECUDIR\sapcrypto.dll

Vinyl Data Server Connection
In Vinyl, you need to configure a Data Server connection. This connection requires the same information used by the SAP connection.
-
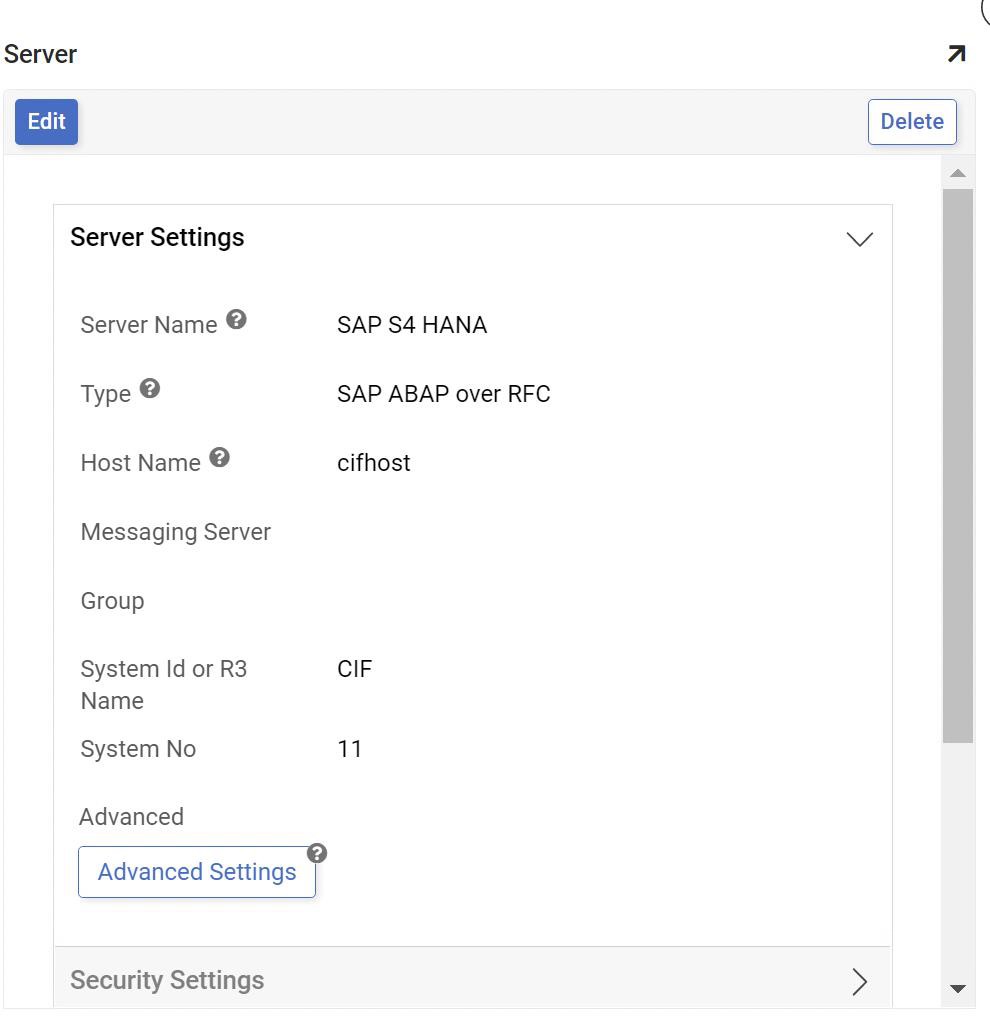
Create an SAP Data Server from IDE > Data Servers > + Server
-
Server Name: Provide a name
-
Type: SAP ABAP over RFC
-
Host Name: Reference to the SAP Application Server. Example: cifhost
-
System Id or R3 Name: Reference to the SAP System ID (SID), represented by three characters. Example: CIF
-
System No: Reference to the SAP Instance Number. Example: 11
-
-
Click Save
-
Expand the Security Settings and enter the User Name and Password
Note
Use the same credentials as the user created in SAP for the PSE
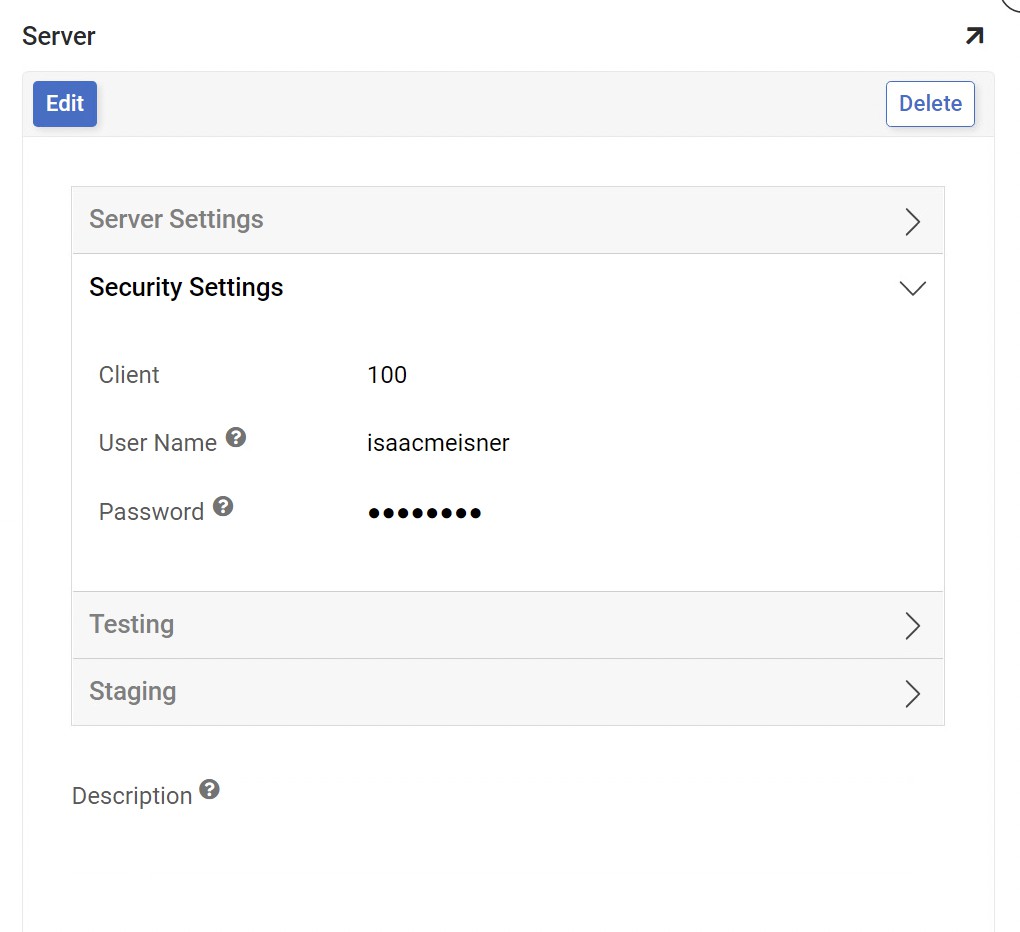
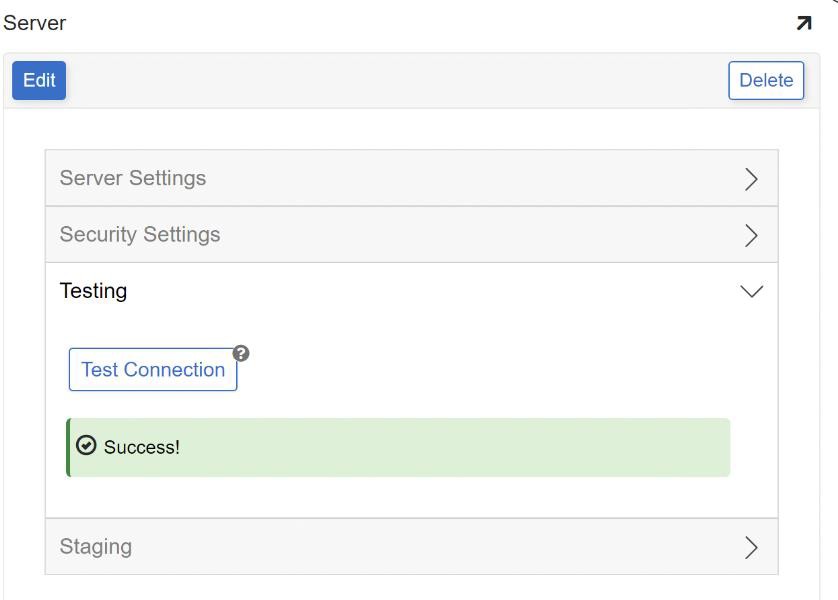
Test the Connection!
Click the Test Connection button from Testing.