ServiceNow Vinyl Connection Guide 2.5
Overview
This guide describes the system requirements and instructions for connecting Vinyl to a ServiceNow database server.
In order to connect your servers, you must have Vinyl 2.5 installed.
System Requirements
Database Server
ServiceNow Database Server
Client Web Browser
-
Chrome TM 60 or newer
-
Firefox ® 55 or newer
-
Safari ® 11.0.2 or newer
Connection Instructions
Adding a OAuth Security Provider
-
Navigate to the Vinyl IDE
-
From the Connect menu, click on the Connect to your enterprise link
-
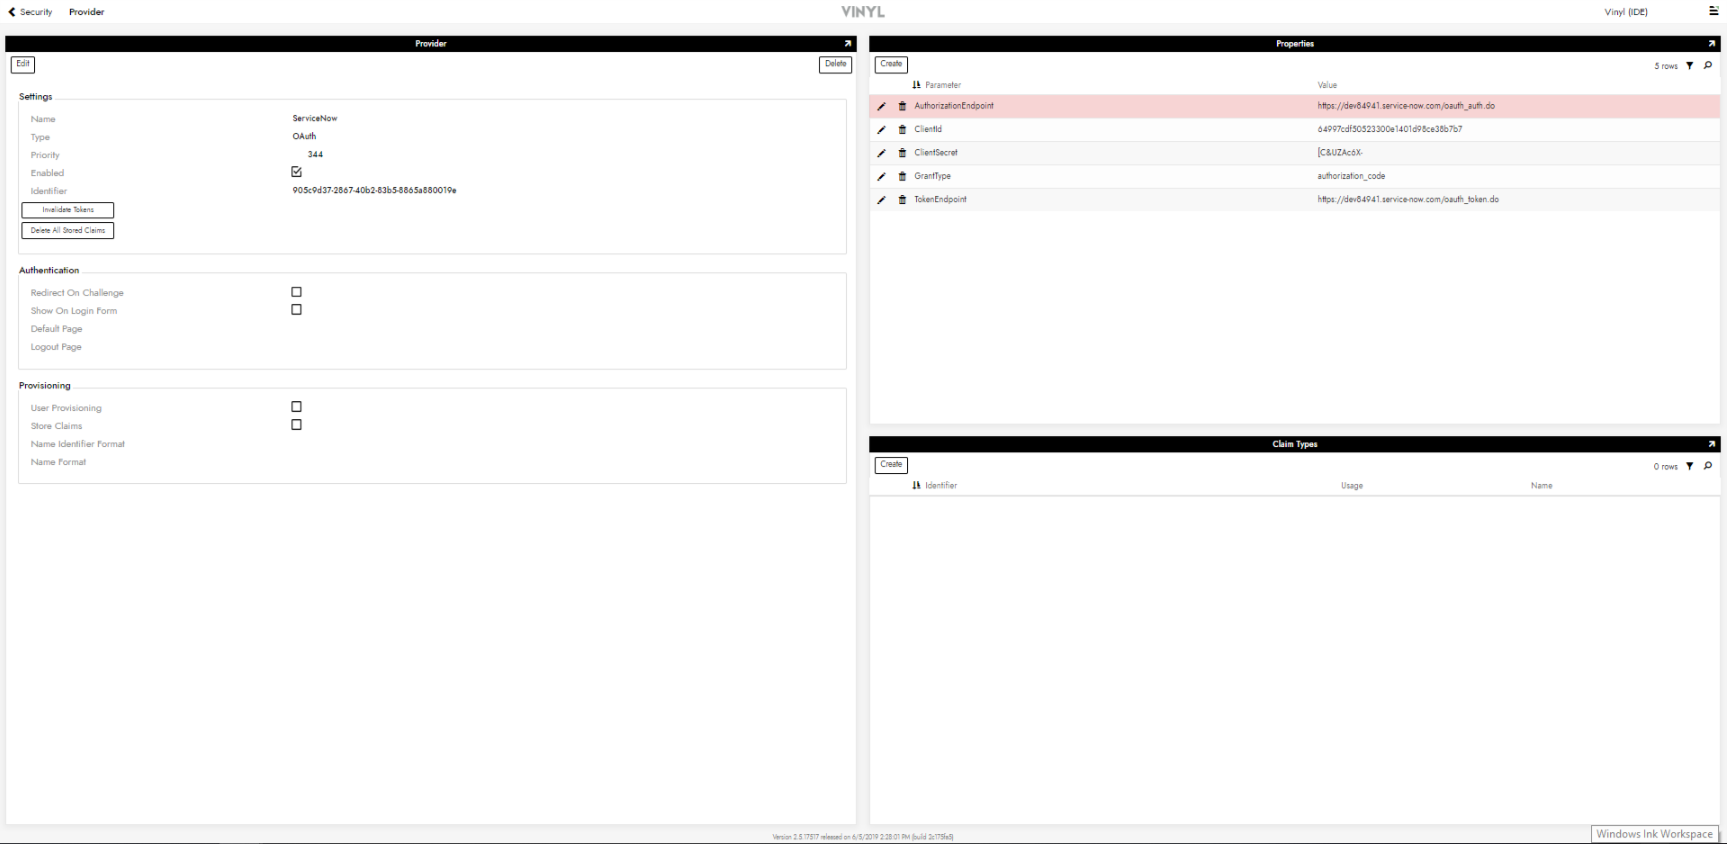
On left hand side, click on Security Providers, then click Create in User Authentication panel
-
In the Properties panel, configure the parameters with the following values:
-
AuthorizationEndpoint:
https://<your instance>.service-now.com/oauth_auth.do -
ClientId: Must be obtained from client's ServiceNow account
-
Client Secret: Must be obtained from client's ServiceNow account
-
GrantType: authorization_code
-
TokenEndpoint:
https://<your instance>.service-now.com/oauth_token.do
-
-
ClientId and Client Secret can be obtained by signing into https://<your instance>.service- now.com/ > Application Registry > Choose or Create OAuth Registry for Connection
-
On same page as step 5, enter Redirect URL as
https://<URL>/signin-<SecurityProvider>where URL is your vinyl server, and Security Provider is the OAuth Security Provider from first step.
Adding a RDBMS Security Provider
-
Navigate to the Vinyl IDE
-
From the Connect menu, click on the Connect to your enterprise link
-
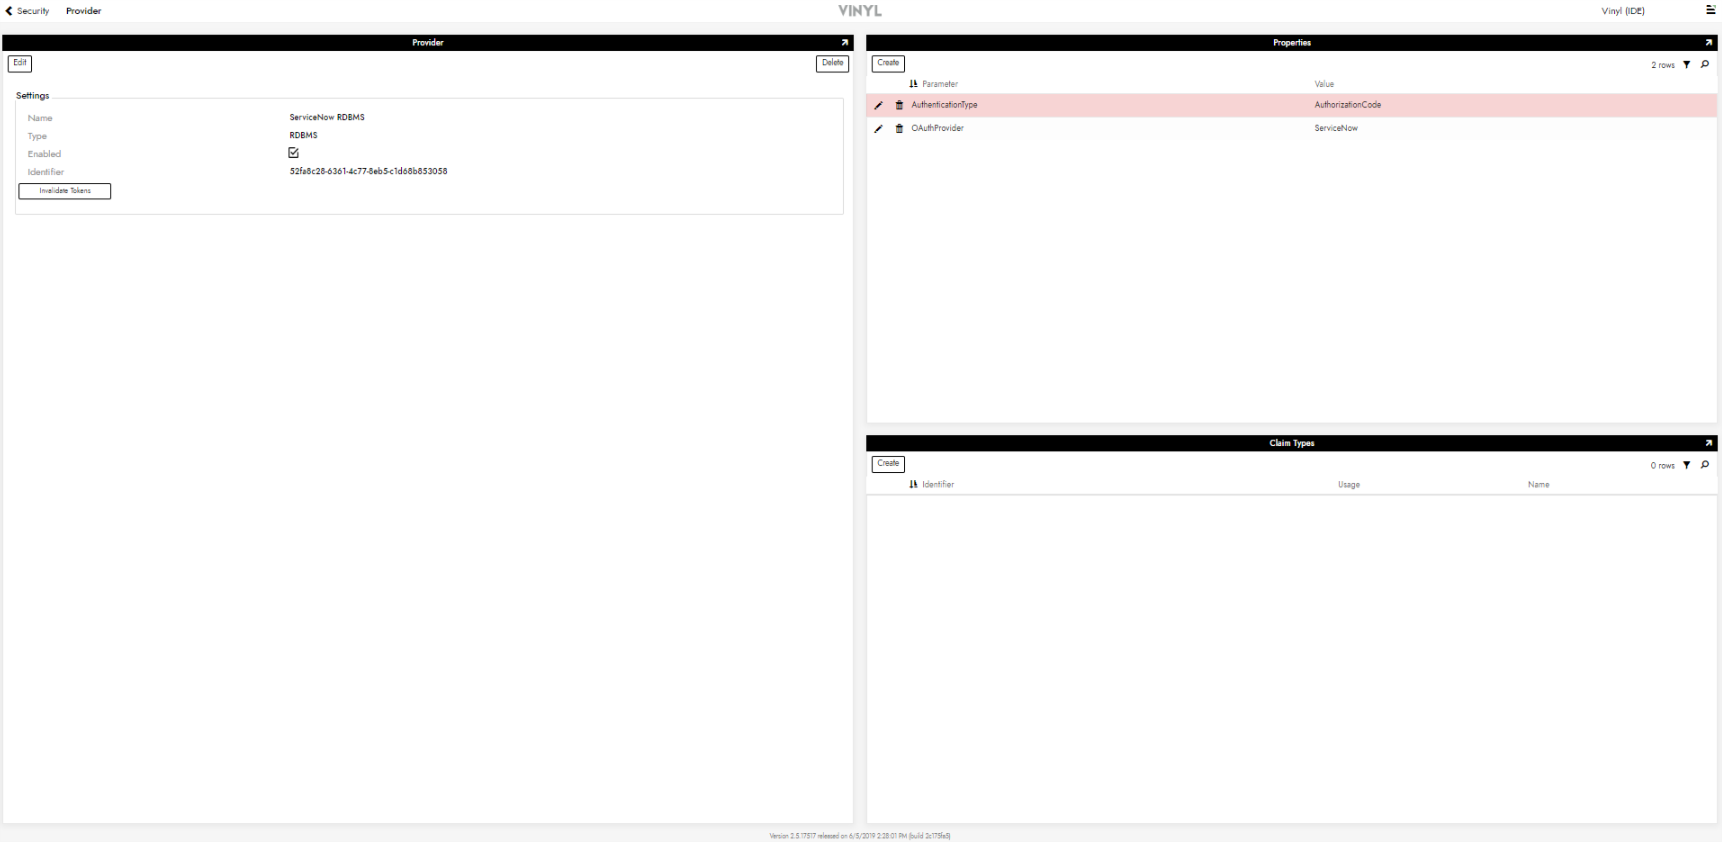
On left hand side, click on Security Providers, then click Create in Data Source Authentication panel
-
In the Properties panel, configure the parameters with the following values:
-
AuthenticationType: AuthorizationCode
-
OAuthProvider: The name of the OAuth provider in the previous step
-
Adding a Server
-
Navigate to the Vinyl IDE
-
From the Connect menu, click on the Connect to your enterprise link
-
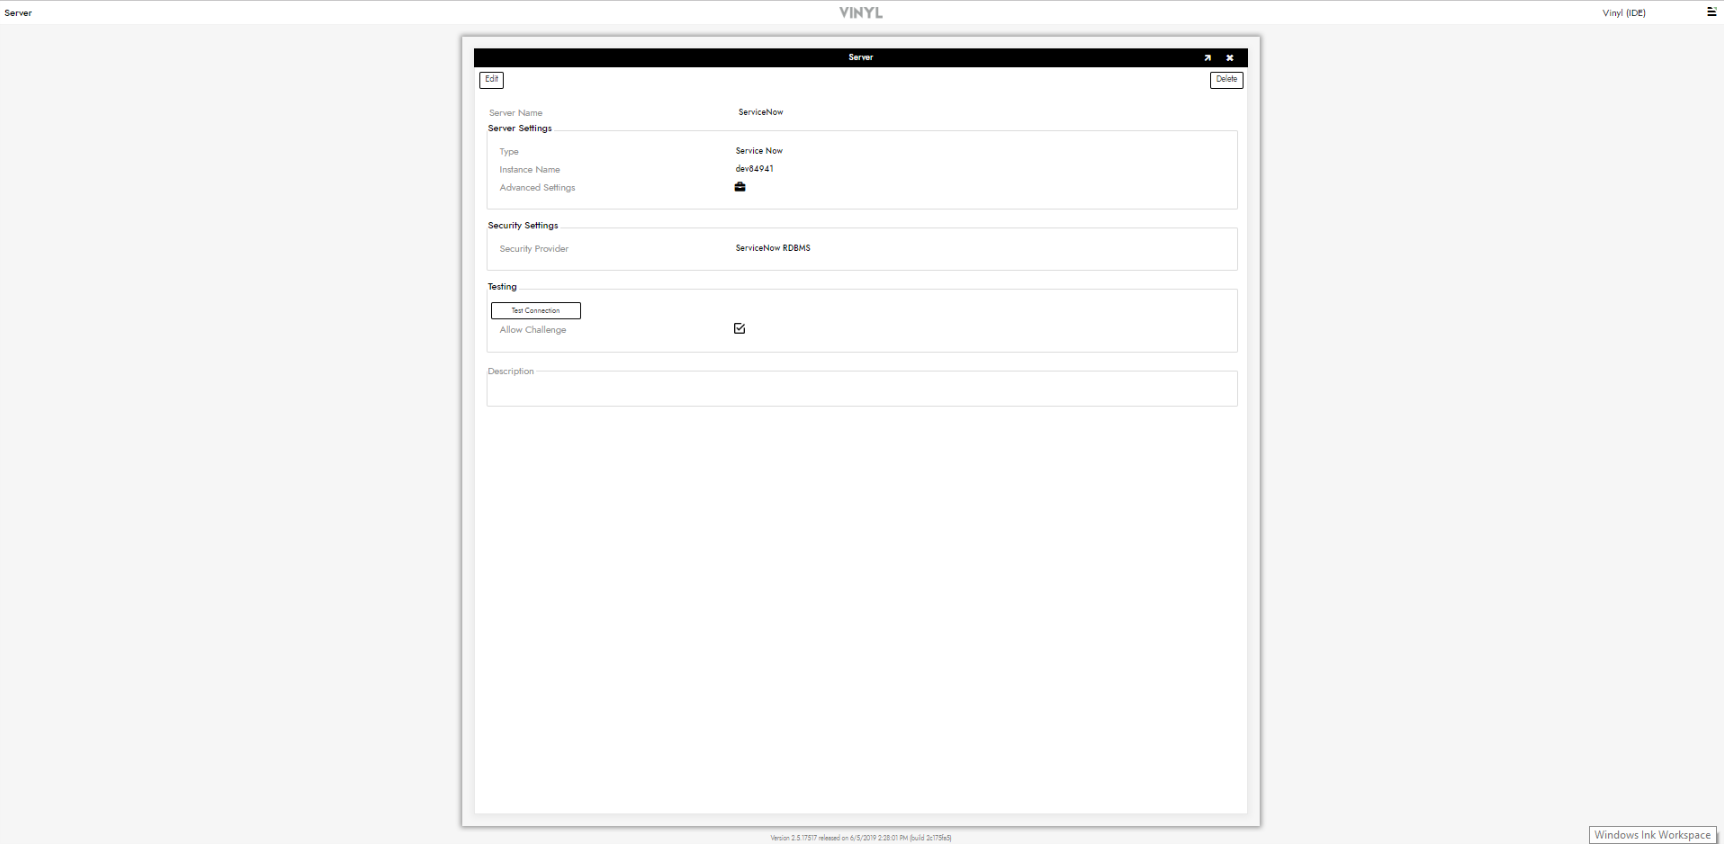
Click the Create button on the top left of the Data Servers panel. This will bring up the Add Server page.
-
Type: Service Now
-
Instance Name: Can be found at https://developer.servicenow.com/ > Manage Instance
-
-
Click Save to complete server connection.
-
Click Test Connection to ensure connection works properly.