Teradata Vinyl Connection Guide
Overview
This guide describes the system requirements and instructions for connecting Vinyl to a Teradata database server.
In order to connect your servers, you must have Vinyl 2.5 installed.
System Requirements
Database Server
Teradata Database Server
Client Web Browser
-
Chrome TM 60 or newer
-
Firefox ® 55 or newer
-
Safari ® 11.0.2 or newer
Connection Instructions
Adding a Server
-
Navigate to the Vinyl IDE
-
From the Connect menu, click on the Connect to your enterprise link
-
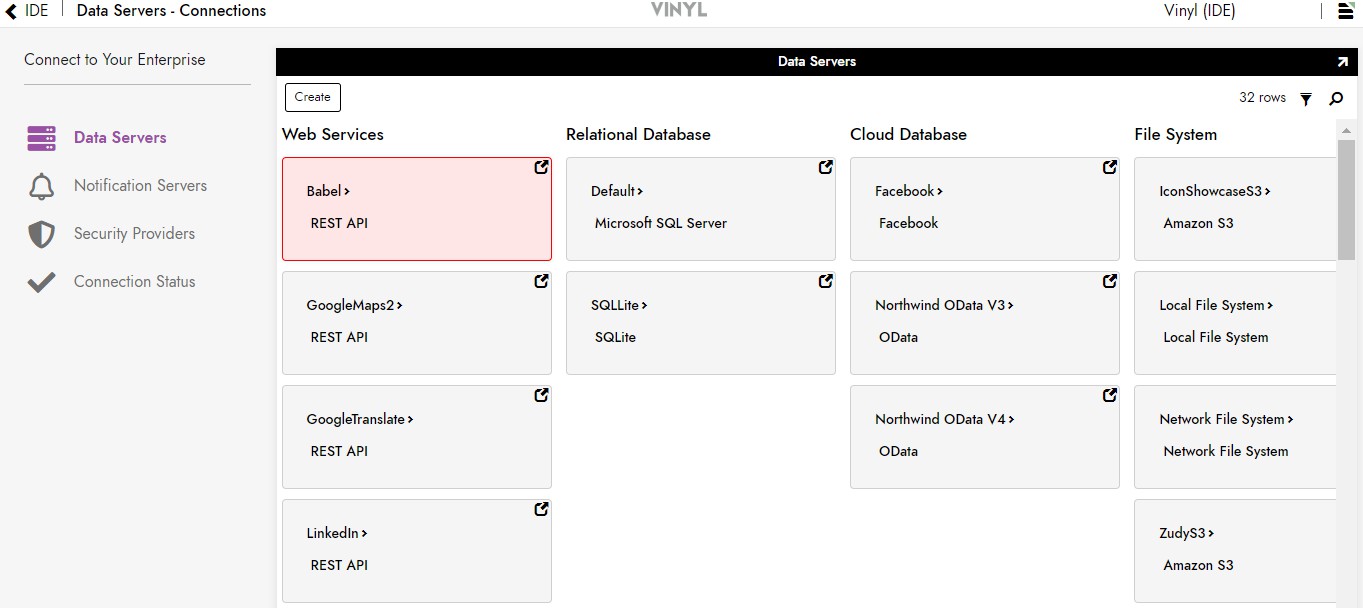
Click the Create button on the top left of the Data Servers panel. This will bring up the Add Server page.
Filling in Credentials
To connect to an Teradata server, provide the following information:
-
Name: An identifiable and unique server name
-
Type: Select Teradata from the dropdown menu
-
Hostname: Enter the hostname of the Teradata database.
-
User Name: The user name with which you access the database server
-
Password: The password associated with the above user name
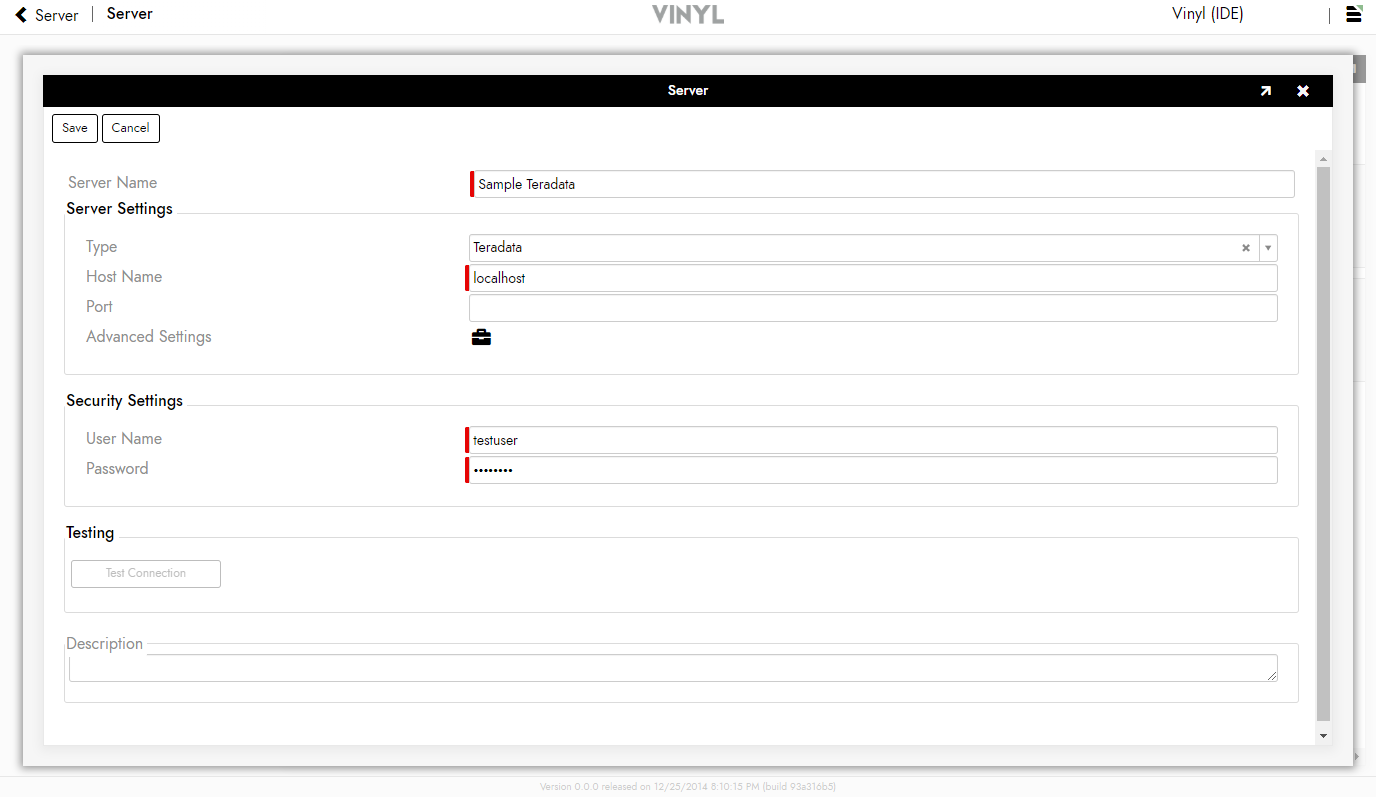
After filling in all necessary credentials, click the Save button to save the settings.
Testing the Connection
-
Click the Test Connection button beneath the server information to make sure the server is properly connected.
-
Upon successful connection, click the Vinyl IDE menu heading at the top of the page to return to the Vinyl IDE.
Adding a Data Source
After the server settings have been saved, the database needs to be connected to Vinyl. Databases that are connected to Vinyl are referred to as a data source.
-
Navigate to the Vinyl IDE.
-
Click the Build your application link from the Build menu.
-
Click the Data Storage Layer link, then Create a new data source record.
-
Some data sources are automatically imported to the Vinyl data storage page. If the data source has already been added, click on the associated Pop-Up icon to bring up the details page. If not, click the Create button on the top left of the page.
-
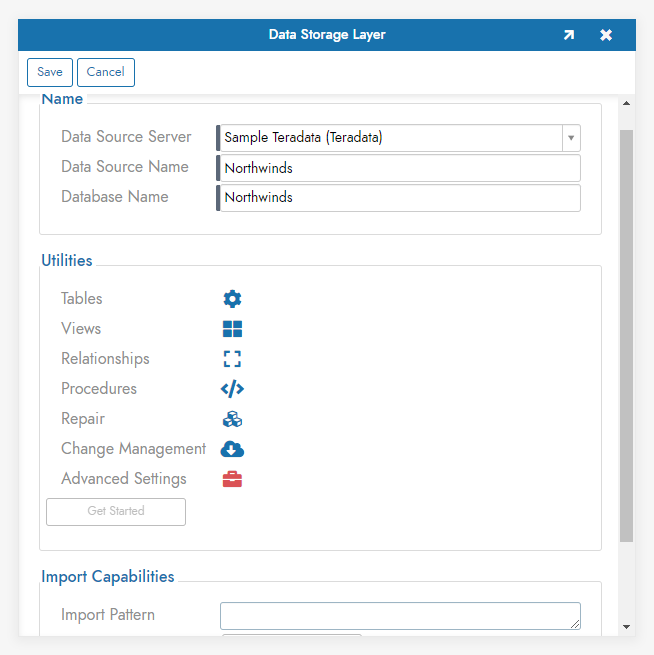
Fill in the following credentials for the data source:
-
Data Source Server: The name of the server being drawn from
-
Data Source Name: Give the data source a unique display name
-
Database Name: Enter the database name as it appears in the database server
-
Schema Name: Allows the user to select a Schema name from a drop down menu
-
Import Pattern: This allows users to import only certain tables by listing them in the box. Prefixes can also be used to only import a subset of tables (for example, MyApp_* will only import tables that start with "MyApp_"). If the space is left blank, it will import all tables.
-
-
Click Save to update the data source settings.
-
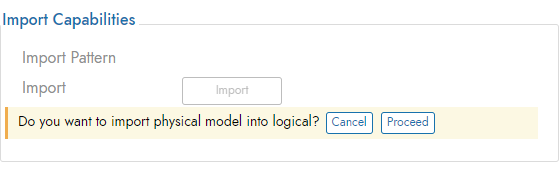
Once the page refreshes, click the Import button that appears below the source credentials. When prompted, click Proceed. The import will be scheduled to run in the background.
-
Click the Import button and, when prompted, click Proceed to import your server's data source.