Wizard Pages
Wizard is one of the page layout options available in Vinyl, and in Vinyl 3.3 there are many enhancements to this type of page. When a page is designed using the Wizard layout, Vinyl displays panels one at a time with Previous, Next, and Finish buttons to navigate through the screens.
The Wizard page allows you to add other button types to the bottom navigation bar, beyond the Previous, Next, and Finish. See the how to override Wizard buttons section of this article for details.
On Wizard pages, simply click on a field and all editable fields will become available. To save changes, click through to the last panel, then Finish. Clicking on the X in the upper right-hand corner will dismiss the page without saving changes.
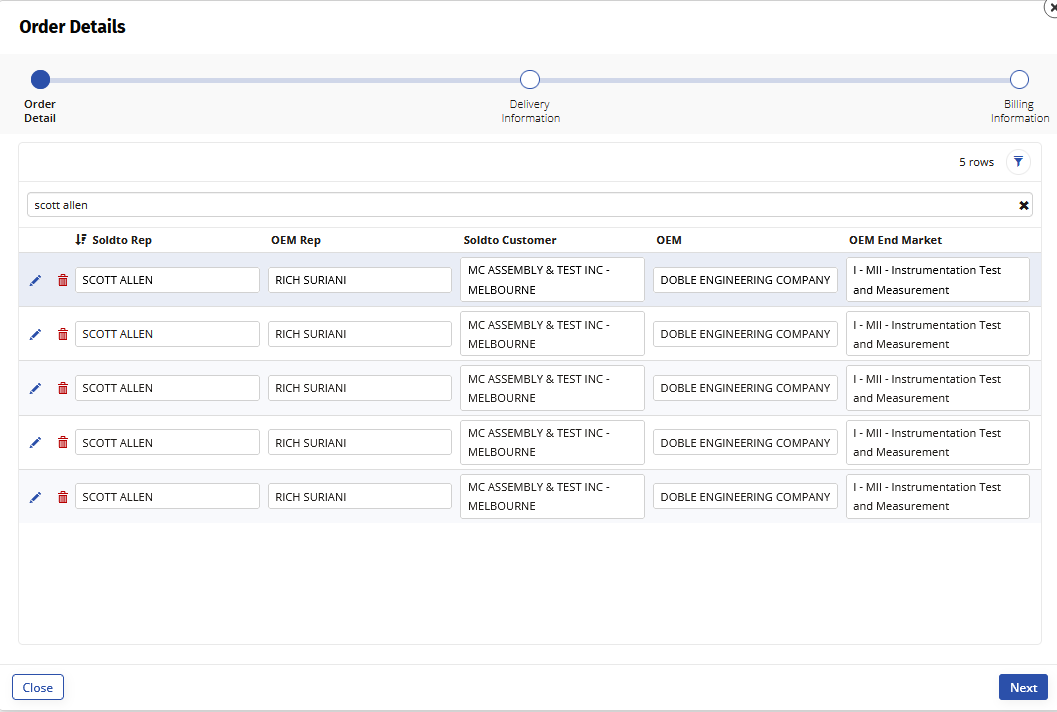
There are many business scenarios where you might use a Wizard page. An example is an order entry form, where there are multiple steps along the way and you want to visually break the information up into separate screens.
Wizard Enhancements
Wizard Vinyl 3.3 introduces the following enhancements:
- A Progress Bar is displayed on the screens to track the current step in the wizard
-
Support for Panel Visibility column, which allows the developer to dynamically hide/show/disable a panel:
- Show - The panel is listed in the steps, and the user goes to it normally
- Hidden - The panel is not listed in the steps, and the user skips over it
- Disabled - The panel is listed in the steps, but it is striked out and the user skips it
-
Explicit support for custom Previous, Next, and Finish buttons, allowing the user to promote a button from their panel to one of those buttons in the Wizard's navigation.
- Help Text - The panel help text appears below the progress bar.
How to Configure a Wizard Page
- Navigate to the App Workbench
- Click the + Page button
- Enter a Page Name. For example: Order Details
- Click Next
- Select the Menu you want to link the page from. For example: Home
- Click Next
- Select Wizard as the panel layout and click Next
- Review the proposed updates and click Finish
- Click the Proceed button to configure the first screen in the Wizard
- Select the panel type for display and click Next. For example: Grid
- Select the panel source and click Next
- Select if you want to Auto Build the screen or Choose Manually and click Next
- Review the proposed updates and click Finish
- Click Next to configure the second screen in the Wizard
- Repeat steps 10-14 until you have all screens configured
- To make any changes to the Wizard screens go to Action Drawer > Live Designer
How to Override Wizard Buttons
As mentioned in the Wizard Enhancements, you can now override the Previous, Next, and Finish buttons. In order to do this, you add a Button Control Type, and then specify the Button Subtype to target the button on the Wizard panel. With this method, you can customize the button behavior.
Example use cases where you might want to customize a button are to execute a custom event when the Next button is pressed, or to navigate to a new page when the Finish button is clicked.
- Navigate to the Wizard to modify
- Go to Action Drawer > Live Designer
- Click Show Panels and double click the panel you want to override a button on
- Click the + Control button
- Select Button as the Control Type
- Provide a Name for the button. For example: Submit
- Select the desired Control Subtype, depending on where on the Wizard you are looking to place the button
- Next = Wizard button that moves forward to the next screen
- Finish = Wizard button that completes and ends the Wizard
- Previous = Wizard button that moves to the previous slide
- Click Next
- Optionally assign an Event to execute, or page to link to and click Next
- Review the proposed updates and click Finish
Configuring a Finish Button
The Finish button on a Wizard is a special case configuration. A Finish button will only display when it's defined on the last visible panel of a Wizard. To configure or override a Finish button, you must do so from the last visible panel of the wizard.
If your Wizard has conditional paths, you can define a Finish button for every panel that might be the last visible panel and Vinyl will adjust to display either the Next or Finish button as visible, as appropriate. If you require a Finish button to appear prior to the last visible page, you can define a Next, or other button, set the Lable to Finish and have it close or navigate to another page in order to get the desired effect.
- Navigate to the Wizard to modify
- Go to Action Drawer > Live Designer
- Click the All Panels tab
- Locate the last visible panel and click the icon to Open Record
- Click + Control
- Set the Control Type to Button
- Set the Control Subtype to Finish
- Enter the Name you want to appear on the button. For example: Submit
- Click Next
- If the button should execute an Event or link to a page, set those values
- Click Next
- Review the proposed updates and click Finish